Philips AZ 1550 User Manual Download Page 4

POWER SUPPLY

5

English

Whenever convenient, use the power supply if you want to
conserve battery life. Make sure you remove the plug from the
set and wall socket before inserting batteries.

BATTERIES (OPTIONAL) 

1.

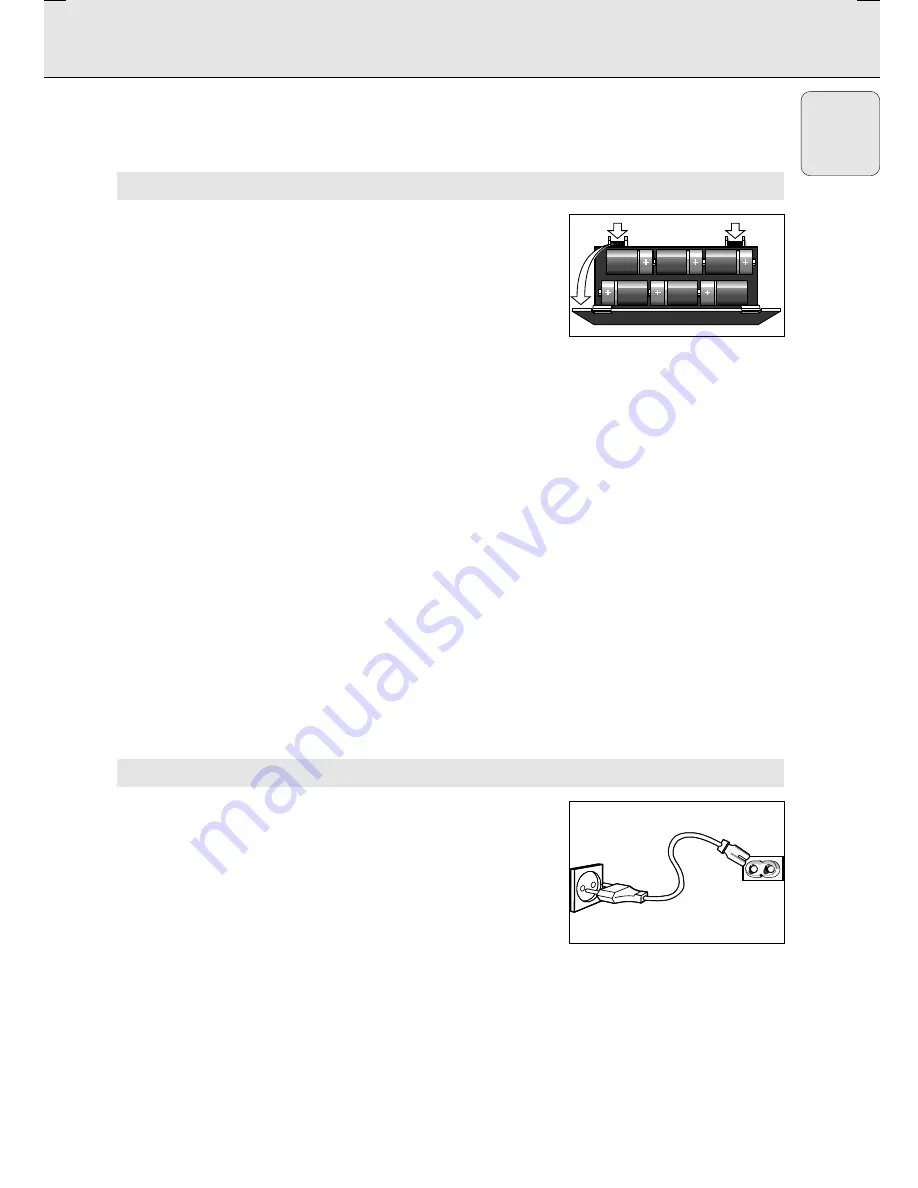
Open the battery compartment and insert six batteries, type 

R-20

UM-4

or 

D-cells

, (preferably alkaline) with the correct

polarity as indicated by the "+" and "-" symbols inside the
compartment.

2.

Replace the compartment door, making sure the batteries are
firmly and correctly in place. The set is now ready to operate.

If 

BATT LOW

lights up, battery power is running low.

– The 

BATT LOW

indicator eventually goes out if the

batteries are too weak.

– Incorrect use of batteries can cause electrolyte leakage and

will corrode the compartment or cause the batteries to burst.
Therefore:

Do not mix battery types

, e.g. alkaline with carbon zinc.

Only use batteries of the same type for the set.

– When inserting new batteries, do not try to mix old

batteries with the new ones.

– Remove the batteries if the set is not to be used for a long

time.

Batteries contain chemical substances, so they
should be disposed of properly.

For users in the U.K.: please follow the instructions on page 2.

USING AC POWER

1.

Check if the mains voltage 

as shown on the type plate

located on the bottom of the set

, corresponds to your local

power supply. If it does not, consult your dealer or service
centre.

2.

If your set is equipped with a voltage selector, adjust the
selector so that it matches with the local mains.

3.

Connect the mains lead to the wall socket and the set is now
ready for use.

4.

To disconnect the set from the mains completely, remove the
plug from the wall socket.

AZ 1550/00  

page

5

6 x D-cells - R20 - UM4

 MAINS

Summary of Contents for AZ 1550

Page 1: ...1550 CD RADIO CASSETTE RECORDER OPEN C L O S E OPEN C L O S E CD REWRITABLE COMPATIBLE CD SYNCRO STRAT RECORDING CD REWRITABLE COMPATIBLE CD SYNCRO STRAT RECORDING STOP PLAY PAUSE PROG SH UFF LE RE PE AT SEARCH BAND MHz FM 108 104 100 96 92 88 kH z LW 155 175 200 225 275 kH z MW 530 650 830 1000 1200 1600 MHz FM 108 104 100 96 92 88 kH z LW 155 175 200 225 275 kH z MW 530 650 830 1000 1200 1600 ...

Page 2: ... L O S E STOP PLAY PAUSE PROG SH UFF LE RE PE AT SEARCH BAND SOUND CONTROL CENTER FM AM BAT LOW LW PROG SHUFFLE VOL S OUND CONTROL CENTER VOLUM E DIGITAL EQUALIZER INCREDIBLE SURROUND MHz FM 108 104 100 96 92 88 kH z LW 155 175 200 225 275 kH z MW 530 650 830 1000 1200 1600 MAINS 12345 90 7 8 6 ...

Page 3: ... or interrupts CD playback BATT LOW indicates when battery power is running low PROG programmes CD tracks and reviews the programme SEARCH searches back and forward within a CD track skips to the beginning of a current CD track previous subsequent track Display shows the status of the set REPEAT repeats a track CD programme entire CD SHUFFLE plays CD tracks in random order BAND selects waveband BA...

Page 4: ...t or cause the batteries to burst Therefore Do not mix battery types e g alkaline with carbon zinc Only use batteries of the same type for the set When inserting new batteries do not try to mix old batteries with the new ones Remove the batteries if the set is not to be used for a long time Batteries contain chemical substances so they should be disposed of properly For users in the U K please fol...

Page 5: ...TAL DBB to switch dynamic bass boost on or off If on the DIGITAL DBB light goes on 4 Press INCREDIBLE SURROUND to switch the surround sound effect on or off If on the INCREDIBLE SURROUND light goes on Note The effect of INCREDIBLE SURROUND may vary with different types of music TUNING TO RADIO STATIONS 1 Select TUNER source 2 Press BAND once or more to select your waveband 3 To tune to a radio sta...

Page 6: ...ress STOP 9 Note CD playback will also stop when the CD door is opened the CD has reached the end unless you have selected REPEAT ALL you select another source TAPE TUNER Selecting a different track Press SEARCH or once or repeatedly until the desired track number appears in the display If you have selected a track number shortly after loading a CD or in the PAUSE position you will need to press P...

Page 7: ...amme in the STOP position to select and store your CD tracks in the desired sequence If you like store any track more than once Up to 20 tracks can be stored in the memory 1 Press SEARCH or once or more to select your desired track number 2 Press PROG Display PROG and the selected track number appears briefly If you attempt to programme without first selecting a track number is shown 3 Press PROG ...

Page 8: ...te door 3 Insert a recorded cassette and close the cassette door 4 Press PLAY 1 to start playback 5 To interrupt playback press PAUSE To resume press this key again 6 By pressing SEARCH 5 or 6 on the set fast winding of the tape is possible in both directions 7 To stop the tape press OPEN STOP 9 The keys are automatically released at the end of the tape except if PAUSE has been activated Note The ...

Page 9: ...amme track numbers 3 Press OPEN STOP 9 to open the cassette door 4 Insert a suitable tape into the cassette deck and close the cassette door 5 Press RECORD 0 to start recording Playing of the CD programme starts automatically from the beginning of the programme It is not necessary to start the CD player separately To select and record a particular passage within a track Press and hold down on SEAR...

Page 10: ... sand or excessive heat caused by heating equipment or direct sunlight To clean the set use a soft slightly dampened chamois leather Do not use any cleaning agents containing alcohol ammonia benzene or abrasives as these may harm the housing Safety information Place the set on a hard and flat surface so that the system does not tilt Make sure there is adequate ventilation to prevent the system fro...

Page 11: ... CD by the edge and return the CD to its box after use to avoid scratching and dust To clean the CD wipe in a straight line from the centre towards the edge using a soft lint free cloth Do not use cleaning agents as they may damage the disc Never write on a CD or attach any stickers to it Tape deck maintenance To ensure quality recording and playback of the tape deck clean parts A B and C shown in...

Page 12: ... Increase the distance Poor radio reception Weak radio signal FM Direct the FM telescopic aerial for optimum reception indication CD badly scratched or dirty Replace clean CD see Maintenance Laser lens steamed up Wait until lens has cleared The CD skips tracks CD damaged or dirty Replace or clean CD SHUFFLE or PROGRAM is active Switch off SHUFFLE PROGRAM Poor cassette sound quality Dust and dirt o...

Reviews: