11
Sorting Channels
According to your preference, you can change the order of the stored
TV channels.
1
Select
SORT
in the
INSTALL
menu.
2
Press the cursor right to enter the menu.
3
Key in the channel number in the
FROM
column you
want to swap from. Use the digit keys or the cursor
left/right.
4
Press the cursor down and select
TO.
5
Key in the channel number in the
TO
column you want to
swap to.
6
Press the cursor down and select
EXCHANGE.
7
Press the cursor right.
The message
EXCHANGED
appears and the selected
channels are exchanged.
8
Repeat steps 3–7 until all TV channels are allocated as you
like.
9
Press the
MENU
key to return to the
INSTALL
menu or
press the
m
key to switch the menu off.
U
SING THE
M
ENUS
: I
NSTALL
INSTALL
•
LANGUAGE
FROM
•
AUTO STORE
TO
•
MANUAL STORE
EXCHANGE
•
F
SORT
•
CHANNEL EDIT
•
G
G
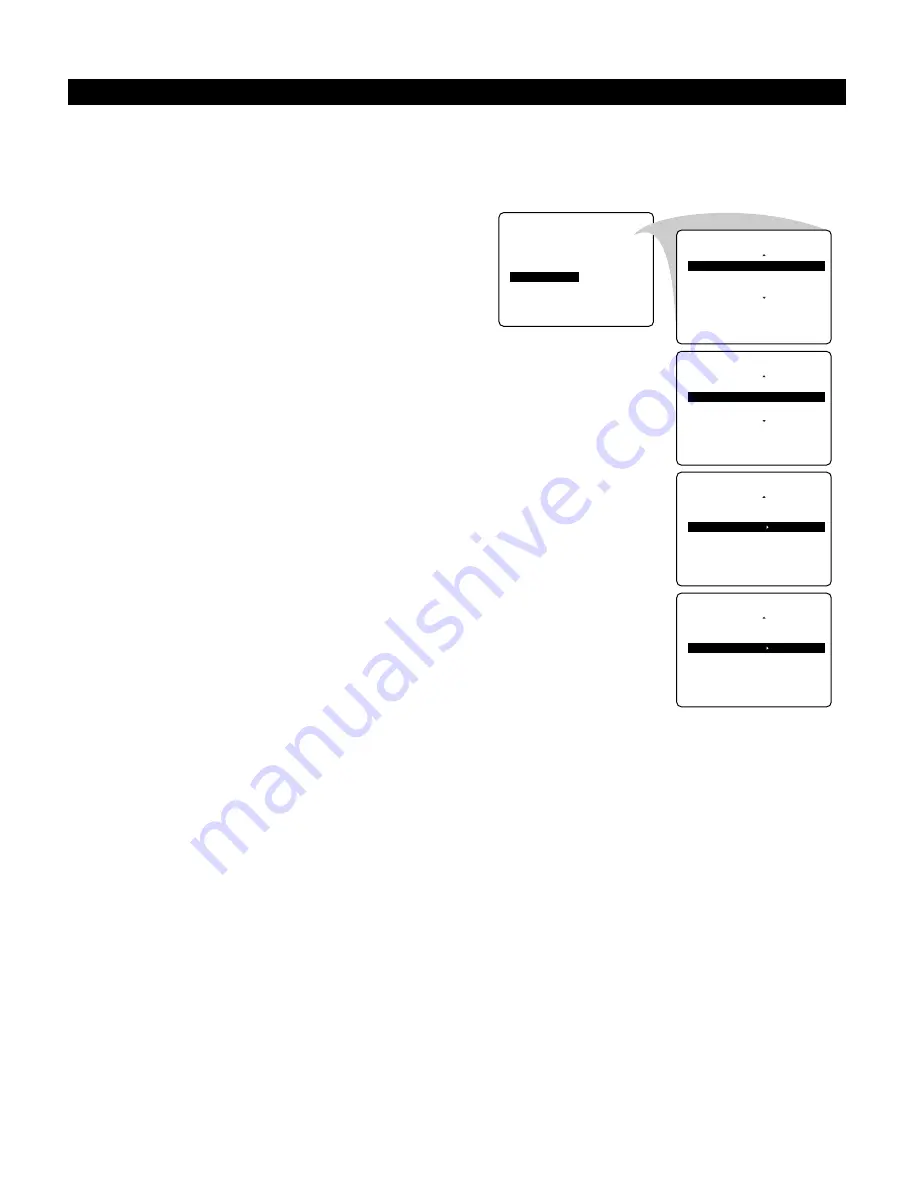
INSTALL
SORT
G
FROM
•
‰
8
•
TO
•
EXCHANGE
INSTALL
SORT
•
FROM
G
TO
•
‰
6
•
EXCHANGE
INSTALL
SORT
•
FROM
•
TO
G
EXCHANGE
•
‰
EXCHANGED
INSTALL
SORT
•
FROM
•
TO
G
EXCHANGE
•
‰
Summary of Contents for 43PP8445
Page 39: ...39 INTERNATIONAL GUARANTEE ...
Page 40: ...40 INTERNATIONAL GUARANTEE ...