background image

English

27

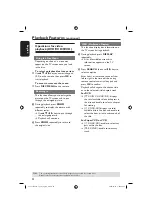
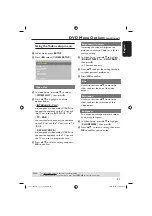
DVD Menu Options

This DVD Player setup is carried out via 
the TV, enabling you to customise the 
DVD player to suit your particular 
requirement.

Using the System Setup 
menu

A

  In disc mode, press 

SETUP

.

B

 Press     to select {

 SYSTEM SETUP

 }.

SYSTEM SETUP

TV SYSTEM

TV TYPE

PASSWORD

RATING

DEFAULT

EXIT SETUP

TV System

This menu contains the options for 
selecting the colour system that matches 
the connected TV. For details, see page 
18.

TIPS: 

The underlined option is the factory default setting.

 Press 


 to go back to previous menu item. Press 

SETUP

 to exit the menu item.

TV  Type

Set the TV TYPE of the DVD player 
according to the TV you have connected. 
The format you select must be available 
on the disc. If it is not, the setting for TV 
display will not affect the picture during 
playback.

A

  In ‘System Setup’, press 


 to select 

TV TYPE

 }, then press  .

B

 Press 

 to highlight one of the options 

below:

 { 

4.3 PANSCAN

 }

Select this if you have a normal TV and 
want both sides of the picture to be 
trimmed or formatted to fi t your TV 
screen.


4.3 LETTER BOX

 }

Select this if you have a normal TV. In 
this case a wide picture with black bands 
on the upper and lower portions of the 
TV screen will be displayed.

 { 

16:9

 }

Select this if you have a wide screen TV.

C

  Select an item and press 

OK

.

01-35 xDV436_12_19_eng4.indd   27

01-35 xDV436_12_19_eng4.indd   27

2006-04-26   4:37:29 PM

2006-04-26   4:37:29 PM

Summary of Contents for 436

Page 1: ...DVD VIDEO PLAYER User Manual Manuel D utilisation Manual de Instrucciones Manual do Utilizador Gebruikershandleiding 01 35 xDV436_12_19_eng4 indd 1 01 35 xDV436_12_19_eng4 indd 1 2006 04 26 4 36 45 PM 2006 04 26 4 36 45 PM ...

Page 2: ...English 2 01 35 xDV436_12_19_eng4 indd 2 01 35 xDV436_12_19_eng4 indd 2 2006 04 26 4 37 08 PM 2006 04 26 4 37 08 PM ...

Page 3: ...Corporation and other rights owners Us eof this copyright protection technology must be authorized by Macrovision Corporation and is intended for home and other limited viewing uses only unless otherwise authorized by Macrovision Corporation Reverse engineering or disassembly is prohibited Index English 6 Français 36 01 35 xDV436_12_19_eng4 indd 3 01 35 xDV436_12_19_eng4 indd 3 2006 04 26 4 37 09 ...

Page 4: ... employs a laser Due to possible eye injury only a qualified service person should remove the cover or attempt to service this device NOTE Pictures shown maybe different between countries CAUTION WARNING LOCATION ON THE BACKPLATE OF THE SET NEVER MAKE OR CHANGE CONNECTIONS WITH THE POWER SWITCHED ON Specifications are subject to change without notice Manufactured under license from Dolby Laborator...

Page 5: ...DVD Video player and enter below the Serial No Retain this information for future reference Model No xDV436 Serial No ___________________ This product complies with the radio interference requirements of the European Community This product complies with the requirements of the following directives and guidelines 73 23 EEC 89 336 EEC 93 68 EEC 01 35 xDV436_12_19_eng4 indd 5 01 35 xDV436_12_19_eng4 ...

Page 6: ...aterries 16 Using the remote control to operate the system 16 Step 2 Finding your viewing channel 16 Step 3 Setting up Progressive Scan feature 17 Step 4 Selecting the matching colour system 18 Step 5 Setting the language 19 On screen display OSD language 19 Audio Subtitle and Disc menu languages 19 Playback from Disc Playable discs 20 Supported formats 20 Playback Features Starting disc playback ...

Page 7: ...V System 27 TV Type 27 Password 28 Rating 28 Default 28 Using the Language setup menu 29 OSD Language 29 Audio Subtitle and Disc Menu Languages 29 Setting the DivX Subtitle font 29 DivX R registration code 29 Using the Audio setup menu 30 Digital Out 30 Down Sample 30 Downmix 30 Using the Video setup menu 31 Video Out 31 Brightness Contrast 31 Hue 31 Saturation 31 Sharpness 31 Others Troubleshooti...

Page 8: ...t overheating 10cm 4 0 10cm 4 0 5cm 2 0 5cm 2 0 Avoid high temperatures moisture water and dust Apparatus shall not be exposed to dripping or splashing Do not place any sources of danger on the apparatus e g liquid filled objects lighted candles Cleaning discs Some problems occur because the disc inside the recorder is dirty frozen picture sound disruptions picture distortions To avoid these probl...

Page 9: ... support the Region Management System Check the regional code number on the disc package If the number does not match the player s region number see table below the player may be unable to playback the disc Tips It may not be possible to play CD R RW or DVD R RW in all cases due to the type of disc or condition of the recording If you are having trouble playing a certain disc remove the disc and t...

Page 10: ...O OUT DIGITAL OUT VIDEO OUT COAXIAL AUDIO IN S VIDEO IN VIDEO IN TV IN AUDIO IN S VIDEO IN VIDEO IN TV IN 1 IMPORTANT You only need to make one video connection from the following options depending on the capabilities of your television Connect the DVD player directly to the television A SCART connection will let you use features both audio and video on the DVD player Using SCART sockets A Use the...

Page 11: ...onnected from the power outlet AUDIO OUT DIGITAL OUT VIDEO OUT COAXIAL AUDIO IN V Pr Cr U Pb Cb Y S VIDEO IN VIDEO IN COMPONENT VIDEO IN AUDIO OUT V Pr Cr U Pb Cb Y S VIDEO IN VIDEO IN COMPONENT VIDEO IN 2 1 IMPORTANT If your television only has a single Antenna In jack or labeled as 75 ohm or RF In you will need an RF modulator in order to view the DVD playback on the television See your electron...

Page 12: ...C power cord to the power outlet Never make or change any connections with the power switched on When no disc is loaded press STANDBY ON on the DVD player front panel NO DISC may appear on the display panel AUDIO OUT DIGITAL OUT VIDEO OU COAXIAL AC MAINS AUDIO OUT V Pr Cr U Pb Cb Y S VIDEO IN VIDEO IN COMPONENT VIDEO IN 01 35 xDV436_12_19_eng4 indd 12 01 35 xDV436_12_19_eng4 indd 12 2006 04 26 4 3...

Page 13: ...strong distorted sound or no sound at all Stereo system has right left Audio In sockets A Select one of the video connections CVBSVIDEO IN SCART COMPONENTVIDEO IN depending on the options available on your TV B Use the audio cables white red to connect AUDIO OUT L R sockets of the DVD Player to the corresponding AUDIO IN sockets on the stereo system cable not supplied Connecting to a digital AV re...

Page 14: ...TOP Stops playback IR Sensor Point the remote control towards this sensor AUDIO OUT DIGITAL OUT VIDEO OUT COAXIAL Mains AC Power Cord Connect to a standard AC outlet Audio Out Left Right Connect to AUDIO inputs of an amplifier receiver or stereo system COAXIAL Digital audio out Connect to coaxial AUDIO input of a digital audio equipment TV OUT SCART Connect to SCART input of a TV YPbPr Component V...

Page 15: ...LE Selects a DVD camera angle ZOOM Enlarge a picture on the TV screen DISPLAY Displays information on TV screen during playback POWER To switch the DVD player to standby mode or ON SEARCH To start playback from designated point SETUP Enters or exits the system setup menu Selects an item in the menu fastforward backward OK Acknowledge menu selection STOP Stops playback Å PLAY PAUSE Starts or pauses...

Page 16: ...ewing channel A Press STANDBY ON 2 on the DVD player to turn it on B Turn on the TV and set it to the correct video in channel You should see the blue DVD background screen Usually these channel are between the lowest and highest channels and may be called FRONT A V IN VIDEO See your TV s manual for more details Or you may go to channel 1 on your TV then press the Channel down button repeatedly un...

Page 17: ...nderlined option is the factory default setting Press to go back to previous menu item Press SETUP to exit the menu item ENABLE PROGRESSIVE OK ENSURE YOUR TV SUPPORTS PSCAN IF TV DISPLAY IS ABNORMAL PLEASE WAIT 15 SECONDS FOR RECOVER NO H Press to select OK and press OK to confirm There will be a distorted picture on the TV at this state until you turn on the progressive scan mode on your TV I Tur...

Page 18: ...e NTSC colour system It will change the video signal of a PAL disc and output it to NTSC format MULTI Select this if the connected TV is compatible with both NTSC and PAL multi system The output format will be in accordance with the video signal of the disc E Select an item and press OK Tip Before changing the current TV colour setting ensure that your TV supports the selected TV System CHANGING P...

Page 19: ...e and Disc menu languages You can choose your preferred language or soundtrack from audio subtitles and disc menu languages If the selected language is not available on the disc the disc s default language will be used instead LANGUAGE SETUP OSD LANGUAGE AUDIO LANG SUBTITLE LANG DISC MENU DIVX SUBTITLE DIVX R VOD EXIT SETUP CHINESE ENGLISH JAPANESE FRENCH SPANISH PORTUGUESE LATIN GERMAN A Press SE...

Page 20: ...Formats 1 0 1 1 2 0 TIPS Some discs cannot be played on this DVD player due to the configuration and characteristics of the disc or due to the condition of recording and authoring software that was used Super Video CD MP3 Disc DivX Disc DivX 3 11 4 x 5 x and 6 x Supported formats MP3 tracks The file extensions has to be mp3 JPEG ISO format Maximum 10 characters display Supported sampling frequenci...

Page 21: ... A During playback press PLAY PAUSE Å to pause playback and display a still picture Sound will be muted B To resume normal playback press PLAY PAUSE Å again Selecting title chapter track Press to go to the previous or next title chapter track In STOP mode press DISPLAY to display the disc information text line for title chapter track example 00 08 Use alphanumeric keypad 0 9 to enter valid title c...

Page 22: ...A During playback press DISPLAY repeatedly A list of available current disc information appears on the TV screen B Press SEARCH then use W X keys to select an option Enter hours minutes and seconds from left to right in the time edit box using remote control numerical key pad and press OK to confirm Playback will change to the chosen time or to the selected title chapter track For DVD TT XX 03 CH ...

Page 23: ... options vary depending on the disc type A While playing a disc press REPEAT continuously to choose a repeat options CHAPTER DVD to repeat playback of the current chapter REP I CD SVCD VCD TITLE DVD to repeat playback of the current track CD SVCD VCD title REP ALL to repeat playback of the disc RANDOM CD VCD DVD the tracks and chapters being played in random order OFF to cancel the repeat mode B P...

Page 24: ...title languages TIPS The operating features described here might not be possible for certain discs Always refer to the instructions supplied with the discs SpecialVCD and SVCD Feature Playback Control PBC For VCD with Playback Control PBC feature version 2 0 only Press DISC MENU to toggle between PBC ON and PBC OFF If you select PBC ON the disc menu if available will appear on the TV Use the or th...

Page 25: ...the subtitle language during playback Tips Subtitle files with the following filename extensions srt smi sub ssa txt are supported but do not appear on the file navigation menu The subtitle filename have to be the same as the filename of the movie TIPS The operating features described here might not be possible for certain discs Always refer to the instructions supplied with the discs Playback Fea...

Page 26: ...C Press or use the numeric keypad 0 9 to highlight an option D Press OK to confirm Playback will start from the selected file to the end of the folder MP3 track will automatically playback if a disc contains music and picture is loaded To play JPEG file press repeatedly to highlight the photo icon and press OK to confirm Playback selection During playback you can Press to select another track file...

Page 27: ... TV TYPE of the DVD player according to the TV you have connected The format you select must be available on the disc If it is not the setting for TV display will not affect the picture during playback A In System Setup press to select TV TYPE then press B Press to highlight one of the options below 4 3 PANSCAN Select this if you have a normal TV and want both sides of the picture to be trimmed or...

Page 28: ... before you can access into the RATING menu A In System Setup press to highlight RATING then press B Press to highlight a rating level for the disc inserted and press OK To disable parental controls and have all Disc play select 8 Adult Default Setting the DEFAULT function will reset all options and your personal settings to the factory defaults except your password for rating A In System Setup me...

Page 29: ...egian Portuguese Spanish and Swedish CENTRAL EU Albanian Croat Czech Dutch English German Hungarian Irish Polish Romanian Slovak Slovene and Sorbian CYRILLIC Bulgarian Belorussian English Macedonian Moldavian Russian Serbian and Ukrainian B Press to select a setting then press OK to confirm your selection DivX R registration code DivX VOD Video On Demand registration code allows you to rent and pu...

Page 30: ...hen press OK to confirm your selection Down Sample You can enable and disable the digital signal for better sound output quality A In Audio Setup press to highlight DOWN SAMPLE then press 48K Playback a disc recorded at the sampling rate of 48kHz 96K Playback a disc recorded at the sampling rate of 96kHz This rate can only be achieved in Stereo Classic Flat mode B Press to select a setting then pr...

Page 31: ...r to connect the appliance to the TV set and the TV set is set to progressive scan C Press to select a setting and press OK to confirm Brightness Contrast Increasing the value will brighten the picture or vice versa Choose six 6 for average setting A In Video Setup press to highlight BRIGHTNESS or CONTRAST then press The menu appears B Press to adjust the setting that best suit your personal prefe...

Page 32: ...eo In channel for the DVD player You may go to Channel 1 on your TV then press the channel down button on your TV s remote control until you see the TV programme Check the video connection between the DVD player and the TV The disc does not match with the TV colour system standard PAL NTSC The disc is dirty clean the disc Sometimes a small amount of picture distortion may appear This is not a mulf...

Page 33: ...o enter the password in order to change the parental rating level or to unlock the disc for playback Moisture may have condensed inside the system Remove the disc and leave the system turned on for about an hour Disconnect the power cord from the power outlet for a few minutes Reconnect the power cord and try to operate again as usual Check the disc for fingerprint scratches and clean with a soft ...

Page 34: ...reo Dolby Surround compatible downmix from Dolby Digital multi channel sound AUDIO PERFORMANCE DA Converter 24 bit 192 kHz DVD fs 96 kHz 4Hz 44kHz fs 48 kHz 4Hz 22kHz SVCD fs 48 kHz 4Hz 22kHz fs 44 1kHz 4Hz 20kHz CD VCD fs 44 1kHz 4Hz 20kHz Signal Noise 1kHz 95 dB Dynamic range 1kHz 85 dB Crosstalk 1kHz 85 dB Distortion noise 1kHz 75 dB MPEG MP3 MPEG Audio L3 CONNECTIONS Scart Output Euroconnector...

Page 35: ...sed by the Joint Photographic Expert Group which features small decrease in image quality in spite of its high compression ratio MP3 A file format with a sound data compression system ÒMP3Ó is the abbreviation of Motion Picture Experts Group 1 or MPEG 1 Audio Layer 3 By using MP3 format one CD R or CD RW can contain about 10 times as much data volume as a regular CD can Multichannel DVD is specifi...

Reviews: