background image

User Manual BDH4222V/4223V

42

.

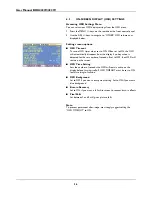
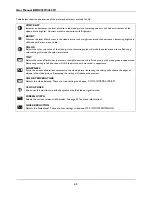
Table below shows an explanation of the picture adjustments available for AV:

CONTRAST

Increases or decreases the level of white in the video picture. Increasing contrast will make white areas of the 
video picture brighter. Contrast works in conjuction with Brightness.

BRIGHT

Enhances the level of dark areas in the video picture such as night scenes and shadow scenes. Increasing brightness 
will make dark areas more visible.

COLOR

Adjusts the color saturation of the video picture. Increasing color will make the color more intense. Reducing 
color setting will make the color less intense.

TINT

Adjusts the color of fleshtones. Increase in the right direction will shift the picture with more green in appearance. 
Decreasing setting in left direction will shift the picture with more red in appearance.

SHARPNESS

Ajusts the amount of detail enhancement to the video picture. Increasing the setting will enhance the edges of 
objects in the video picture. Decreasing the setting will reduce enhancement.

COLOR TEMPERATURE

Adjusts the white balance. There are tree settings to choose: COOL; NORMAL,WARM. .

CLOCK PHASE

Fine-tunes the monitor to perfectly synchronize the video’s signal source.

SCREEN WIDTH

Selects the various screen width modes. See page 34 for more information.)

NOISE REDUCTION

Adjusts the Noice level. There are four settings to choose: OFF; lOW; MEDIUM;HIGH.

Summary of Contents for 42-WXGA PLASMA MONITOR BDH4223V-27B

Page 1: ...Philips Business Solutions User Manual EN TYPE Nr BDH4222V BDH4223V ...

Page 2: ......

Page 3: ... a HDTV Decoder Set Top Box 20 6 3 Connecting a VCR 21 6 4 External Audio Connection 22 6 5 Connecting a PC 23 6 6 RS 232 Remote Control Connections 24 7 BASIC FUNCTIONS 27 7 1 Powering ON OFF 27 7 2 Selecting Signal Source 28 7 3 Adjusting Sound Volume 28 7 4 Understanding HDTV 29 8 ADVANCED FUNCTIONS 31 8 1 Picture In Picture PIP Side by Side Picture POP 31 8 2 Widescreen 16 9 Aspect Ratio Viewi...

Page 4: ...User Manual BDH4222V BDH4223V 2 11 CLEANING AND TROUBLESHOOTING 53 11 1 Cleaning 53 11 2 Troubleshooting 54 12 LIMITED WARRANTY EUR 55 13 LIMITED WARRANTY USA 59 ...

Page 5: ... equipment or usage of an unshielded connecting cable may cause excessive interference Adjust only those controls that are covered by the operating instructions Improper adjustment of other controls can result in damage which often requires extensive work by a qualified technician to restore the unit to normal operation Use in well ventilated area and do not block any of the ventilation openings I...

Page 6: ... The power supply cord or the plug has been damaged or frayed Objects have fallen or liquid has been spilled into the appliance The appliance has been exposed to rain The appliance does not appear to operate normally or exhibits a marked change in perfomance The appliance has been dropped or the enclosure damaged Unit does not operate normally when the operating instructions are followed Tilt Stab...

Page 7: ...w or carbon and alkaline etc Remove batteries when the unit is not used for a long time 1 2 WARNINGS AND PRECAUTIONS 1 2 1 NOTE TO THE CATV SYSTEM INSTALLER This reminder is provided to call the CATV system installer s attention to Article 820 40 of the NEC that provides guidelines for proper grounding and in particular specifies that the cable ground must be connected to the grounding system of t...

Page 8: ...ly wipe the cabinet surfaces with a clean cloth or sponge dampened in a solution of cool clear water Use a clean dry cloth to dry the wiped surfaces Occasionally vacuum the ventilation holes or slots in the cabinet back Never use thinners insecticide sprays or other chemicals on or near the cabinet as they might cause permanent marring of the cabinet finish Do not allow a still image to be display...

Page 9: ...hich the receiver is connected n Consult the dealer or an experienced radio TV technician for help Warning User must use shielded signal interface cables to maintain FCC compliance for the product Provided with this moniotr is a detachable power supply cord with IEC320 style terminations It may be suitable for connection to any UL Listed personal computer with similar configuration Before making t...

Page 10: ...User Manual BDV4222V BDH4223V 6 ...

Page 11: ...ize the display to match the incoming signal source without manual intervention Picture in Picture PIP Watch two programs simultaneously using the monitor s picture in picture with four selectable window position settings Side by Side Picture POP Watch two programs silmultaneous by splitting the screen in half HDTV Signal Compatible This display is capable of accepting 1080i and 720p HDTV signals ...

Page 12: ...arious PC and HDTV signals and digitally map the signals to fit within 1024 x 1024 pixels Compatible signals include PC resolutions up to 1280x1024 and HDTV signals including 720p and 1080i Discrete Power ON OFF Separate Power ON OFF buttons on the remote control facilitates the recording of IR macros with advanced system setups Direct Input Selection Keys Separate input selection keys on the remo...

Page 13: ...trate are inatalled on the front of the product Since both glasse can be brokn and scraped easily the product has to be handled with care Never place the monitor with the glass faced down unless it is protected with pads After opening the carton ensure that the content is in good condition and complete When possible use the handles on the back of the monitor for transport 4 2 PACKAGE CONTENTS Plea...

Page 14: ...he back of the product and the wall should be maintained for proper ventilation Avoid installing the product in the kitchen bathroom or any other places with high humidity so as not to shorten the service life of the electronic components Please ensure the product is installed horizontally Any 90 degrees clockwise or counter clockwise installation may induce poor ventilation and subsequent compone...

Page 15: ... 2 Power Standby Button Turns power on off from standby mode There is a wait period between on off cycles 3 Volume Adjustment Buttons Use these buttons to adjust volume up and down These keys also serve as navigation and adjustment keys when On Screen Display menu is engaged 4 Select Buttons Use these buttons to navigate through the the On Screen Display menu If an optional TV tuner is installed t...

Page 16: ...User Manual BDH4222V 4223V 12 5 2 REAR VIEW MAIN POWER ...

Page 17: ...modes sequentially See page 32 10 PIP Picture in Picture Button Turns on PIP Picture in Picture mode under DVI input mode See page 32 11 PIP Source Changes the input source of the PIP among TV AV Component input sources See page 32 12 PIP Position Changes the PIP sub window to 4 different corner locations See page 32 13 Swap Swaps the main and sub picture windows under PIP or POP modes See page 32...

Page 18: ...UND 17 WIDE Toggles between various aspect ratio settings See page 34 18 Discrete Power ON OFF Press OFF to send monitor into standby mode Press ON to power on from standby mode See page 34 19 Direct Input Selection Keys Directly change input signal selection by pressing the appropriate key 1 1 1 1 19 17 16 14 18 15 ...

Page 19: ... 2 Power Standby Button Turns power on off from standby mode There is a wait period between on off cycles 3 Volume Adjustment Buttons Use these buttons to adjust volume up and down These keys also serve as navigation and adjustment keys when On Screen Display menu is engaged 4 Select Buttons Use these buttons to navigate through the the On Screen Display menu If an optional TV tuner is installed t...

Page 20: ...User Manual BDH4222V 4223V 16 5 2 REAR VIEW MAIN POWER ...

Page 21: ...sequentially See page 28 10 PIP Picture in Picture Button Turns on PIP Picture in Picture mode under DVI input mode See page 31 11 PIP Source Changes the input source of the PIP among TV AV Component input sources See page 32 12 PIP Position Changes the PIP sub window to 4 different corner locations See page 31 13 Swap Swaps the main and sub picture windows under PIP or POP modes See page 31 AV Mo...

Page 22: ... SURROUND 17 WIDE Toggles between various aspect ratio settings See page 34 18 Discrete Power ON OFF Press OFF to send monitor into standby mode Press ON to power on from standby mode 19 Direct Input Selection Keys Directly change input signal selection by pressing the appropriate key 1 1 1 1 19 17 16 14 18 15 ...

Page 23: ...ite L audio jacks of the DVD to the R and L audio in jacks of the monitor Note There are two sets of component inputs provided You can use either set of component inputs to connect your DVD Using S Video Input 1 Connect the S Video 4 pin DIN connector of the DVD to the S VIDEO input of the monitor 2 Connect the red R and white L audio jacks of the DVD to the R and L audio in jacks located next to ...

Page 24: ...method There are two sets of component inputs provided You can use either set of component inputs to connect your HDTV Set top box Using RGB Input 1 Connect the 15 pin D Sub RGB connector of the HDTV Set top box to the RGB IN connector of the monitor 2 Connect the red R and white L audio out jacks of the HDTV Set top box to the R and L audio in jacks of the monitor Notes Some HDTV Set top boxes ma...

Page 25: ...ect the red R and white L audio jacks of the VCR to the R and L audio in jacks located next to the S VIDEO connector Using Composite Input 1 Connect the yellow video out connector of the VCR to the yellow Video 1 input of the monitor 2 Connect the red R and white L audio out jacks of the VCR to the R and L audio in jacks located next to the yellow Video 1 connector or ...

Page 26: ...monitor In addition this monitor is equipped with a small 3 5 mm phono style plug for remote turn on applications that will automatically send a remote turnon off signal to the external amplifier 1 Connect the red R and white L AUDIO OUT jacks to the external amplifier or receiver 2 As an option you may use the remote turn on plug Please note that not all external amplifiers can accept remote turn...

Page 27: ...e R and L jacks located to the left of the VIDEO 1 connector Notes Your PC may have audio jacks in the form of a 3 5mm phono plug If this is the case you will need to use a phono plug to RCA converter cable in order to connect audio A RGB loop out labeled RGB Out will allow another RGB monitor to be connected The RGB loop out will display the same signal as the RGB In signal source The physical mo...

Page 28: ...page 25 must first be sent to the monitor followed by the desired value setting in hexadecimal format The steps below show an example of how the monitor input can be changed to RGB 1 Send 1 byte for command 91 input select to the monitor in hex format 0x91 2 Send 1 byte for the value of the RGB input In this example send 0x06 3 The monitor will then respond back to the PC with a 1 byte value to co...

Page 29: ...ion 88 01 64H H Size 89 01 64H H Position 8A 01 64H Color 8E 01 64H Tint 8F 01 64H Sharpness 90 01 64H Input Select 91 00 07 00 TV 01 AV1 02 AV2 03 AV3 04 Component 1 05 Component 2 06 RGB 07 DVI Recall 92 00 00 Initiate recall Mute On Off 95 00 01 00 Off 01 On PanelKey Lock 96 00 01 00 Off 01 On Language 97 00 02 00 English 01 French 02 Spanish Color Temp 98 00 03 00 High 01 Mid 02 Low 03 6500D B...

Page 30: ...User Manual BDH4222V BDH4223V 26 ...

Page 31: ...off the power by pressing the POWER button on the front panel or the remote control again Using Discrete Power ON OFF Keys The discrete POWER ON OFF keys sends two discrete signals to the monitor 1 Turn on the power by pressing the POWER ON button If the monitor is turned on already pressing this button will have no effect 2 Turn off the power by pressing the POWER OFF button If the monitor is alr...

Page 32: ...nput Selection key for that input 7 3 ADJUSTING SOUND VOLUME Using Front Panel or Remote Control 1 To turn up sound volume press VOLUME on either the front panel of the monitor or on the remote control 2 To turn down sound volume press VOLUME on either the front panel of the monitor or on the remote control Using MUTE 1 If you would like to turn off the volume on a temporary basis press the MUTE k...

Page 33: ...itors are capable of displaying a maximum of 480 lines using interlaced scan method All resolutions higher than 480 lines must be reduced to 480 lines in order to be displayed 1 Vertical Resolution Scan Lines Vertical scan lines refer to the number of horizontal lines a TV or monitor can display to create an image As the number of lines increase more information is displayed resulting in better pi...

Page 34: ... in lesser information being displayed This plasma monitor is HDTV compatible This means that this monitor can display up to 720 lines using progessive scan format and 1080 lines using interlace scan format What is Up Convert Up convert takes place when a HDTV set up box display capabilities exceed the digital broadcast signal and the broadcast signal is increased to match the TV s display capabil...

Page 35: ...ures Notes POP 4 3 Mode will preserve 4 3 aspect ratio for both images displayed in the POP windows POP 16 9 Mode will preserve 16 9 aspect ratio for both images displayed in the POP windows All PIP and POP related settings are also accessible using the On Screen menu Display Changing the Sub Picture Position in PIP Mode Once the PIP mode is turned on 1 Press the POSITION key to switch position 2 ...

Page 36: ...de the position of the sub window will start at default position Accessing PIP and POP Modes Modes using OSD To access these modes using OSD 1 Press the MENU keys on the remote or on the front control panel of the monitor 2 Use the ADJ keys to switch to PIP POP Menu 3 Make sure that the Picture OSD menu below is displayed 4 Use the MENU keys to move up and down to choose the sub category you wish ...

Page 37: ...t it fits within the smaller window Choose 4 3 to show an image in native 4 3 aspect ratio within the POP windows Small black bars are added in order to maintain a true 4 3 aspect ratio Choose 16 9 to show an image in wide screen aspect ratio within the POP windows Small black bars are added in order to maintain a true 16 9 aspect ratio PIP Window SWAP By default the OSD will always display DISABL...

Page 38: ... the the extra space on the left and right 16 9 FULL The original 4 3 image is proportionally stretched to fill the entire screen PANORAMA The original 4 3 image is expanded in both the horizontal and vertical directions The center of the picture is almost normal while the edges are considerably expanded For Widescreen Content Many popular DVD titles are anamorphic widescreen however there are two...

Page 39: ...ailable Do not stay in 4 3 mode for an extended period as this may cause a permanent after image to remain on your screen Accessing Widescreen Viewing Modes using OSD To access these modes using OSD 1 Press the MENU keys on the remote or the front control panel of the monitor 2 Make sure that the Picture OSD menu is displayed 3 Use the MENU keys to navigate to SCREEN WIDTH and use the ADJ keys to ...

Page 40: ...ion is detected for the set number of seconds If set to OFF then OSD will remain on the screen OSD Time Setting Sets the number of seconds the OSD will remain active on the display before turning itself off OSD TIMEOUT must be set to ON for this setting to function OSD Background Set to OFF if you want a transparent setting Set to ON if you want a blue background Burn in Recovery Set to ON if you ...

Page 41: ... SLEEP 4 Use the ADJ keys to set to ON The monitor will function normally until the 1 minute mark At the 1 minute mark the sleep timer will display a second by second countdown clock to notify you that the monitor is about to turn off Sleep Timer options Sleep Timer On Off To turn on sleep timer switch to ON position To turn OFF sleep timer switch to OFF Timer Setting Use the ADJ keys to set the t...

Page 42: ...se the ADJ keys to navigate to SOUND OSD sub menu 3 Use the MENU keys to select the AUDIO OUTPUT option 4 Use the ADJ keys to change setting between FIXED or VARIABLE Audio Output Sets the type of audio output sent from the audio output jacks located in the rear of monitor VARIABLE When set to Variable audio output is affected by the monitor s internal audio controls including bass treble surround...

Page 43: ...e LEFT reduce the value down to 1 SRS Surround Sound and BBE Sound Maximizer circuitry Use SRS Surround Sound to simulate a surround sound effect if you are not using a multi channel sound setup Use the BBE Sound Maximizer when using the monitor to playback live performance related audio programs Note When BBE is switched ON then the BASS and TREBLE levels are set to a default Auto level Switching...

Page 44: ... Press the MENU keys on the remote or the front control panel 2 Use the ADJ keys to navigate to the OTHER OSD sub menu INPUT H FREQ KHZ Displays the horizontal signal frequency of the signal currently displayed INPUT V FREQ HZ Displays the vertical signal frequency of the signal currently displayed When Using AV1 and AV2 Inputs Horizontal Vertical Format 15 7 60 NTSC Video 15 6 50 PAL Video 6 BURN...

Page 45: ...e first menu displayed is the PICTURE menu Make sure that the Picture OSD menu is displayed 3 Use the MENU keys to move up and down to choose the option you wish to adjust An explanation of each adjustment is listed below 4 Use the ADJ keys to change the setting Notes These controls are available when input selection is set to AV1 and AV2 S To restore picture settings to the factory defaults simpl...

Page 46: ...e the color less intense TINT Adjusts the color of fleshtones Increase in the right direction will shift the picture with more green in appearance Decreasing setting in left direction will shift the picture with more red in appearance SHARPNESS Ajusts the amount of detail enhancement to the video picture Increasing the setting will enhance the edges of objects in the video picture Decreasing the s...

Page 47: ...the level of white in the video picture Increasing contrast will make white areas of the video picture brighter Contrast works in conjuction with Brightness BRIGHT Enhances the level of dark areas in the video picture such as night scenes and shadow scenes Increasing brightness will make dark areas more visible COLOR Adjusts the color saturation of the video picture Increasing color will make the ...

Page 48: ...justments SCREEN WIDTH Selects the various screen width modes See page 34 for more information NOISE REDUCTION Adjusts the Noice level There are four settings to choose OFF lOW MEDIUM HIGH GEOMETRIC ADJUST Opens the Geometric Adjust sub menu NOISE REDUCTION V SIZE Changes the vertical size of the picture Increase to enlarge the picture size in the vertical direction Decrease to reduce the picture ...

Page 49: ...anation of the picture adjustments available for RGB DVI H WIDTH COLOR TEMPERATURE V SIZE V CENTER H POSITION NORMAL 4 3 50 50 50 CONTRAST Increases or decreases the level of white in the video picture Increasing contrast will make white areas of the video picture brighter Contrast works in conjuction with Brightness BRIGHT Enhances the level of dark areas in the video picture such as night scenes...

Page 50: ...he picture down H WIDTH Changes the horizontal size of the picture Increase to enlarge the picture size in the horizontal direction Decrease to reduce the picture size in the horizontal direction H POSITION Changes the horizontal position of the picture Increase to shift the picture to the right Decrease to shift the picture to the left ...

Page 51: ...NAL ACCESSORIES The following accessories are available and may be purchased from your local sales representative Wall Mount Composite Video Cable RCA S Video Cable Mini DIN Component Video Cable RCA to RCA Audio Cable RCA Cable RGB Cable ...

Page 52: ...User Manual BDH4222V 4223V 48 ...

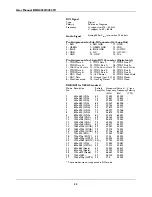
Page 53: ...Types RCA Jacks for audio video Y CB CR and Y PB PR 4 pin DIN S terminal for S Video 9 pin Sub D for RS 232 15 pin Sub D for RGB 24 pin DVI Type Analog Polarity Positive Amplitude Video 1 Vp p with sync S Video Y 1 Vp p C 0 286 Vp p Frequency H 15 734 kHz V 60 Hz NTSC H 15 625 kHz V 50 Hz PAL Input Impedance 75 ohms Type Analog Polarity Positive Amplitude Y 1 Vp p with sync CB PB 0 7 0 1 Vp p CR P...

Page 54: ...o Resolution Refresh Rate Hz Horizontal Frequency kHz Vertical Frequency Hz V sync Polarity TTL 1 640x480 VGA 60 31 500 59 940 2 640x480 VGA 72 37 861 72 809 3 640x480 VGA 75 37 500 75 000 4 640x480 VGA 85 43 269 85 008 5 800x600 SVGA 56 35 156 56 250 6 800x600 SVGA 60 37 879 60 317 7 800x600 SVGA 72 48 077 72 188 8 800x600 SVGA 75 46 875 75 000 9 800x600 SVGA 85 53 674 85 061 10 1024x768 XGA 60 4...

Page 55: ...ve Humidity 20 80 Pressure 800 1114 hPa Temperature 5 45 C Relative Humidity 20 90 Pressure 700 1114 hPa Vibration X Y Z 0 5G 10 55 Hz sweep 10 minutes IHF A weighted 1 meter 40 dB max Residual hum at max Volume 500 µW max Practical max audio output at 10 THD max 1 0 Vp p 1 kHz input 5 W 5 W max 12 ohms Sound distortion at 250 mW 1 kHz 1 max Audio output input at 1 4 Vp p 1 0 Vp p The MTBF is 20 0...

Page 56: ...h a computer equipped with DPMS 10 2 MOUNTING MATERIALS Fixed and Flexible Wall Mounts Ceiling Mounts etc Notes Follow mount bracket instruction included in mounting kit This type of equipment is to be installed by qualified installers please contact with authorized dealer for installation ...

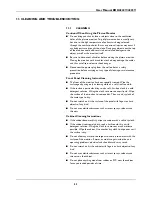
Page 57: ...aning cloth or a soft lint free cloth If the surface is particular dirty soak a soft lint free cloth in a mild detergent solution Wring the cloth to remove excess liquid Wipe the surface of the monitor to remove dirt Then use a dry cloth of the same type to dry Do not scratch or hit the surface of the panel with fingers or hard objects of any kind Do not use volatile substances such as insect spra...

Page 58: ...e screen 1 If under RGB mode the H Size and V Size is incorrectly set 2 If under AV1 AV2 or Component with 480i input the 4 3 WIDE mode is switched on 1 Use H Size and V Size to adjust the size of the video 2 Use the WIDE key to scroll through various full screen modes Can hear sound but no picture Improperly connected source signal cable 1 Make sure that both video inputs and sound inputs are cor...

Page 59: ...ent unauthorized repair or other cause not within the control of Philips Consumer Electronics Europe reception problems caused by signal conditions or cable or antenna systems outside the unit a product that requires modification or adaptation to enable it to operate in any country other than the country for which it was designed manufactured approved and or authorized or repair of products damage...

Page 60: ... BEFORE REQUESTING SERVICE Please check your owner s manual before requesting service Adjustments of the controls discussed there may save you a service call TO GET WARRANTY SERVICE OR IF YOU HAVE QUESTIONS Please contact Philips at one of the telephone numbers below Austria 01 5465 75603 Belgium 02 275 0701 Cyprus 800 92256 Denmark 35 25 87 61 Finland 09 2290 1908 France 03 8717 0033 Germany 0696...

Page 61: ...del and serial numbers found on the product below Also please fill out and mail your warranty registration card promptly It will be easier for us to notify you if necessary MODEL _ _ _ _ _ _ _ _ _ _ _ _ _ _ _ _ _ _ _ SERIAL _ _ _ _ _ _ _ _ _ _ _ _ _ _ _wo_ _ _ ...

Page 62: ...User Manual BDH4222V 4223V 58 ...

Page 63: ...nauthorized repair or other cause not within the control of Philips Consumer Electronics North America reception problems caused by signal conditions or cable or antenna systems outside the unit a product that requires modification or adaptation to enable it to operate in any country other than the country for which it was designed manufactured approved and or authorized or repair of products dama...

Page 64: ...service center to arrange repair In U S A Puerto Rico and U S Virgin Islands all implied warranties including implied warranties of merchantability and fitness for a particular purpose are limited in duration to the duration of this express warranty But because some states do not allow limitations on how long an implied warranty may last this limitation may not apply to you TO GET WARRANTY SERVICE...

Reviews: