background image

How to search for and store TV channels

EN

28

This menu allows you to select your preferred language for
menu, audio and subtitle.

Menu language

This allows you to select your menu language out of the list
of the available languages.

Preferred audio language 

(only with Digital TV broadcasting)

This allows you to select your audio language preference in
case several languages are broadcasted.

Preferred subtitle language 

(only with Digital TV broadcasting)

This allows you to select your subtitle language preference
in case several languages are broadcasted.

Hearing impaired 

(only with Digital TV broadcasting)

This allows you to select the hearing impaired audio or
subtitle language.
When set to On, the Hearing impaired version of your
preferred audio or subtitle language will, if available, be
reproduced.
When set to Off, the normal audio and subtitle language
behaviour will be applicable.

Select your language preferences

This menu will adjust settings related to the installation of the
TV channels, language and country and to the initial installation
of your TV.

1. Press the 

MENU/BROWSE

key on the remote control.

>

The main menu appears.

2. Select TV menu and press the cursor right.

>

The TV Menu is moved to the left.

3. Select Installation and press the cursor right.

>

The Installation menu is moved to the left panel.

4. Use the cursor up/down to select the Installation menu

items.

5. Press the cursor right to enter the selected Installation

menu item.

6. Use the cursor keys to make a selection.
7. Press the 

OK

key to activate or to confirm.

8. Press the cursor left to return to the Installation menu or

press the 

MENU/BROWSE

key to switch off the menu.
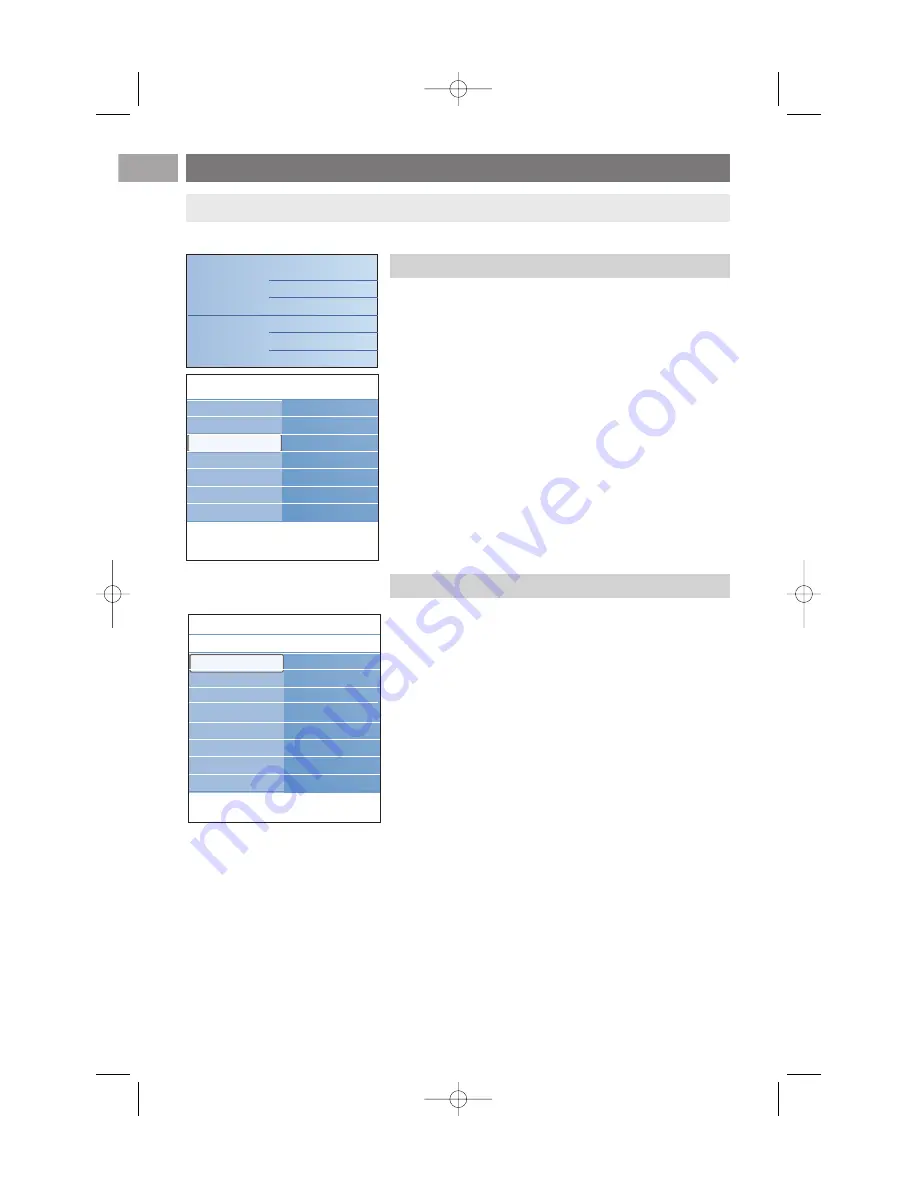
Installation menu

Tip: you will need this chapter only if you want to change the installation settings.

Info

TV menu

Installation

Languages

Country

Time zone

Channels

Manual network i..

Preferences

.............

TV settings

Features

Installation

Info

TV menu

Installation

Languages

Menu language

Preferred audio l...

Preferred subtitle...

Hearing impaired

Languages

Country

Time zone

Channels

Manual network i..

Preferences

Connections

.............

Television

Multimedia

TV menu

TV channels

Programme guide

Media servers

2504.4 en  13-12-2006  08:29  Pagina 28

Summary of Contents for 37PF9731D

Page 1: ... DVD player a satellite or HD receiver 52 a PC 53 a Home Cinema amplifier 54 Use the Common Interface slot 55 Select connected equipment 56 Record with your recorder 56 Audio and video equipment keys 57 Troubleshooting 58 Annex 1 Philips TV software upgrade with portable memory 60 Annex 2 Philips TV Slideshow Format with background music 63 Annex 3 Philips TV Portable memory and USB issues 65 Anne...

Page 2: ...problem if they are bright and stationary Moving or low contrast graphics are less likely to cause uneven aging of the screen Stock market stickers presented at the bottom of the TV screen Shopping channel logos and pricing displays bright and shown constantly or repeatedly in the same location on the TV screen Examples of still pictures also include logos computer images time display teletext and...

Page 3: ...ressive DISPLAY SYNCHRONIZED 480p 576p 720p 1080i IN IN L R EXT3 AUDIO OUT AUDIO OUT L R DIGITAL AUDIO OUT COMMON INTERFACE COMMON INTERFACE AUDIO OUT DIGITAL AUDIO IN HDMI 1 HDMI ANTENNA VGA AUDIO in L R EXT2 EXT1 HDMI 2 ANTENNA 75 o o o PC VGA EXT2 EXT1 o o AUDIOINL R EXT3 Pr Pb Y DIGITAL AUDIO AUDIO HDTV Progressive DISPLAY SYNCHRONIZED 480p 576p 720p 1080i IN IN L R EXT3 AUDIO OUT AUDIO OUT L ...

Page 4: ...able supplied Warning verify that the mains supply voltage corresponds to the voltage printed on the sticker at the rear of the TV Overview of the side connector panel Connect the antenna Connect the mains Insert the mains cord supplied into the mains at the bottom of the TV and in the wall socket Remote control Insert the 2 batteries supplied Type R6 1 5V Be sure the and ends of the batteries lin...

Page 5: ... press repeatedly to enlarge the teletext page display See Teletext p 44 aTo open and close the Electronic Programme Guide See EPG Electronic Programme Guide p 37 Cursor keys Press the cursor keys up down left right to navigate through the menus OK To activate a setting Starts playing content in the Multimedia Browser application BROWSE MENU To open and close the main menu See How to navigate thro...

Page 6: ...itch Ambilight On or Off For the Ambilight settings see Use of the TV menu settings Enjoy Ambilight p 21 MODE press this key repeatedly to toggle through the Ambilight modes Ò π Audio and Video equipment keys See Audio and Video equipment keys p 57 See Multimedia browser functional keys p 42 CANCEL Only for UK Digital text Interactive services Press this key to cancel those special services and th...

Page 7: ...e the position of the PIP screen 1 Press the cursor right to highlight the PIP screen 2 Press the red colour key on the remote control to select Position 3 Use the cursor keys to define the position of the PIP screen FAV To display the channels list You can create up to four favourite lists Use of the remote control RC4401 01 RC4420 01 Continued EN 7 a v Note not all combinations might be possible...

Page 8: ...p to the selected menu item in the TV menu Except for the Clock option 4 Use the cursor keys to make a selection 5 Press the option key to exit a Note digital related menu items will only be accessible in case of digital TV broadcasting Use of the OPTION key Quick access Digital audio language Digital subtitle language Subtitles Picture format Equalizer PIP format Clock In case your remote is lost...

Page 9: ...r TV Switch the TV on Press the power switch B at the side of the TV An indicator on the front of the TV lights up and the screen comes on If the TV is in standby mode press the P keys or the B key on the remote control Note the first time and only the first time you switch on your TV you see a Welcome screen followed by the installation procedure See First time installation Note for digital TV ch...

Page 10: ...leted Notes reception of digital terrestrial TV channels is applicable dependent on the country selected if you choose to install the channels at a later time select the Automatic installation in the TV menu Installation Channels to scan available channels 1 Press the green colour key on your remote control when Television is highlighted 2 Select the country where you are now located Step 2 comple...

Page 11: ... been completed and how many screens there are in total The Settings assistant will step sequentially through the settings of picture sound and ambilight 5 Press the green colour key again to store all the settings and to return to the TV installation menu 6 Press the red colour key again to finish the First time installation procedure and to display the first stored TV channel Note when you skip ...

Page 12: ...u to access detailed information about individual digital TV programmes According to the type of Electronic Programme Guide it also allows you to access the table of scheduled Digital TV programmes and easily select and tune to a desired programme See EPG Electronic Programme Guide p 37 Multimedia allows you to access the Multimedia browser application It lets you display your personal multimedia ...

Page 13: ...ctory standard settings to upgrade your TV software 5 Press the cursor right to enter the highlighted menu item The content of the right panel is moved to the left panel and the right panel now shows the content of the newly highlighted item in the left panel 6 Press the MENU BROWSE key to exit the main menu Note in some cases it is important that the picture can be watched while you adjust the se...

Page 14: ...l The main menu appears on the screen 2 Select TV menu and press the cursor right The TV menu is displayed 3 Select TV settings and press the cursor right The TV settings menu is moved to the left 4 Press the MENU BROWSE key to exit the menu To make it easier to change the settings of the TV there are 3 ways of doing it Adjust viewing and listening settings The TV menu allows you to access and cha...

Page 15: ... settings for viewing and listening Current shows your current settings for viewing and listening If you select Natural it allows you to set your picture sound and ambilight settings to the recommended standard values In most cases this will give the best balanced viewing experience If you select Vivid it allows you to set your picture sound and ambilight settings to rich values making use of the ...

Page 16: ...hich will mainly affect the darker areas of the picture Colour Adjusts the saturation level of the colours to suit your personal preference Hue Compensates for the colour variations in NTSC encoded transmissions Sharpness Adjusts the sharpness of fine details in the picture Tint Increases or decreases Warm red and Cool blue colours to suit personal preferences Select Cool to give the white colours...

Page 17: ... to make every single pixel the best it can be improving contrast sharpness picture depth and colour reproduction and brilliance from every source including High Definition Select On or Off in order to activate de activate Pixel plus Digital Natural Motion Reduces the field and line flicker and reproduces smooth movement especially in movies Select Off Minimum or Maximum in order to really see the...

Page 18: ...w to navigate through the TV settings menu see p 13 Use of the TV menu settings Choose among the following picture formats Auto format Super zoom 4 3 Movie Expand 14 9 Movie Expand 16 9 or Wide screen Auto format makes the picture fill the screen as much as possible In case of subtitles in the bottom black bar Auto format makes the subtitles visible In case of a broadcaster logo in the corner of t...

Page 19: ...Balance Allows you to adjust the output of the right and left speakers to obtain the best stereo reproduction for your listening position Digital audio language only with Digital TV broadcasting Allows you to select an audio language out of the list of the available broadcasted languages for the current digital programme Adjust sound menu settings EN 19 Note dependent on the input signal one or mo...

Page 20: ...el of sound through the headphones AVL Automatic Volume Leveler Automatically reduces the volume differences between channels and programmes providing a more constant overall level This will also reduce the dynamics of sound Delta volume Allows you to correct for any permanent volume differences between TV channels or external sources Auto surround When switched On this allows the TV to automatica...

Page 21: ... 5 Use the cursor up down to select the Ambilight menu items 6 Press the cursor right to enter the selected Ambilight menu item 7 Use the cursor keys to adjust the settings 8 Press the cursor left to return to the Ambilight menu Ambilight Allows you to switch the lights On or Off at the rear of the TV Select Off to switch off the ambient lights and downlight all other ambilight menu items Select O...

Page 22: ...manual fine tuning in the next Ambilight menu items The options Relaxed Moderate or Dynamic will dynamically match brightness and colour to the screen content The selection made will effect the speed which determines the viewing impression For example in Relaxed mode the rate of brightness and colour change as predefined in the factory is smoothly and soft which gives you an immersive yet relaxed ...

Page 23: ...een selected in the Colour menu Note when the TV is switched to standby and you switch Ambilight On then less Ambilight modes are available Caution Infrared interference To avoid bad infrared remote control reception place your peripheral equipment out of sight of the ambient lights of your TV Ambilight does not function well when the room temperature is less than 59 F 15 C Ambilight in standby mo...

Page 24: ...e stored for each TV channel 1 Switch on teletext and select the proper subtitle page from the index 2 Switch off teletext 3 Select Subtitle On to display the subtitles on the selected TV channels On during mute to automatically display the subtitles only when the sound has been muted with the key on the remote control Adjust feature menu settings EN 24 Digital subtitle language only with Digital ...

Page 25: ...ime and press the cursor right Enter the time with the cursor up down and right Channel lock to lock a certain TV channel or external Press the OK key to activate deactivate Parental rating to set an age rating to a digital programme if the programme is parental rated The ratings applied are according the selected country in the initial installation Press the cursor right and select an age rating ...

Page 26: ...l number at a specified time 1 Select On timer 2 Press the cursor right to enter the On timer menu 3 Select Timer and press the cursor right 4 Select On 5 Select Channel and then the TV channel you want your TV to switch to on a selected time and day 6 Select Day and then a day of the week or select Daily 7 Select Time and enter the time with the digit keys or with the cursor up down 8 Press the O...

Page 27: ...top the demo and to return to the demo menu 6 Press the red colour key to exit the demo menu Note this menu item and the common interface applications are only selectable when an authenticated Common Interface card is present and some Common Interface card user interface sessions are listed The CI service provider is responsible for the messages and texts on screen In case of failure or strange be...

Page 28: ...f the TV channels language and country and to the initial installation of your TV 1 Press the MENU BROWSE key on the remote control The main menu appears 2 Select TV menu and press the cursor right The TV Menu is moved to the left 3 Select Installation and press the cursor right The Installation menu is moved to the left panel 4 Use the cursor up down to select the Installation menu items 5 Press ...

Page 29: ... not be according to the standard for your country in case the country selected is not DVB T supported by your TV digital related menu items will not be accessible This allows you to select the country where you are now located Only applicable for certain countries and dependent on the selected country This allows you to select your local time zone so that the clock display shows the correct time ...

Page 30: ... number Press the cursor right and confirm with the OK key 9 Use the rearrange menu to rename or reshuffle the channels See next page Note when on a frequency where a DVB signal is broadcasted the tuner will try to decode an analogue TV channel and hence will not show video Tip if you know the frequency enter the 3 digits of the frequency with the digit keys 0 to 9 For example 049 Info TV menu Ins...

Page 31: ...so allows you to reinstall an earlier uninstalled channel 1 Select the channel you want to uninstall 2 Press the green colour key to uninstall the selected channel The uninstalled channel is indicated in the list by an icon in front of the uninstalled channel 3 Press the green colour key again to reinstall the uninstalled channel Rearrange the channel number list EN 31 Notes press the yellow colou...

Page 32: ...ed or extended on screen display of programme and channel information Select Minimum to activate the display of reduced channel information Select Normal to activate the display of extended channel and programme information For example information on the programme input signal quality of connected peripheral equipment the screen format and sound mode selected audio language subtitle language ratin...

Page 33: ...th a single cable to the TV s DIGITAL AUDIO IN connector In the Connections menu assign the DIGITAL AUDIO IN to the corresponding external input to which your peripheral equipment is connected In addition to accepting audio input via Digital Audio In the TV can output encoded Dolby Digital audio via the DIGITAL AUDIO OUT connector to an external amplifier or receiver If your amplifier or receiver ...

Page 34: ...XT2 Select None if you do not want the selected channel number being activated as a decoder channel number Info TV menu Installation Decoder Channel Status Channels Manual network i Preferences Connections Decoder Factory settings Software upgrade This allows you to reset most of the predefined factory states 1 Select and press the cursor right 2 Press the OK key to erase settings and reset them t...

Page 35: ...r that a new software upgrade is available Press the red colour key on the remote control if you want to be reminded later on Press the green colour key on the remote control to confirm you have read the message Once you have confirmed the message will not pop up again If however you want to see the last broadcasted announcement again select Announcement in the Software upgrade menu How to upgrade...

Page 36: ...key to check or uncheck the highlighted channel and to add it to or remove it from your selected favourite list 8a Press the green colour key again to leave the Edit mode The modified favourite channel list appears Press the FAV key again to exit With the P key you will be able to browse through the TV channels of the selected list 8b Press the red colour key to remove the channel list Create your...

Page 37: ...t may take some time to acquire EPG data The EPG screen updates automatically if the EPG data is acquired successfully If not the EPG screen remains blank Information about the selected programme appears Use the coloured keys to activate the available EPG features displayed at the bottom of the screen 2 To quit the Programme Guide page press the a key again When the type of Electronic Programme Gu...

Page 38: ...being acquired This menu allows you to mark unmark up to 50 preferred EPG channels Acquire EPG data allows you to update the information for the preferred programme guide channels Follow the instructions on screen 6 To quit the Electronic Programme Guide press the a key again EPG Electronic Programme Guide Continued EN 38 Tips the EPG screen will not include TV channels which are not in the Prefer...

Page 39: ...erify if its configuration settings are correct see the manual of your camera remove the memory card from your camera and insert it in the memory card slot Refer to www philips com support for more information Philips can not be held responsible if your USB device is not supported To insert a Memory card USB device Insert a memory card in one of the cardslots at the right side of the TV Insert it ...

Page 40: ...s insert a card in the correct direction Failure to do so may result in damage to the card and the unit Do not subject the card to excessive pressure or strong impacts Malfunctions of the unit or card may result in data loss or damage to the card Philips shall not accept any liability for damage or loss of stored data Compact Flash I II Micro Drive Memory Stick Smart Media Card MultiMedia Card SD ...

Page 41: ...t press the key on the remote control Multimedia Browser Continued EN 41 Note press the green colour key to display all the image files in the current directory as thumbnails when browsing pictures Press the green key again to display the image files in a list Tip the blue colour key can if necessary be used to let the colour keys reappear Notes your TV supports slide shows with background music S...

Page 42: ...or a small screen Multimedia function keys on the remote control Ò to fast rewind displaying content to stop playing content π to play a single file start a slide show playback of a folder or other collection to pause playing content to fast forward displaying content Viewing content via Media servers Media servers provides easy access to your personal multimedia files You get access to digital pi...

Page 43: ...i A T O P overview of the teletext subjects available is displayed Select with the cursor up down left right the desired subject and press the OK key Select subpages When a selected teletext page consists of different subpages a list of available subpages appears on the screen Press the cursor left or right to select the next or previous subpage Picture Teletext 1 Press the b key 2 Press the b key...

Page 44: ...o return to the normal teletext page size Teletext Continued EN 44 Teletext menu The Teletext menu offers various functions to control teletext 1 Switch teletext on and press the MENU BROWSE key to activate the menu 2 Press the cursor up down to select the menu items 3 Press the OK key to activate 4 Press the MENU BROWSE key to leave the teletext menu Reveal Reveals conceals hidden information on ...

Page 45: ...creen to return to picture 5 Press CANCEL to cancel digital text or interactive services Text info Some digital channels also offer information on the programme being broadcast In that case a message may appear at the bottom of the screen for a few seconds Follow the instructions on screen and use the cursor keys to scroll through the next pages Teletext Continued EN 45 Note UK only Digital text i...

Page 46: ...s necessary to view video sources for example digital broadcastings coming from a settop box in 1080i 720p 576i 576p 480i or 480p PC equipped with a VGA connector see p 53 S VIDEO HDMI VIDEO 75 EUROCONNECTOR Pr Pb Y DIGITAL AUDIO AUDIO HDTV Progressive 480p 576p 720p 1080i IN IN L R EXT3 Pr Pb Y DIGITAL AUDIO AUDIO HDTV Progressive 480p 576p 720p 1080i IN IN L R EXT3 Pr Pb Y DIGITAL AUDIO AUDIO HD...

Page 47: ...into the headphone socket L as shown 2 The headphone impedance must be between 8 and 4000 Ohm The headphone socket has a 3 5 mm jack In the Sound menu select Headphone volume to adjust the headphone volume USB Memory card See Multimedia browser p 39 To make video and audio connections Side panel overview EN 47 1 2 3 Warning do not connect cable 1 and 2 at the same time This may cause picture disto...

Page 48: ...NNA VGA EXT2 EXT1 AUDIO OUT DIGITAL AUDIO IN HDMI 2 ANTENNA 75 o o o PC VGA AUDIO IN L R o o EXT3 EXT2 EXT1 ETHERNET o AUDIOINL R VGA AUDIOINL R DVI DVI DVI AUDIOINL R DIGITAL AUDIO IN CABLE YPbPr AUDIO IN To make video and audio connections Rear panel overview 48 EN Game console VCR DVD player Satellite receiver 1 DVD recorder 1VCR 2 DVD recorders 2VCRs Decoder PC DVI PC VGA DVD player HD receive...

Page 49: ...been connected in the Installation menu Select your connections p 33 With the aerial cable only 1 Connect the aerial cables 1 and 2 as shown 2 Tune in your recorder s testsignal and store the testsignal under programme number 0 See Analogue manual installation p 30 See also the handbook of your recorder Connect a decoder and a VCR Connect a eurocable 4 to your decoder and to the special euroconnec...

Page 50: ...llation p 30 See also the handbook of your recorder EN 50 ANTENNA EXT2 EXT1 ANTENNA 75 o EXT2 EXT1 RECORDER CABLE 1 2 RECORDER 3 5 EXT 1 2 4 With a eurocable 1 Connect the aerial cables 1 and 2 as shown 2 Connect your satellite receiver to EXT1 and 2 with a eurocable 3 3 Select the equipment you have connected in the Installation menu Select your connections p 33 and link it to EXT1 or 2 With Comp...

Page 51: ... PC VGA AUDIO IN L R o o EXT3 HDMI DVI DIGITAL AUDIO IN 1 2 Note in case of any problems see Annex 4 Issues referring to connected peripherals with a HDMI connector p 66 With a HDMI connector HDMI is the leading new standard for Digital video and audio interconnection 1 Connect your equipment with the HDMI connector 2 Select the equipment you have connected in the Installation menu Select your con...

Page 52: ...Tip if necessary you can adjust the picture position to the centre of the screen with the cursor keys Notes cables are often colour coded Connect red to red white to white etc the labels for the component video sockets may differ depending on the DVD player connected Although the abbreviations may vary the letters B and R stand for the blue and red component signals respectively and Y indicates th...

Page 53: ...e TV 3 Select VGA in the Installation menu Select your connections p 33 and link it to VGA 4 Also select AUDIO IN L R in the same Connections menu PC equipped with a DVI connector With Digital audio 1 Use a DVI to HDMI cable to connect to one of the HDMI connectors of your TV 1 2 Connect the audio cable 2 to the DIGITAL AUDIO IN connector of the TV 3 Select the computer you have connected in the I...

Page 54: ...AUDIO OUT connector to connect your Home Cinema amplifier INTERNET EXT 1 NETWORK EXT 4 DIGITAL AUDIO Pr Pb Y IN1 IN2 OUT Pr Pb Y DIGITAL AUDIO AUDIO HDTV Progressive DISPLAY SYNCHRONIZED 480p 576p 720p 1080i IN IN L R EXT3 AUDIO OUT AUDIO OUT L R DIGITAL AUDIO OUT AUDIO OUT DIGITAL AUDIO OUT DIGITAL AUDIO OUT Pr Pb Y DIGITAL AUDIO AUDIO HDTV Progressive DISPLAY SYNCHRONIZED 480p 576p 720p 1080i IN...

Page 55: ...aviour you must call your CI service broadcaster Insert a CA module Insert the specified Conditional Access module into the Common Interface slot as far as it will go It may take a few minutes before the CA module is activated and service information is downloaded To access common interface applications see TV menu Adjust feature menu settings Common Interface p 27 Warning switch off your TV befor...

Page 56: ...ter the list of types of peripherals connected to the selected input 9 Select the peripheral equipment with the cursor up down Select connected equipment EN 56 a You can record a TV programme using your recorders tuner without affecting your TV 1 Select the channel number on your recorder 2 Set your recorder to record See the handbook for your recorder Note when recording analogue progammes switch...

Page 57: ...isc CD cursor left right to select the previous or following track CD 0 to select a DVD title chapter index AUX b to select your choice of subtitle language DVD Normal mode if no action is being undertaken within 30 seconds the remote control returns to TV mode Expert mode in Expert mode the remote will stay in the selected mode even when the 30 seconds time out is elapsed To select between Normal...

Page 58: ...rs persistently see the manual of your connected equipment to verify the connection necessary adjustments Alternatively connect an extra audio cable either an analogue or a digital audio cable from your connected peripheral to your TV Verify whether you selected the connected equipment in the Installation menu Select your connections and also select the respective audio input in the same Connectio...

Page 59: ... peripheral function well equipment No photo or music Verify if the source complies with a supported code play or in poor quality No stable or not Verify if you have selected the correctVGA mode in your PC synchronisedVGA See Connect a PC p 53 picture Verify the connections between the TV and the PC No solution found Switch off your TV off and then on again once for your picture or Never attempt t...

Page 60: ...ownloaded from the www philips com support website 1 Insert a USB portable memory device into a PC linked to the internet 2 Go to www philips com support 3 Choose your country or area language 4 Enter your model number 5 In the Search results click on the model number 6 Under Product support click on Software and drivers 7 Click on the Firmware Upgrade zip file 8 Click on the Download arrow in the...

Page 61: ...wed to remove the USB portable memory during the software upgrade procedure In case of a power drop during the upgrade procedure don t remove the USB portable memory from the TV The TV will continue the upgrade as soon as the power comes back If an error occurs during the upgrade you should retry the procedure or contact your Local Customer Service Centre Note once the upgrade is finished use your...

Page 62: ...ect the correct upgrade version and press the red colour key to start the upgrade Your TV will restart and will automatically go to the upgrade mode After a few seconds it will display the status of the upgrade procedure 8 When the software upgrade was successful remove the USB portable memory and restart your TV with the power switch B at the side of the TV Your TV will start up with the new soft...

Page 63: ... a recommendation It is preferable that URL s referencing PM content are based on a relative path starting from the directory where the slideshow is stored This path includes the device or drive name of the PM An absolute path to content will also be supported relative path pictures test1 jpg tamper jpg new bird jpg absolute path USB1 pictures1 foo_bar jpg C f1 jpg organization jpg General Format ...

Page 64: ...the slideshow A single song or playlist m3u pls are the only valid audio references Other reference will not result in any audio playback If a single song is referenced the song will be repeated forever If a playlist is referenced the playlist will be played in sequence with a repeat at the end of the playlist The default display time in 0 1 second of a slide The TV application isn t obliged to su...

Page 65: ...t USB Mass Storage or PC Drive on your digital camera If your camera supports different interface settings be sure to try them one by one or contact the reseller of your camera to find out the correct setting USB Memory Device Issues Devices connected to the USB port of your TV must be Mass Storage Class compliant If your device digital camera MP3 player portable harddisk is not Mass Storage Class...

Page 66: ...nnect your peripheral equipment with the HDMI 2 connector 1 2 Connect the analogue audio output of your peripheral equipment to the AUDIO L R input of your TV 2 3 Select the equipment you have connected in the Installation menu Select your connections p 33 and link it to HDMI 2 4 Also select AUDIO IN L R in the same Connections menu Extra digital audio cable 1 Connect your peripheral equipment wit...

Page 67: ...lation menu 28 language preferences 28 location 32 manual installation 30 menu key 12 MPEG reduction 18 multimedia browser 39 mute key 5 navigate through the menus 12 on screen language 10 on screen information 6 on timer 26 option key 7 OK key 5 PC 52 picture adjustment menu 16 picture format 18 PIN code 26 pixel plus 17 preferences menu 32 preferred audio language 28 preferred subtitle language ...

Page 68: ...xhausted batteries according to local regulations Recycling 68 EN Recycling Product information Your TV consumes energy in standby mode Energy consumption contributes to air and water pollution Very low standby power consumption Specifications see the product leaflet on www philips com support If you need further assistance please call the customer support service in your country The corresponding...

Page 69: ...e following instructions carefully and follow very closely and step by step the instructions What do you need to enjoy Connected Planet A network connection to your PC é Install the Philips Media Manager PMM from the supplied CD on your PC More extended instructions on the installation and use of Connected Planet can be found on the extended manual on the supplied CD If you have problems or questi...

Page 70: ...port those contents You can install the PMM on more than one computer in your home network Make sure that the PMM is not blocked by the firewall installed on your PC Select your PMM menu language You can select among a few available languages in the Settings menu Change the PMM server name You can change the name of the PMM Server in the PMM Settings menu This server name is important as it will b...

Page 71: ...ymbol in the task bar é Click on Music Pictures or Movies at the top of the PMM window Select Add Music Add Pictures or Add Movies Click on Add Files or Folders Select a folder or one or more media files and click on Open to add the selected folder or files to the Media Manager window 2492 3 EN 24 02 2006 15 55 Pagina 3 ...

Page 72: ...ion A before connecting your TV You have a PC with a free Ethernet connector Note If you don t have a free Ethernet connector on your PC you will have to buy and install an extra Ethernet card Go to Connecting and configuring your TV Configuration B p 5 Connecting your TV to a single PC requires a special crossed network cable Ethernet Ethernet is a well established local area networking standard ...

Page 73: ...n p 6 to test your connection Configuration A Make sure DHCP Auto IP automatic network addressing is enabled on your router and your PCs On most of the recently purchased PCs and routers automatic network addressing is already enabled You can check this on your PC with the Network Utility on the supplied CD Connecting your TV Push one end of an Ethernet cable a straight cable into the NETWORK conn...

Page 74: ...hrough the Pictures Music Video files or folders Press the OK key to play the content Press the cursor left to display the content list again a v Step 4 Viewing multimedia content folder picture file music file video file Televisie Multimedia TV menu TV zenders Programmagids Media servers Multimedia browser functional keys to stop playing your content for fast forward Ò for rewind π for play for p...

Reviews: