35
PICTURE
SOUND
FEATURES
INSTALL
TIMER
ACTIVE CTRL
AutoLock
PIP
CLOSED CAP
FEATURES
ACTIVE CTRL
AutoLock
PIP
CLOSED CAP
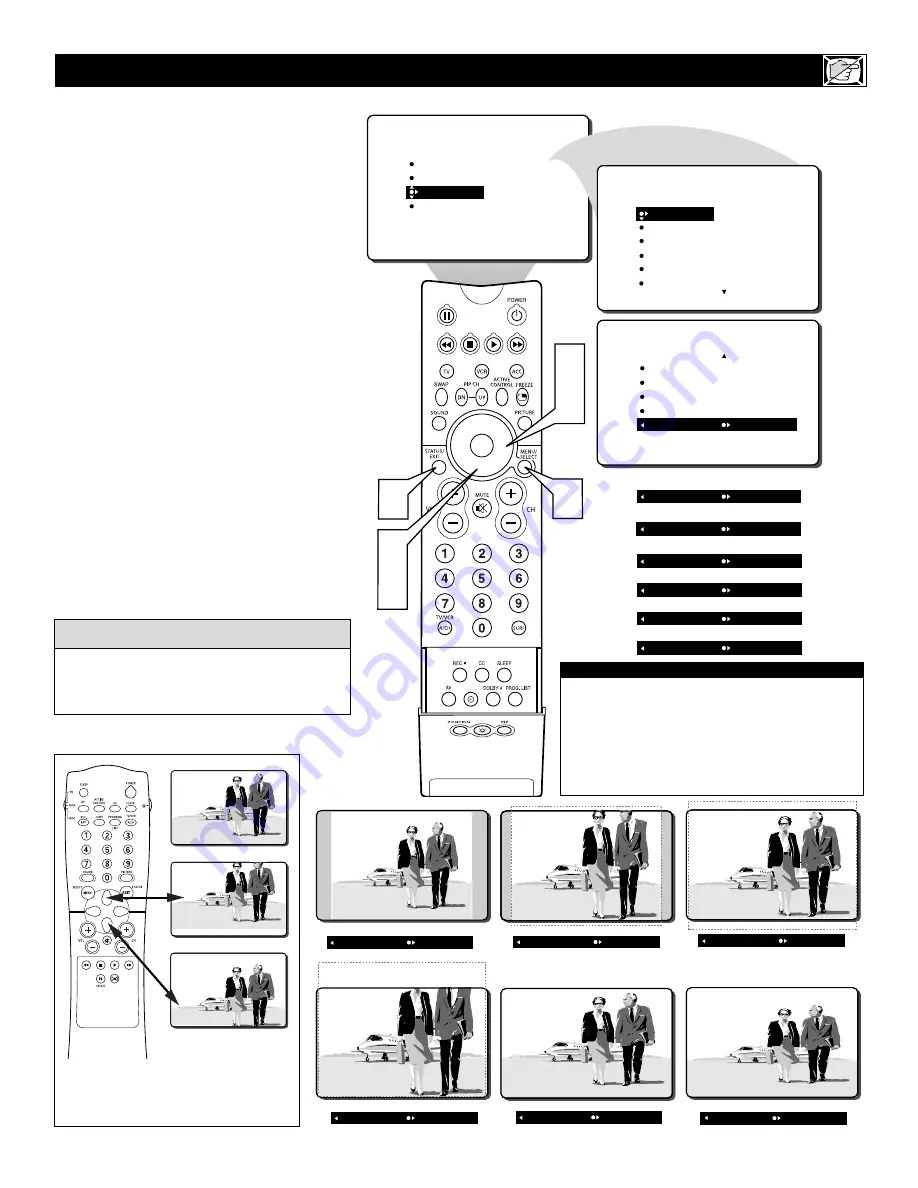
FORMAT AUTO
6
1
3
5
2
4
FEATURES
TIMER
ACTIVE CTRL
AutoLock
PIP
CLOSED CAP
TIME
START TIME
STOP TIME
CHANNEL
ACTIVATE
FORMAT ZOOM 14:9
OR
FORMAT ZOOM 16:9
OR
FORMAT SUBTITLE ZOOM
OR
FORMAT SUPERWIDE
OR
FORMAT WIDE SCREEN
OR
FORMAT 4:3
OR
Y
ou can change the screen format size to
match the type of program you’re watching.
Select the normal 4:3 aspect ratio or any of the
zoom or wide screen aspect ratios.
1
Press the MENU button
on the remote
control to show the on-screen menu.
2
Press the CURSOR DOWN button
twice to highlight FEATURES.
3
Press the CURSOR RIGHT button
and the menu will shift to the left.
4
Press the CURSOR DOWN button
repeatedly until the FORMAT control is
highlighted.
5
Press the CURSOR RIGHT button
repeatedly to toggle among the six
screen format sizes – AUTO, 4:3,
ZOOM 14:9, ZOOM 16:9, SUBTITLE
ZOOM, SUPER WIDE or WIDE
SCREEN.
6
Press the STATUS/EXIT button
to
remove the menu from the screen.
H
OW TO
U
SE THE
S
CREEN
F
ORMAT
C
ONTROL
FORMAT 4:3
FORMAT ZOOM 14:9
FORMAT SUBTITLE ZOOM
FORMAT SUPERWIDE
FORMAT WIDE SCREEN
FORMAT ZOOM 16:9
Normal
Up
Down
Use the CURSOR UP or DOWN buttons to
move
(pan)
the picture up or down in short
movements when needed. This will work in
all formats except 4:3, and WIDE SCREEN.
IMPORTANT NOTE:
Some DVD Discs are encoded with as much as 30%
more video information to give the viewer the best pos-
sible picture quality. With the DVD Player in the 16:9
picture format, the playback of this type of disc (con-
taining extra video information), can produce a number
of small white lines in the upper portion of the black
letterbox area. With some of these discs, this situation
is unavoidable and it does not require a service call.
When the onscreen menu is not displayed,
pressing the CURSOR RIGHT or LEFT but-
tons will toggle the screen FORMAT options.
H
ELPFUL
H
INT


