background image

27

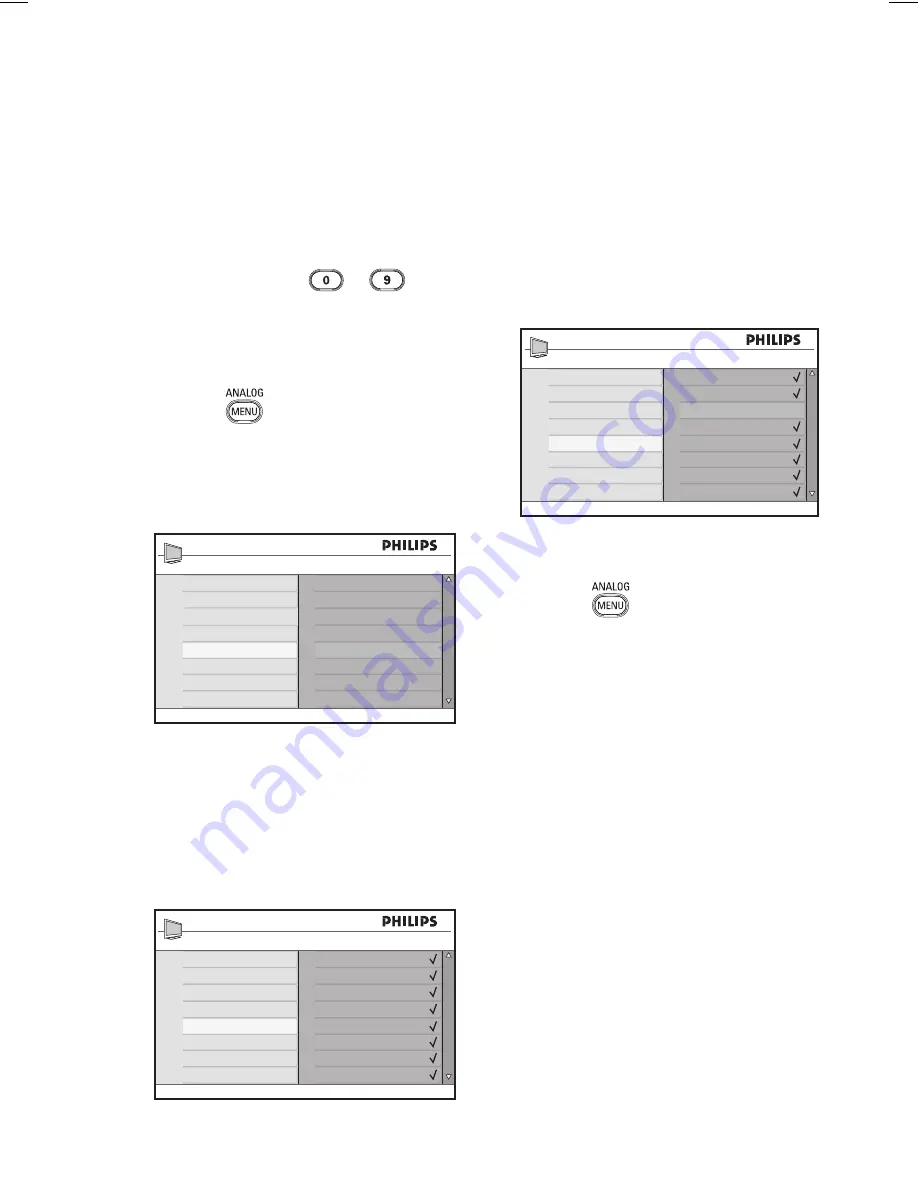
You can specify a list of favourite channels. 

When you use the 

P – / +

 keys of the 

remote control to access channels, only the 
favourite channels are accessed. 

To access channels that are not in your 
list of favourites, use the 

 to 


numerical keys.

Adding or removing channels from 
your list of favourites

Press the 

 key to display the 

Main


menu.

Press the 

Î

 or 

ï

 key to select 

Install

,  

and press the 

Æ 

or 

u


key to enter the 

menu. 

Auto Store

Manual Store
Sort
Name

Favourite Program

Main
Picture
Sound
Ambilight*
Features
Install

* Available in selected models

Press the 

Î

 or 

ï

 key to select 

Favourite Program

, and press the 

Æ 

or 

u


key to enter the menu.

Press the 

Î

 or 

ï

 key to select the 

channel number you want to add or 
remove from the list.

001
002
003
004
005
006
007
008

Install
Auto Store
Manual Store
Sort
Name
Favourite Program

100

1.

2.

3.

4.

Toggle the 

Æ

 or


u


key to add or 

remove the 

channel from your list

- When  the 

$

 is displayed 

on the right 

of the menu, the channel is in the list of 
favourites. 
- When  the 

$

 is not displayed 

on the 

right of the menu, the channel is not in 
the list of favourites. 

001
002

003

004
005
006
007
008

Install
Auto Store
Manual Store
Sort
Name
Favourite Program

100

Press the 

Í

 key to return to the 

previous menu.

Press the 

 key to exit the menu.


5.

6.

7.

Selecting your favourite channels

Summary of Contents for 3139

Page 1: ...USER MANUAL Register your product and get support at www philips com welcome ...

Page 2: ...9 free Ireland 01 601 1777 local Italy 840320086 0 08 min Luxemburg 40 6661 5644 local Netherlands 0900 8407 0 10 min Norway 2270 8111 local Poland 0223491504 local Portugal 2 1359 1442 local Slovakia 0800004537 free Spain 902 888 784 0 10 min Sweden 08 5792 9100 local Switzerland 0844 800 544 local UK 0870 900 9070 local This information is correct at the time of press For updated information see...

Page 3: ...u options for language 14 Submenu options for location 15 Restricting access to digital channels 16 Opting to use a pin code 16 Changing your pin code 16 Options for restricting access to digital channels 16 Using the Common Interface slot 16 Setting up lists of favourite channels 17 Updating software automatically 18 Obtaining the software version 18 Information about software downloads 18 Downlo...

Page 4: ...ng HD equipment to your TV 39 Adjusting picture or sound settings in HD mode 39 Picture settings in HD mode 39 Sound settings in HD mode 39 Configuring the TV in HD mode 40 Displaying in native 1080 mode 40 Supported formats 41 Using Auto HDMI 41 HDMI 1 3a CEC 41 Using the TV as a PC Monitor 42 Connecting a PC to your TV 42 Adjusting picture or sound settings in PC mode 42 Picture settings in PC m...

Page 5: ...e screen with anything hard as this may scratch or damage the screen permanently 1 2 3 4 Introduction Congratulations on your purchase and welcome to Philips To fully benefit from the support that Philips offers register your product at www philips com welcome This manual contains information about how to install and operate your TV If you still have problems after reading this manual call your Lo...

Page 6: ...ls filled with water on top of or near to the TV Spilling water into the TV can result in electric shock If you spill water into the TV do not operate the TV Immediately 1 2 3 4 5 6 7 8 disconnect the TV from the mains and have the TV checked by a qualified technician Do not touch any part of the TV power lead or aerial lead during lightning storms Do not leave the TV in standby mode for an extend...

Page 7: ...n Side HDMI To connect to peripheral equipment including high definition equipment 1 2 3 4 5 6 7 Common Interface CI slot To connect a Conditional Access card such as a cable card or smartcard TV Aerial To connect to the aerial plug HDMI To connect to peripheral equipment including high definition equipment Some models have three HDMI connectors EXT 4 Y C and EXT 4 YPbPr To connect to peripheral e...

Page 8: ...nd the mains cord firmly into their respective socket at the bottom of the TV before connecting them into the wall socket How to switch your TV on To switch the TV on press the POWER key on the side controls A blue indicator light comes on and after a few seconds the screen lights up If the TV set remains in standby mode the indicator light remains red Press the PROGRAM key on the side controls or...

Page 9: ... enter or exit the TV menus in analogue mode Î ï Í Æ To select and adjust menu options u OK To confirm selections and access the program list in digital mode Analogue Digital To switch between analogue and digital mode VOL To increase or decrease volume Mute To turn the speaker sound on or off to Numerical keys To access programme numbers directly For a two digit programme number enter the 2nd dig...

Page 10: ...al menu To display or exit from the digital menu in digital mode Programme listings To obtain programme listings For information see Getting programme listings on page 20 P Programme To select the previous or next TV channel BACK To toggle between the previously viewed channel and the current channel This key can also be used to edit or move back when you are naming channels Smart picture and soun...

Page 11: ...orm to the standard for your country You might receive fewer or no services Press the Î or ï key to select your preferred Country or Time Zone Press the u key to confirm your selection Press the ï key to select Service Scan Press the u key to start the installation The TV searches for the available analogue and digital channels If no digital channels are detected press key to switch to analogue mo...

Page 12: ...r i More information about this programme is available To display more information press the key once Press the key a second time to remove the information Subtitling is available To access subtitles press the key Alternatively press the key to access the options menu and then select subtitles TXT Analogue teletext is available in digital mode ù Other languages are available To select other langua...

Page 13: ...hannel number 1 2 3 4 5 6 7 Press the green key to confirm your choice The exchange is complete Repeat the previous steps until all of the channels are in the required order Press the Í key to return to the previous menu Press the key to exit the menu Checking for new TV channels or radio stations You can check for the availability of TV channels or radio stations that have been launched by the br...

Page 14: ... number of channels found is displayed When the search is complete press the u key to accept the new services 1 2 3 4 5 6 Press the Í key to return to the previous menu Press the key to exit the menu Reinstalling all channels This menu allows you to reinstall all the digital TV channels and radio stations If you are in analogue mode switch to digital mode by pressing the key on the remote control ...

Page 15: ...s you to check the strength of the signal that you are receiving through your aerial From the digital mode press the key to display the setup menu 1 2 3 4 5 6 7 8 1 Press the ï key to select Installation and press the Æ key Frequency Network name Service lists Service setup Test reception Setup 11 28 Test signal quality Installation Close Signal quality Signal strength Press the ï key to select Te...

Page 16: ...you back to your preferred language Press the key to exit the menu 1 2 3 4 5 6 7 8 1 Press the key again to display menu Press the ï key to select the second item in the menu Press the Æ key to enter into the next level of the menu Press the Æ key followed by the ï key to select the fifth item on the menu Press the Æ key to enter into the next level of the menu Press the Î or ï key to select your ...

Page 17: ...u are located Time zone To select the time zone where you are located The language can be selected independently from the country Caution If you select a wrong country the channels might not be numbered according to the standard for your country Consequently you might receive fewer or no services Selecting your language and location cont ...

Page 18: ...ing the key on the remote control Press the key to display the setup menu Press the ï key to select Access restrictions and press the Æ key 1 2 3 4 5 6 7 1 2 3 Press the ï key to select Change pin code Press the Æ key to enter into the Change pin code menu Follow the on screen instruction to change your pin code The default pin code is 1234 If you forget your pin code reset to the default pin code...

Page 19: ...bes the options for the Favourites menu Name To name a list Press the Î or ï key to move around the name display area Press the P keys to select the characters The name can contain up to 16 characters Press the key to change a character When the name has been entered press u key to exit 1 2 3 4 5 6 Select TV channels To add TV channels to a list Press the Î or ï key to select a TV channel Press th...

Page 20: ...software when it is available When a download is accepted the software is downloaded at the designated time and date You must put the TV into standby mode when the download is due If a problem occurs during the software download you are informed about the next scheduled software download Press the u key to return to using your TV normally If the software download is successful a congratulatory mes...

Page 21: ... u key to confirm your selection To deactivate your lists of favourite channels select None For information about how to create a list of favourite channels see Setting up lists of favourite channels on page 17 Subtitle language To change the subtitle language 1 2 3 4 Press the Î or ï key to select your language Press the u key to confirm your selection To permanently change the subtitle language ...

Page 22: ... selected favourites list is displayed Press the ï key to enter into the Preset Service list Alternatively press the Æ key to access the Today list Press the Î or ï key to select a programme Press the colour keys to activate the TV guide The TV guide features are displayed at the bottom of the screen Press the key to display more information about the selected programme More information is display...

Page 23: ...lour key links are available in the Digital Teletext to allow you to exit teletext mode use the key instead When you switch to a digital channel with a teletext service the teletext is downloaded in the background Wait for the download to complete before you press the key If you press the key before the download is complete there is a short delay before the teletext is displayed When you navigate ...

Page 24: ...sert the CI module into the CI slot on the TV The following instructions describe how to use conditional access Switch off the TV If your module comes with a viewing card insert the CA card into the CI module Ensure that the arrow on the CA card faces the arrow on the module Insert the CI module into the CI slot on the TV CONDITIONAL ACCESS CARD COMMON INTERFACE MODULE 1 2 3 Switch on the TV Press...

Page 25: ...ram 3 TV 196 MHz To exit or interrupt the search before it is complete press the key If you interrupt an auto store not all of the channels are stored To store all channels restart the auto store again Automatic Tuning System ATS If the transmitter or cable network sends an automatic sort signal the programmes are numbered correctly In this case the installation is complete If an automatic sort si...

Page 26: ...menu and select one of the following options Europe automatic detection France LL standard UK I standard West Europe BG standard East Europe DK standard Press the Æ or u key to confirm your selection Enter the Search menu and press the Æ key to start a search When a channel is found the searching stops and if a channel name is available the name is displayed Alternatively enter the frequency of th...

Page 27: ...s the Î or ï key to select the channel number you want to change Press the Æ key to enter the sorting mode Notice that the arrow cursor now points to the left 1 2 3 4 5 001 002 003 004 005 006 007 008 Install Auto Store Manual Store Sort Name Favourite Program 100 Press the Î or ï key to select the new channel number and press the Í key to confirm your choice Notice that the arrow cursor now point...

Page 28: ...t Name Favourite Program 100 Press the Î or ï key to select the channel number you want to name Press the Æ key to enter the name area for that channel Press the Î or ï key to select the characters of the name You can use up to 5 characters in the name You can navigate the name area by pressing the Í and Æ keys 1 2 3 4 5 6 001 002 003 004 005 006 007 008 Install Auto Store Manual Store Sort Name F...

Page 29: ...ess the Î or ï key to select Favourite Program and press the Æ or u key to enter the menu Press the Î or ï key to select the channel number you want to add or remove from the list 001 002 003 004 005 006 007 008 Install Auto Store Manual Store Sort Name Favourite Program 100 1 2 3 4 Toggle the Æ or u key to add or remove the channel from your list When the is displayed on the right of the menu the...

Page 30: ...ing the key the TV will automatically come on at the programmed time 1 2 3 4 5 If you leave the TV set on it will change channel at the Start Time and will go to standby at the Stop Time This list describes the options for the timer Sleep To select a time period after which the TV switches to standby mode Select the Off option to deactivate the feature Note During the last minute of a sleep time s...

Page 31: ...sing the to digit keys The word Incorrect appears on the screen 1 2 3 1 2 Key in the access code 0711 again The TV prompts you to change the code Key in your own 4 digit code by using the to digit keys and confirm the new code 001 002 003 004 005 006 007 008 Parental Control Lock Program Change Code Clear All Lock All 109 Press the Í key to return to the previous menu Press the key to exit the men...

Page 32: ...Accessing the Parental Control menu on page 29 Key in your own 4 digit code by using the to digit keys Press the ï key to select Change Code Press Æ key to enter the Change Code mode Key in the code by pressing the to keys Confirm the code by keying in the code again Blocking or unblocking all channels Enter the Parental Control menu as decribed in Accessing the Parental Control menu on page 29 5 ...

Page 33: ... the Î or ï key to select Features and press the Æ or u key to enter the menu Press the ï key to select Child Lock and press the Æ or u key to enter the menu Off On Features Timer Child Lock Parental Control Auto HDMI Press the Î or ï key to select On or Off Press the Æ or u key to confirm your choice Press the Í key to return to the previous menu Press the key to exit the menu 1 2 3 4 5 6 7 Locki...

Page 34: ...ng options Brightness 1 2 3 4 5 1 2 Mode Colour Custom Colour or Balance Press the Æ or u key to confirm your choice Press the Î and ï keys to select the options for the feature Configure the option and press the Æ or u key to confirm the configuration This list describes the Ambilight options Brightness To adjusts the brightness of the Ambilight lamp Mode To select one of the following preset mod...

Page 35: ... the colour intensity Contrast To change difference between light and dark tones in the TV contrast range Sharpness To increases or decreases the sharpness Colour Temp To cycle through the following colour settings Cool more blue Normal balanced and Warm more red More options Contrast To increase the contrast range of the TV Select On to activate the Contrast feature Active Control To adjust pictu...

Page 36: ...ising slots Incr Surround Select between Incredible Surround and Stereo when in stereo transmission Select between Mono and Spatial when in mono transmission BBE High definition sound To restore clarity and presence for better speech intelligibility and musical realism Adjusting picture and sound settings cont ...

Page 37: ...osphere Game For PCs games consoles playstations etc Personal The customised settings you defined by using the Picture menu in the Main menu Using Smart Sound You can toggle through a selection of predefined sound settings Press the button to cycle through the settings Music News Personal or Movie The Personal setting is the setting that you create by using the Sound menu in the Main menu This is ...

Page 38: ...n 14 9 format A thin black band remains on both sides of the picture and the top and bottom of the picture is clipped off Movie expand 16 9 The picture is enlarged to 16 9 format This mode is recommended when displaying pictures with black bands at the top and bottom letterbox format In this mode large parts of the top and the bottom of the picture are clipped off Subtitle Zoom This mode is used t...

Page 39: ...ed at the bottom of the screen The colour areas flash when the item or the page is not yet available Selecting a page to To enter the number of a teletext page For example to access page 120 enter 120 The number is displayed at the top left corner of the screen When the page is located the counter stops searching and the page is displayed Repeat this operation to view another page If the counter c...

Page 40: ...in analogue mode only The favourite pages can be accessed by pressing the colour keys Once set the favourite pages become the default every time teletext is selected To store the favourite pages proceed as follows Press the key to switch the teletext display on Press the key to change to favourite page mode Use the to keys to enter the teletext page that you want to store as a favourite page Press...

Page 41: ...cture or Sound setting and press the 1 2 3 4 5 1 2 3 Æ or u key to enter the menu Press the Î or ï key to adjust the Picture or Sound setting Press the Í key to return to the previous menu Press the key to exit the menu Picture settings in HD mode Except for the Horizontal Shift and the Vertical Shift features all of the picture settings in PC mode are the same as the picture settings in TV mode H...

Page 42: ...enter the menu Press ï key to select Display native 1080 Features Timer Child Lock Parental Control Auto HDMI Display 4 5 6 1 2 3 Press the Æ key to access Display mode Press the Æ key twice to access the Off On option in the native 1080 Off On Display native 1080 Press the Î ï keys to select Off or On Select On option to watch native 1080mode Press the Í key to return to the previous menu Press t...

Page 43: ...HDMI Off On Press the Í key to return to the previous menu 1 2 3 4 5 6 Using the TV in High Definition mode cont Press the key to exit the menu HDMI 1 3a CEC Your TV is enabled for HDMI CEC connections with other devices The following descriptions apply to devices that are CEC compliant and connected to your TV through an HDMI cable One touch play When you connect your TV to devices that support o...

Page 44: ...DMI 2 HDMI 3 Side HDMI Digital TV Available in selected models Press the Æ or u key to confirm the selected source 1 2 3 4 5 Adjusting picture or sound settings in PC mode For information about how to adjust picture or sound settings in HD mode follow the procedure in Adjusting picture or sound settings in HD mode on page 39 Picture settings in PC mode The picture settings in HD mode are the same ...

Page 45: ... on certain channels Check whether the correct TV system is selected see page 24 No sound Verify that the volume is not at the minimum Check that the mute mode is not on If mute mode is on press the key to deactivate mute mode Verify the connections between the peripheral equipment and the TV Sound interference Try switching off any electrical appliances to prevent interference for example hairdry...

Page 46: ...ether the connections are correct Check whether the source is correctly selected Press the button to enter the Source list and select the correct source Check whether you have configured the computer to a compatible display resolution Check the graphic card setting of PC S Video colour becomes faint Check whether the SVHS cable is properly connected Press the P key on the remote control to change ...

Page 47: ... rear of the TV For more product specifications see the product leaflet on www philips com support Environmental Information Note Specifications and information are subject to change without notice For further assistance call the customer support service in your country The telephone numbers and addresses are given in the worldwide guarantee booklet supplied with the TV Electric Magnetic and Elect...

Page 48: ...is fitted with an approved moulded 13 AMP plug Should it become necessary to replace the mains fuse this must be replaced with a fuse of the same value as indicated on the plug Remove fuse cover and fuse The replacement fuse must comply with BS 1362 and have the ASTA approval mark If the fuse is lost make contact with your retailer in order to verify the correct type Refit the fuse cover If for an...

Page 49: ...ing digital TV switchover and broadcasters will advise you when to re tune on each occasion If you do not re tune your equipment you risk losing some or all of your TV services during and following switchover Please refer to the instruction manual supplied with your digital TV equipment for help with re tuning channels Some manufacturers refer to re tuning as rescanning channels or reinstalling Pl...

Page 50: ......

Page 51: ......

Page 52: ... 2007 Koninklijke Philips N V All rights reserved Document order number 3139 125 38891 ...

Reviews: