background image


EN      13  


En

gl

is

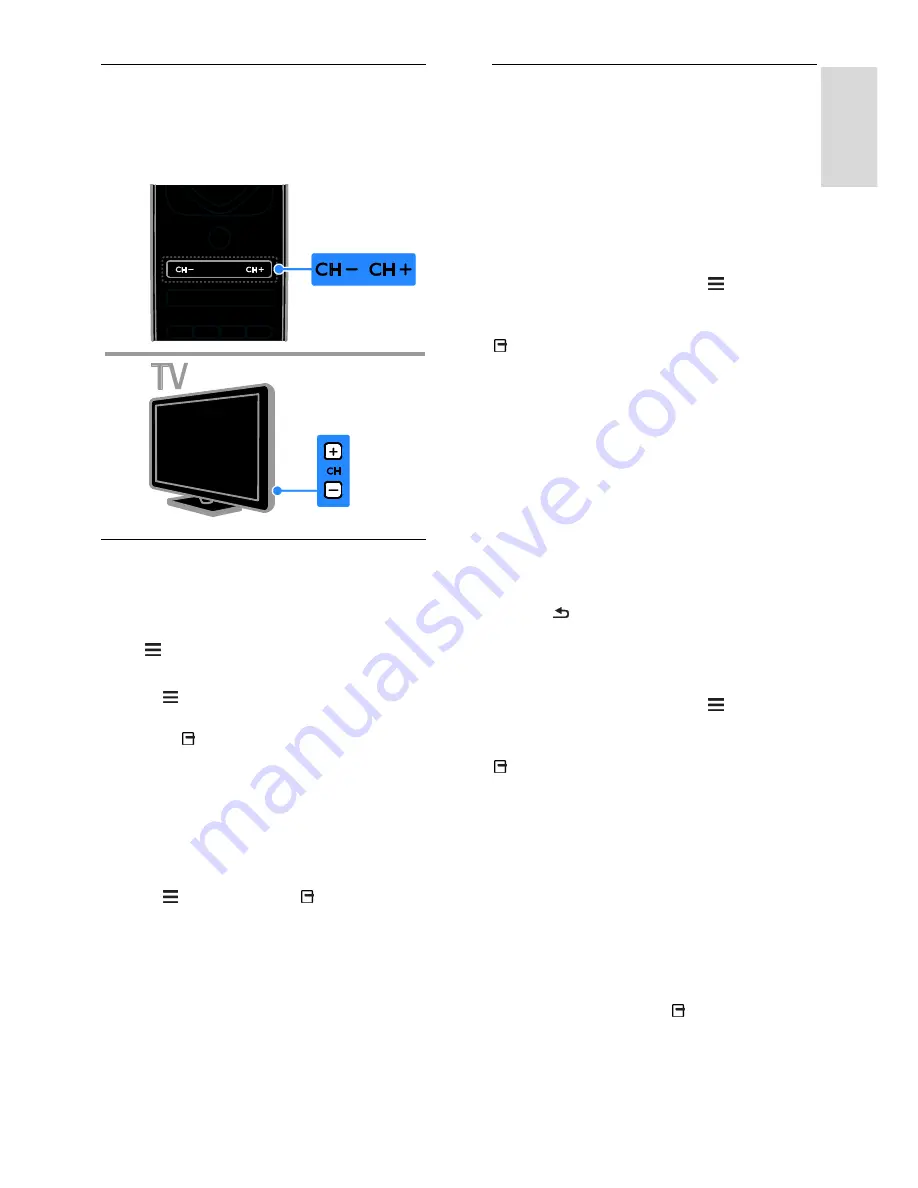
Switch TV channels 


Press 

CH +/-

 on the remote control or 

TV. 


Press the 

Numeric buttons

 to enter a 

channel number. 


Manage favourites 

You can view all channels or only a list of 
your favourite channels so that you can find 
them easily.  
Press 

 LIST

 to access the channel list. 

Create a list of your favourite channels


1. Press 

 LIST

2. Select the channel to mark as a favourite, 

then press   

OPTIONS

3. Select 

[Mark as favourite]

, then press 

OK

.   

The selected channel is marked with a star. 
To remove a channel from the favourites list, 

select 

[Unmark as favourite]

, then press 

OK

Select a channel list


1. Press 

 LIST

, then press   

OPTIONS

2. Select 

[Select list]

 > 

[Favourites]

 to 

display channels in the favourite list or 

[All]


to display all channels. 

3. Press 

OK

 to confirm. 


Manage channel lists 

After the channels have been installed, you 
can manage them: 


Rename channels 


Reorder channels 


Listen to digital radio 

Rename channels


You can rename the channels. The name 
appears when the channels are selected. 

1. While you watch TV, press 

 LIST

.   

The channel list is displayed. 
2. Select the channel to rename, then press 


OPTIONS

3. Select 

[Rename]

, then press 

OK

4. Press the 

Navigation buttons

 to select 

each character, then press 

OK

Tips

:  


You can press 

OK

 in the entry screen 

to enable the 

Onscreen Keyboard


Press 

[ABC]

 or 

[abc]

 to switch 

between uppercase and lowercase 
letters. 

5. Once complete, select 

[Done]

, then press 

OK

 to confirm. 

6. Press   to exit. 

Reorder channels


After the channels have been installed, you 
can reorder the channel list. 
1. While you watch TV, press 

 LIST

.   

The channel list is displayed. 
2. Select the channel to reorder, then press 


OPTIONS

3. Select 

[Reorder]

, then press 

OK

.  

4. Press the 

Navigation buttons

 to move the 

highlighted channel to another location, then 

press 

OK

5. Select one of the following options, then 

press 

OK

.  


[Insert]

: Insert the channel into the 

desired location. 


[Swap]

: Swap location with another 

channel. 

6. Once complete, press   

OPTIONS

, then 

select 

[Exit]

.    

Summary of Contents for 26PFL4007H/12

Page 1: ...EN User Manual Register your product and get support at www philips com welcome 26PFL4007H 12 26PFL4007K 12 26PFL4007K 12 ...

Page 2: ...te settings 37 Language settings 38 Universal access settings 39 Other settings 40 Update software 41 Restore default settings 41 5 Connect your TV 42 About cables 42 Connect devices 43 Connect more devices 49 Watch a connected device 51 Network and the Internet 52 Common interface 54 6 Troubleshooting 55 General issues 55 Channel issues 55 Picture issues 56 Sound issues 57 Connection issues 57 Ne...

Page 3: ...res music and much more with Youtube and other Smart TV applications While you re watching a digital channel you can pause TV at any time and catch up with the broadcast later The broadcast is stored on a USB hard disk or streamed through catch up TV applications in Smart TV If you connect your TV to the Internet you can record your favourite TV show on a USB hard disk You can use Philips smartpho...

Page 4: ...or other objects Remote control 1 Standby Switch the TV on or to standby 2 Play buttons Control playback of media files 3 SOURCE Access a connected device 4 FORMAT Change picture format 5 TV Switch source to watch TV 6 Home Access the Home menu 7 OK Confirm an entry or selection 8 SMART TV Access Smart TV features 9 Navigation buttons Navigate through menus and select items 10 LIST Access the TV c...

Page 5: ...d You can also view a slideshow of the images in your smartphone on the TV To download the application Philips My Remote visit the Apple App store or the Android Market Follow the instructions provided at the application store Ensure that your TV and smartphone are connected to the same local network Read more on network connections at Connect your TV Network and the Internet Page 52 Important inf...

Page 6: ...he value printed on the back of the TV Never connect the TV to the power outlet if the voltage is different Parts of this product may be made of glass Handle with care to avoid injury and damage Risk of injury to children Follow these precautions to prevent the TV from toppling over and causing injury to children Never place the TV on a surface covered by a cloth or other material that can be pull...

Page 7: ...ir respective owners TP Vision Netherlands B V reserves the right to change products at any time without being obliged to adjust earlier supplies accordingly The material in this manual is believed adequate for the intended use of the system If the product or its individual modules or procedures are used for purposes other than those specified herein confirmation of their validity and suitability ...

Page 8: ...ay Philips plays an active role in the development of international EMF and safety standards enabling Philips to anticipate further developments in standardisation for early integration in its products Trademarks and copyrights Windows Media is either a registered trademark or trademark of Microsoft Corporation in the United States and or other countries Manufactured under licence from Dolby Labor...

Page 9: ...f their respective owners Sustainability Energy efficiency This TV is designed with energy efficient features To access these features press the Green button on the remote control Energy saving picture settings You can apply a combination of energy saving picture settings While you watch TV press the Green button and select Energy saving Screen off If you only want to listen to audio from the TV y...

Page 10: ... and human health Your product contains batteries covered by the European Directive 2006 66 EC which cannot be disposed of with normal household waste Please inform yourself about the local rules on separate collection of batteries because correct disposal helps to prevent negative consequences for the environment and human health EU energy label The European Energy Label informs you on the energy...

Page 11: ...ntable PDF version of this user manual Email us a specific question Chat online with our support personnel available in certain countries only Search the TV forum Your question may have already been answered by the Philips TV community of users Visit www supportforum philips com Contact Philips You can contact Philips Consumer Care in your country for support The number is available in the leaflet...

Page 12: ... If you are not going to use the TV for an extended period of time disconnect the TV from the mains plug Automatic switch off You can save energy with this TV s energy efficiency settings The settings are enabled by default so that if there is no user interaction such as pressing a remote control button or a control on the rear panel for four hours the TV will automatically switch to standby To di...

Page 13: ...s Listen to digital radio Rename channels You can rename the channels The name appears when the channels are selected 1 While you watch TV press LIST The channel list is displayed 2 Select the channel to rename then press OPTIONS 3 Select Rename then press OK 4 Press the Navigation buttons to select each character then press OK Tips You can press OK in the entry screen to enable the Onscreen Keybo...

Page 14: ...tor that connects the device to the TV 1 Press SOURCE 2 Press the Navigation buttons to select a connector in the list 3 Press OK to confirm Use smart settings Your TV comes with smart picture and sound settings You can apply these settings or customise them Select your preferred picture setting 1 While you watch TV press ADJUST 2 Select Smart picture 3 Select one of the following settings then pr...

Page 15: ...er Synopsis of programmes Note Programme guides are available in certain countries only Set programme guide Before you use the programme guide check the following settings 1 Press 2 Select Setup TV settings Preferences Programme guide 3 Select From the broadcaster then press OK Access the TV programme guide 1 Press 2 Select Programme guide then press OK Use TV programme guide options You can custo...

Page 16: ...e TV Play files from computer What you need A wired or wireless home network connected with a Universal Plug and Play uPnP router Philips wireless USB adapter PTA01 for WiFi ready models or a LAN cable that connects your TV to your home network A media server program running on your computer Appropriate settings on your computer firewall to allow you to run the media server program Set up the netw...

Page 17: ... a video Shuffle on Shuffle off Enable or disable random play of videos Show info Display the file information Listen to music Press the Navigation buttons to select a music track then press OK Press to pause Press to stop Press or to search forward or backwards within a music track Press CH CH to skip to the previous or next video Press and hold to exit content browser Music playback options Pres...

Page 18: ...tely Functions that require plug ins may be unavailable TP Vision Netherlands B V bears no responsibility regarding the content and the quality of the content provided by the content service providers What you need 1 On your home network connect the TV to the Internet 2 On your TV configure Smart TV 3 Optional On your PC register with Philips to enjoy exclusive benefits and receive updates on prod...

Page 19: ... to enter each character of the web address Tip You can also use the Numeric buttons on the TV remote control to enter a web address Zoom page To zoom in and out on an Internet page do the following 1 Press OPTIONS then press Zoom page 2 Use the slider bar to set the enlargement 3 Use the Navigation buttons to jump between highlighted items and scroll through an Internet page Scroll pages Press P ...

Page 20: ...then press OK You can also press SMART TV on the remote control 2 Access the App Gallery to search for available video store apps in your country 3 Press the Navigation buttons to select a store then press OK to confirm The icon of the video store is added to the home page 4 To view a store select its icon and press OK Rent a video To rent a video open the video store app and locate the video Foll...

Page 21: ... the following digital channels with interactive services A wired or wireless home network connected with a Universal Plug and Play uPnP router For network connection see Connect your TV Network and the Internet Page 52 Access interactive TV Most channels that offer interactive services invite you to press the Red button or OK to open their interactive programme 1 Switch to a digital channel with ...

Page 22: ...ce Formatting removes all data from the connected USB hard drive The USB hard drive is formatted exclusively for this TV Keep it permanently connected to the TV You cannot access the USB hard drive contents from another TV or PC Do not overload the USB port If you connect a USB hard drive device that consumes more than 500mA power make sure that it is connected to its own external power supply 1 M...

Page 23: ...nto a USB hard drive You can either record current TV programmes or a future TV programme Start and manage the recordings from the electronic programme guide on the TV See Use your TV View programme guide From the Internet Page 15 Note Recording is only supported in countries with Internet programme guides and when your TV is connected to the Internet In Nordic countries the TV provides limited su...

Page 24: ...ive contents from another TV or PC Do not overload the USB port If you connect a USB hard drive device that consumes more than 500mA power make sure that it is connected to its own external power supply 1 Make sure that the TV and the USB hard drive are switched off 2 Make sure that there are no other USB devices connected to the TV 3 Connect the USB hard drive directly to the TV or if you intend ...

Page 25: ...then press OK The programme is scheduled for recording If you schedule overlapping recordings a warning is displayed If you schedule recordings while you are away make sure that you leave the TV in standby and keep the USB hard drive switched on Schedule a timed recording To schedule a timed recording that is not linked to any programme 1 Press then select Programme guide 2 Press OPTIONS select Ma...

Page 26: ...he recording then press OPTIONS 2 Select Delete recording then press OK Failed recordings If a scheduled recording is prevented by the broadcaster or if the recording does not occur as per schedule it is marked as Failed in the recordings list Play games Add a game console You can play games projected on your TV Before you start connect your game console to this TV Read Connect your TV Connect dev...

Page 27: ...t Text language For digital TV channels where the broadcasters provide different text languages you can select your preferred primary and secondary languages 1 Press 2 Select Setup Channel settings or Satellite settings 3 Select Languages Primary Text or Secondary Text 4 Select a language then press OK Subpages If the text page contains several subpages you can view each subpage in succession Thes...

Page 28: ...enu select Daylight saving Daylight saving time or Standard time then press OK Daylight saving time is enabled or disabled Set the clock manually You can set the date and time manually Before you start set the clock mode to Manual 1 In the Clock menu select Date or Time then press OK 2 Use the Navigation buttons to make your selection 3 Select Done then press OK Sleeptimer You can switch the TV to...

Page 29: ... correct source One touch standby When you press on the TV remote control the TV and all HDMI CEC compliant devices switch to standby mode EasyLink remote control You can control multiple HDMI CEC compliant devices with your TV remote control System audio control If you connect an HDMI CEC compliant device that includes speakers through the HDMI ARC connector you can choose to hear the TV audio fr...

Page 30: ...n button then press OK 4 Press to exit Select speaker output If a connected device is HDMI CEC compliant you can output TV audio through an HDMI cable Additional audio cables are not required Make sure that you connect the device to the HDMI connector on the TV See Connect your TV About cables HDMI Page 42 Configure TV speakers 1 Press 2 Select Setup TV settings EasyLink TV speakers 3 Select an op...

Page 31: ...eferences 3 Select Audio Out delay On then press OK Retain picture quality If your TV picture quality is affected by the picture processing features of other devices you can switch on Pixel Plus Link Switch on Pixel Plus Link 1 Press 2 Select Setup TV settings EasyLink 3 Select Pixel Plus link On then press OK Maximise video display Some subtitles create a separate subtitle bar under the video whi...

Page 32: ...r the duration of the sleeptimer For information about the sleeptimer see Use more of your TV Set locks and timers Sleeptimer Page 28 Load TV wallpaper You can also load your own picture from a connected USB storage device or a connected PC as the wallpaper Note When you load a new picture it overrides the existing picture 1 Connect the USB storage device to the TV or connect to the network 2 Pres...

Page 33: ... surrounding pixels This setting produces a brilliant high definition image HD Natural Motion Reduce motion judder and reproduce smooth motion Clear LCD Enable superior motion sharpness better black level high contrast with a flicker free quiet image and a larger viewing angle Super resolution Enable superior sharpness especially on lines and contours in the picture Dynamic contrast Set the level ...

Page 34: ...io Reset picture and sound You can restore the default picture and sound settings while the channel installation settings remain the same 1 While you watch TV press 2 Select Setup TV settings Factory settings then press OK All TV settings except for channel settings are reset to the default factory settings Channel settings Automatic install When the TV was switched on for the first time a full in...

Page 35: ...e new TV channel Note If the reception is poor reposition your antenna and repeat the procedure Install digital channels NonPublish If you know the channel frequency of the channels you want to install you can search and store digital channels one by one For best results contact the broadcaster or a professional installer 1 Press 2 Select Setup Channel settings Channel installation 3 Select Digita...

Page 36: ...nstall them again on the second TV The channel list file is small enough to fit on any USB storage device What you need Two Philips TVs that have these properties The same country setting The same year range The same DVB type as indicated by the suffix H K T or D 00 in the model name The same settings for satellite channels including the number of LNB satellites The same hardware type as indicated...

Page 37: ...e Satellite settings What you can do View satellite channels Note Available on certain models only Search for satellite is only available if the TV supports DVB S To receive satellite channels connect the SAT connector on your TV to a satellite dish antenna LNBs This TV can receive signals from 4 different low noise block down converters LNBs An LNB is mounted at the end pole of the dish antenna a...

Page 38: ...nd the position of the dish antenna 3 If no satellite is found select Search to scan again or Next LNB to skip to the next LNB If there are no free LNBs available remove a satellite first If you are satisfied with the added satellite install the channels 4 To install all channels select Install The installation can take several minutes Remove a satellite 1 Press Setup Search for satellite 2 Select...

Page 39: ...aired You can switch these features on or off 1 Press 2 Select Setup TV settings Preferences 3 Select Universal access On or Off then press OK Hearing impaired access Tip To make sure that a hearing impaired audio language is available press OPTIONS then select Audio language Languages with an ear icon support hearing impaired audio To switch on hearing impaired audio and subtitles 1 While you wat...

Page 40: ...ed audio Off Disable audio effects in the visually impaired audio Choose type of speech 1 Press 2 Select Setup Channel settings Languages Visually impaired Speech 3 Select a setting then press OK Descriptive Hear descriptive speech in the visually impaired audio Subtitles Hear subtitles in the visually impaired audio Other settings TV demo You can start a demo to find out more about the features o...

Page 41: ...he onscreen instructions to start the update Note The update assistant directs you to the Philips support website See the installation instructions on the website to complete the update Update from digital broadcast When available the TV can receive software updates through digital broadcasts When a software update is received you are prompted to update the software We strongly recommend that you ...

Page 42: ... a composite CVBS cable to connect the device to the Y Pb Pr connector on the TV HDMI An HDMI connection has the best picture and sound quality An HDMI cable combines video and audio signals Connect HDMI for high definition HD TV signals and to switch on EasyLink An HDMI Audio Return Channel ARC connector allows output of TV audio to an HDMI ARC compliant device Connect HDMI cables shorter than 5 ...

Page 43: ... can handle RGB video signals but cannot handle high definition HD TV signals VGA You can connect VGA to display PC content on the TV VGA only transmits video For sound also connect to AUDIO IN Connect devices Blu ray or DVD disc player Connect the disc player to the TV with an HDMI cable ...

Page 44: ...ponent video cable Y Pb Pr and an audio L R cable TV receiver Connect the satellite or digital TV receiver to the TV with an antenna cable SAT is available on certain models only Connect the satellite or digital TV receiver to the TV with an HDMI cable ...

Page 45: ...iver to the TV with a SCART cable Connect the satellite or digital TV receiver to the TV with a component video cable Y Pb Pr and an audio L R cable Video recorder Connect the recorder to the TV with an antenna cable SAT is available on certain models only ...

Page 46: ...Connect the recorder to the TV with a SCART cable Connect the recorder to the TV with a component video cable Y Pb Pr and an audio L R cable Game console Connect the game console to the TV with an HDMI cable ...

Page 47: ...e game console to the TV with a component video cable Y Pb Pr and an audio L R cable Home theatre Connect the home theatre to the TV with an HDMI cable and an optical cable Connect the home theatre to the TV with a SCART cable ...

Page 48: ... theatre to the TV with a component video cable Y Pb Pr and an audio L R cable Digital camera Connect the digital camera to the TV with a USB cable Digital camcorder Connect the digital camcorder to the TV with an HDMI cable ...

Page 49: ...tal camcorder to the TV with a component video cable Y Pb Pr and an audio L R cable Connect more devices USB hard drive Connect the USB hard drive to the TV with a USB cable Computer Connect the computer to the TV with an HDMI cable ...

Page 50: ...rd to enter text such as device names on the TV or text for Smart TV apps USB mouse You can connect a USB mouse to navigate pages on the Internet and click on links easily Note If you need extra USB connectors use a USB hub You can also connect the USB mouse to a connected USB keyboard You can also connect the USB mouse to a connected USB keyboard Connect the keyboard and mouse to the TV with a US...

Page 51: ...button left click OK Right mouse button right click Back Scroll wheel to scroll up and down an Internet page Note The USB mouse cannot navigate in Smart TV apps or the TV menus Watch a connected device Add new device You can watch a connected device in one of the following ways Add its icon to the Home menu for easy access Select from the Source menu Note If you connect an HDMI CEC compliant devic...

Page 52: ...ee Use your TV Browse Smart TV Page 18 Interactive TV If you connect the TV to the Internet you can enjoy the full benefits of Interactive TV Systems such as HbbTV MHP and DTVi use the Internet to communicate with the TV The availability of these systems depends on your local broadcaster What you need Warning This TV complies with the EMC directive only when you use a shielded Cat5 Ethernet cable ...

Page 53: ...ording to the operating environment of your wireless home network Start wireless setup 1 Switch on your wireless network router 2 Connect the Philips USB adapter PTA01 to a USB connector on the TV The wireless installation starts automatically 3 Follow the onscreen instructions Tip Keep the wireless USB adapter connected to the TV WPS Wi Fi Protected Setup 1 If your router supports WPS WiFi Protec...

Page 54: ...ive it a unique name 1 Press Setup Network settings and select TV network name 2 To enter the name press OK to open the onscreen keyboard or use the remote control keypad Common interface What you can do You can watch scrambled digital TV channels with a Conditional Access Module CAM After the CAM is inserted and subscription fees are paid you can watch the programme This TV supports CI as well as...

Page 55: ...lips Consumer Care You forgot the 4 digit code to unlock the channel blocking feature child lock Enter 8888 The TV or Smart TV menu is in the wrong language Change the menu to your preferred language See Set up your TV Language settings Menu language Page 38 You want to upgrade your TV software Visit www philips com support and download the latest software package for your TV Software installation...

Page 56: ... Make sure that the picture settings are set correctly The TV did not save your picture settings Make sure that the TV location is set to Home You can change and save settings in this mode The picture does not fit the screen it is too big or too small Try a different picture format The picture format keeps changing with different channels Try applying specific picture format instead of Auto zoom T...

Page 57: ...tion support can delay the time taken for a TV to display content from an HDMI device If the TV does not recognise the HDMI device and no picture is displayed switch the source from one device to another and back again If there are intermittent sound disruptions make sure that output settings from the HDMI device are correct If you use an HDMI to DVI adapter or HDMI to DVI cable make sure that an ...

Page 58: ...less connection see the router s documentation to improve the signal quality between the router and TV Wireless network is distorted or not found Make sure that the wireless network is not disturbed by microwave ovens DECT phones or other neighbouring Wi Fi devices If the wireless network is not working try a wired network connection Make sure that the firewalls in your network allow access to the...

Page 59: ...e on certain models only Display and sound Picture Display Display type LED backlight HD Diagonal size 81 cm 26 inch Aspect ratio 16 9 widescreen Panel resolution 1366 X 768 p Picture enhancement Pixel Plus HD Perfect Motion Rate PMR 200 Hz HD Natural Motion Sound Output power RMS 10 THD For PFL4007 10 W Incredible Surround Clear Sound Dynamic Bass Enhancement Mono Stereo NICAM Display resolutions...

Page 60: ...EN 60 Supported audio video files Multimedia file names must not exceed 128 characters Supported audio video files Multimedia file names must not exceed 128 characters ...

Page 61: ...Windows Sony Vaio Media Server for Microsoft Windows TVersity for Microsoft Windows Nero MediaHome DiXiM for Microsoft Windows XP Macrovision Network Media Server for Microsoft Windows Fuppes for Linux uShare for Linux AwoX CyberLink JVC media server MediaTomb Buffalo LinkStation Live Connectivity Rear Ethernet LAN RJ 45 VGA PC input AUDIO IN DVI VGA stereo 3 5 mm mini jack Y Pb Pr and L R Compone...

Page 62: ...inches 100 mm x 100 mm M4 Warning Follow all instructions provided with the TV mount TP Vision Netherlands B V bears no responsibility for improper TV mounting that results in accident injury or damage To prevent damage to cables and connectors leave a gap of at least 5 5 cm 2 2 inches from the back of the TV Before you mount the TV on the wall find the correct length of the screw To find the leng...

Page 63: ...ock 28 common interface 54 computer play files 16 Conditional Access Module 54 connect devices 42 connect digital camcorder 48 connect digital camera 48 connect disc player 43 connect external hard disk 49 connect game console 46 connect home network 52 connect home theatre system 47 connect keyboard 50 connect mouse 50 connect PC 49 connect recorder 45 connect TV receiver 44 connect USB 17 connec...

Page 64: ...elp version 62 high definition HD content 3 home mode 40 home network 52 home theatre system connect 47 I install channels automatic 34 Interactive TV 21 K kensington lock 7 L language menu 38 language subtitles 39 location home or shop 40 M media server program 16 mode home or shop 40 Multimedia Home Platform MHP 21 multimedia play files 16 multimedia supported formats 59 N network connect 52 net...

Page 65: ... shop mode 40 sleeptimer 28 smart settings 14 Smart TV 3 Smart TV applications 19 Smart TV browse 18 Smart TV network 52 smartphone control 5 software check version 41 software digital update 41 software Internet 41 software USB 41 sound settings reset 34 standby 12 subtitles analog 39 subtitles digital 39 subtitles language 39 sustainability 10 switch TV on off 12 T teletext search 27 text 2 5 28...

Page 66: ...EN 66 W wall mount 61 wallpaper 32 wireless dongle 53 Y YouTube 19 YPbPr component video 42 ...

Page 67: ... 2012 TP Vision Netherlands B V All rights reserved Document order number 313913705631 ...

Reviews: