background image

EN-24

9  Trouble shooting

This section describes commonly-encountered 

issues and accompanying solutions.

Communication issues

9�1 

The TV does not communicate with 

external interactive terminal:

Check that the card slot is enabled. See 

• 

Section 4.6.2 Access CAM services

 for details.

Picture issues

9�2 

No picture

Check that the 

• 

Blank current channel 

feature is not switched on. See 

Section 7.16 

Select blank current channel

 for details.

Other issues 

9�3 

The character 'F' appears on the TV 

screen�

This means that the TV is currently in factory 

mode.

Press and hold the 

• 

MENU button at the 

side of the TV for a few seconds. This will 

reset the TV to normal operation.

No respond from TV when using guest 

mode remote control�

This means that high security mode has been 

set to On.

Select 

• 

Setup menu Remote control

Set High security mode to Off.

BDS mode not working�

Check that the mode is not switched on. 

• 

Switch the TV off and on to reset.

Remote control does not work

Check that the batteries are not faulty.

• 

Check that the remote control is not 

• 

locked.  See 

Section 7.4 Select remote control 

setting

 for details.

Summary of Contents for 22HFL3350D

Page 1: ...Philips Professional and Business Solution EN SETUP MANUAL 22HFL3350D 26HFL3350D 32HFL3350D ...

Page 2: ......

Page 3: ...1 Access setup menu 16 7 2 Switch on BDS mode 17 7 3 Lock local keyboard 17 7 4 Select remote control setting 17 7 5 Select OSD display 18 7 6 Set switch on volume 19 7 7 Set maximum volume 19 7 8 Select switch on channel 19 7 9 Set power on status 19 7 10 Set low power standby 20 7 11 Select clock settings 20 7 12 Set auto scart 21 7 13 Set USB break in 21 7 14 Select monitor out 21 7 15 Select b...

Page 4: ...stribution a complete machine readable copy of the corresponding source code on a medium customarily used for software interchange To obtain the source code write to Philips Singapore Pte Ltd Philips GBU Hospitality Software Development Manager 620A Lorong 1 Toa Payoh Singapore 319762 This offer is valid for a period of 3 years after the date of purchase of this product Pixel characteristics This ...

Page 5: ...er to maintain conformity to the EMC directive the mains plug on this product must not be detached from the mains cord Copyright VESA FDMI and the VESA Mounting Compliant logo are trademarks of the Video Electronics Standards Association Windows Media is either a registered trademark or trademark of Microsoft Corporation in the United States and or other countries Kensington and Micro Saver are re...

Page 6: ...unt the TV use only the supplied stand Secure the stand to the TV tightly Place the TV on a flat level surface that can support the weight of the TV and stand The TV must be mounted on the wall bracket designed for this TV and on a wall that can safely hold the weight of the TV Koninklijke Philips Electronics N V bears no responsibility for improper wall mounting that results in accident or injury...

Page 7: ...chemicals or household cleaners on the TV Risk of damage to the TV screen Never touch push rub or strike the screen with any object To avoid deformations and colour fading wipe off water drops as soon as possible 1 3 Recycling This product is designed and manufactured with high quality materials and components which can be recycled and reused This product is designed and manufactured for material ...

Page 8: ...t connector for composite devices 12 S VIDEO S Video input connector for S Video devices YourTV 2 2 1 Connection overview 9 6 10 11 12 13 14 15 7 8 1 2 5 3 4 1 EXT 1 First SCART connector for DVD players VCRs digital receivers game consoles and other SCART devices Supports Audio L R CVBS in out RGB 2 EXT 2 Second SCART connector Supports Audio L R CVBS in out 3 EXT 3 Component video Y Pb Pr and Au...

Page 9: ...OLUME 4 5 Power indicator remote control sensor 6 Clock 13 USB USB connector for storage devices 14 HDMI Additional HDMI connector for mobile high definition devices 15 COMMOM INTERFACE Slot for Conditional Access Modules Note D D Refer to the user manuals for the respective devices for details of connection ...

Page 10: ...ntrol For setup and configuration purposes Setup remote control This remote control may be purchased separately for Institutional TV Professional and Business Solutions features and SmartCard settings POWER SLEEP GUIDE CLOCK A V SMART GUEST DCM SETUP TEXT RECALL H C L O V CC RESET CH E F G 8 0 1 4 5 6 7 9 2 3 M A CH _ _ D B C A _ ...

Page 11: ... mount theTV 4 2 WARNING B B Wall mounting of the TV should only be performed by qualified installers Koninklijke Philips Electronics N V bears no responsibility for improper mounting that results in accident or injury Step 1 Purchase a VESA compatible wall bracket Depending on the size of your TV screen purchase one of the following wall brackets TV screen size inches cm VESA compatible wall brac...

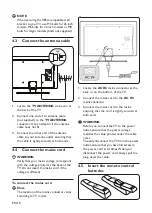
Page 12: ...esponds with the voltage printed at the back of the TV Do not insert the mains cord if the voltage is different To connect the mains cord Note D D The location of the mains connector varies according to TV model Locate the 1 AC IN mains connector at the back or on the bottom of the TV Connect the mains cord to the 2 AC IN mains connector Connect the mains cord to the mains 3 ensuring that the cord...

Page 13: ...d services you choose for example pay TV Contact your digital TV service operator for more information about services and terms Using the 4 6 1 Conditional Access Module WARNING B B Switch off your TV before inserting a CAM Be sure to follow the instructions described below Wrong insertion of a CAM may damage both the CAM and your TV Following the directions printed on the 1 CAM gently insert the ...

Page 14: ...EN 12 OSD display Enable CI slot OSD display Display message Welcome message line 1 Welcome message line 2 Welcome message ti Enable CI slot Enable teletext Enable MHEG On Off Press 4 MENU or M to exit ...

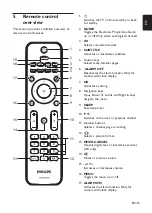
Page 15: ...lects tasks teletext pages 6 ALARM OFF Deactivates the alarm function Only for models with clock display OK 7 Activates a setting Navigation keys 8 Up Î Down ï Left Í and Right Æ keys navigate the menu SLEEP 9 Sets sleep timer P 10 Switches to the next or previous channel Number buttons 11 Selects a channel page or setting 12 Selects a picture format 13 MHEG CANCEL Cancels digital text or interact...

Page 16: ...EN 14 TELETEXT 18 Toggles teletext on or off 19 Spilts the current channel or source on the left of the screen Teletext appears on the right ...

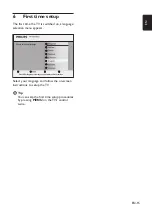
Page 17: ...ion menu appears Please select your language Press OK or the green colour key on your remote control to continue Select your language and follow the on screen instructions to setup the TV Tip E E You can skip the first time setup procedures by pressing MENU on the TV s control twice ...

Page 18: ...st mode remote control to Switch on the TV and select a TV channel 1 Press 2 3 1 9 7 5 3 and on the remote control within 20 seconds to display the Setup menu Setup menu BDS mode On Off BDS mode Local keyboard locked Remote control OSD display Switch on volume 50 Maximum volume 100 Switch on channel Power on Select 3 Setup menu Remote control High security mode On Allows access to the BDS Hotel Mo...

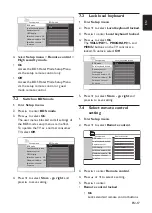
Page 19: ...lect Store go right and press Æ to save setting Lock local keyboard 7 3 Enter 1 Setup menu Press 2 ï to select Local keyboard locked Press 3 Æ to enter Local keyboard locked Press 4 Î to select On The VOLUME PROGRAM and MENU buttons on the TV control are locked To unlock select Off Setup menu Local keyboard locked On Off BDS mode Local keyboard locked Remote control OSD display Switch on volume 50...

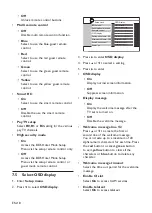
Page 20: ...ssage Welcome message line 1 Welcome message line 2 Welcome message ti Enable CI slot Enable teletext Enable MHEG BDS mode Local keyboard locked Remote control OSD display Switch on volume 50 Maximum volume 100 Switch on channel Power on Press 3 Æ to enter OSD display Press 4 Î or ï to select a setting Press 5 Æ to enter OSD display On Display normal screen information Off Suppress screen informat...

Page 21: ...p menu Maximum volume BDS mode Local keyboard locked Remote control OSD display Switch on volume 50 Maximum volume Switch on channel Power on 100 Press 4 Î or ï to select the desired volume level Press 5 ï to select Store go right and press Æ to save setting 7 8 Select switch on channel When the user switches the TV on it will tune to the specified channel Enter 1 Setup menu Press 2 ï to select Sw...

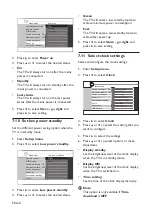
Page 22: ...nter Low power standby Press 4 Î or ï to select the desired status Green The TV will enter a low standby mode to achieve minimum power consumption Fast The TV will enter a semi standby mode to achieve fast power up Press 5 ï to select Store go right and press Æ to save setting Select clock 7 11 settings Select and configure the clock settings Enter 1 Setup menu Press 2 ï to select Clock Setup menu...

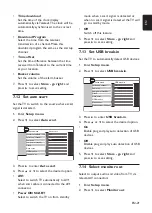
Page 23: ... Î or ï to select the desired option AV1 Select to switch TV automatically to AV1 when scart cable is connected to the AV1 connector Power ON SCART Select to switch the TV on from standby mode when a scart signal is detected or when no scart signal is detected the TV will go to standby mode Off Switch off this feature Press 5 ï to select Store go right and press Æ to save setting Set USB break in ...

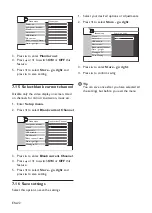
Page 24: ...ow power standby Clock Auto scart USB break in Monitor out Blank current Channel Store go right Cloning to TV On Off Press 3 Æ to enter Blank current Channel Press 4 Î or ï to switch ON or OFF this feature Press 5 ï to select Store go right and press Æ to save setting Save settings 7 16 Select this option to save the settings Select your desired options or adjustments 1 Press 2 ï to select Store g...

Page 25: ...s of copying do not remove the USB stick All remote control command and control buttons on the TV are disabled Switch off and then on to reset the TV 6 after cloning FromTV to Cloning 8 2 Copy TV configuration data from TV to USB stick Enter 1 Setup menu Press 2 ï to select TV to Cloning Press 3 Æ to enter TV to Cloning Press 4 Æ to load data to the USB stick Setup menu TV to Cloning Clock Auto sc...

Page 26: ...3 The character F appears on the TV screen This means that the TV is currently in factory mode Press and hold the MENU button at the side of the TV for a few seconds This will reset the TV to normal operation No respond from TV when using guest mode remote control This means that high security mode has been set to On Select Setup menu Remote control Set High security mode to Off BDS mode not worki...

Page 27: ... O OSD display 18 P Pay TV Index 10 A AUDIO IN 6 L R 6 Auto scart 21 B BDS mode setup 16 C Channel install manually 19 switch on 19 Clock 7 display on 20 display standby 20 settings 20 time download 21 time offset 21 time setting 20 Clone configuration from Cloning to TV 23 From Cloning to TV 23 Common Interface 7 Conditional Access Module 11 Connect 10 antenna cable 10 ...

Page 28: ...ible wall bracket 9 VIDEO 6 Volume buzzer 21 maximum 19 switch on 19 W Warranty 2 setup 18 Power indicator 7 low standby 20 on status 19 R Recycling 5 Remote control 8 basic use 8 batteries 10 locked 17 multi 18 overview 13 sensor 7 setting 17 smart 18 S Safety 4 SCART 6 Screen care 5 SERV U 6 Setup menu 16 with guest mode remote control 16 with setup remote control 16 Side Controls 7 ...

Page 29: ......

Page 30: ... 2008 Koninklijke Philips Electronics N V All rights reserved ...

Reviews: