4
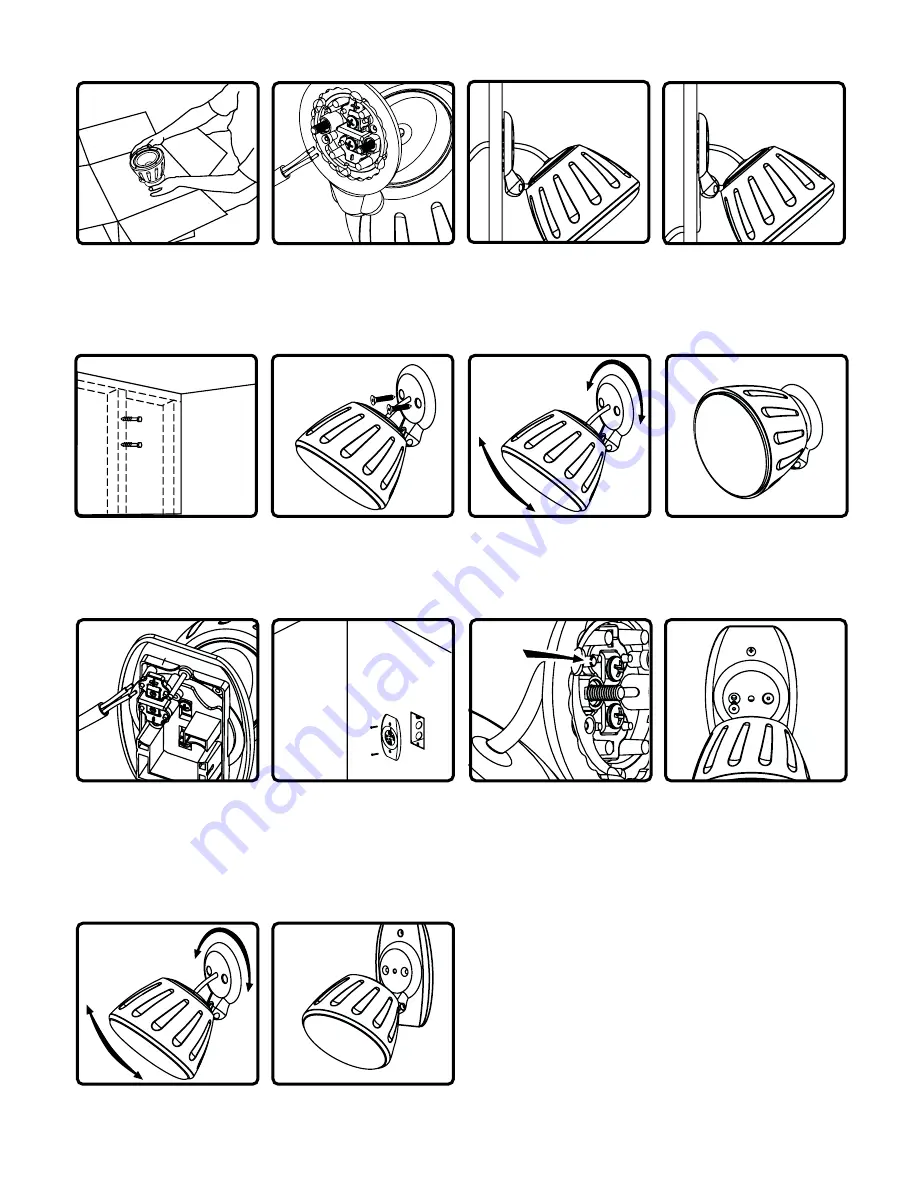
1. Unpack speaker.
4. Choose a secure mounting surface
with sufficient strength to reliably
hold the speaker.
5. Attach speaker to surface using
installer-supplied fasteners.
6. Aim speaker by pointing it up or
down and/or rotating it.
7. DONE!
3a. If mounting the speaker directly
over the wire, ensure the base plate
covers the hole in wall.
3b. If mounting speaker offset from
wiring point, run wire out hole in wall
and behind base plate through 2 mm
standoff gap between base plate and
wall. The standoff gap accepts up to
18 gauge flat signal wire.
2. Connect speaker wire leads to the
terminal screws on the back of the
base plate. Polarity is indicated.
[INSTALLING YOUR SPF-15]
1. Attach signal wire to terminal strip.
For daising chaining, attach additional
wires to positive and negative inputs.
3. The base is keyed to ensure proper
polarity. Be sure smaller post on rear
of SPF-15 connects to polarity key on
wall plate. Both are marked for easy
identification.
4. Attach speaker to mounting plate
with supplied fasteners. No wiring is
necessary because signal wire con-
tact made when speaker is screwed
in place.
2. Install the AC-SPF15-MP into the
installer-supplied junction box using
included fasteners.
Note: The AC-SPF15-MP will only fit
into a single-gang new construction
junction box (will not fit in retrofit
style junction box).
1. To aim the speaker, rotate it using
the ball and base plate to point in any
direction.
2. DONE!
[INSTALLING YOUR SPF-15 USING AC-SPF15-MP]


