


8
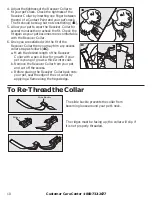
Customer Care Center 1-800-732-2677
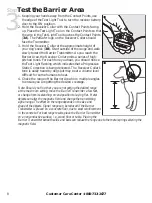
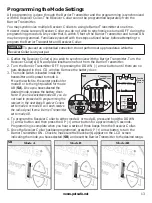
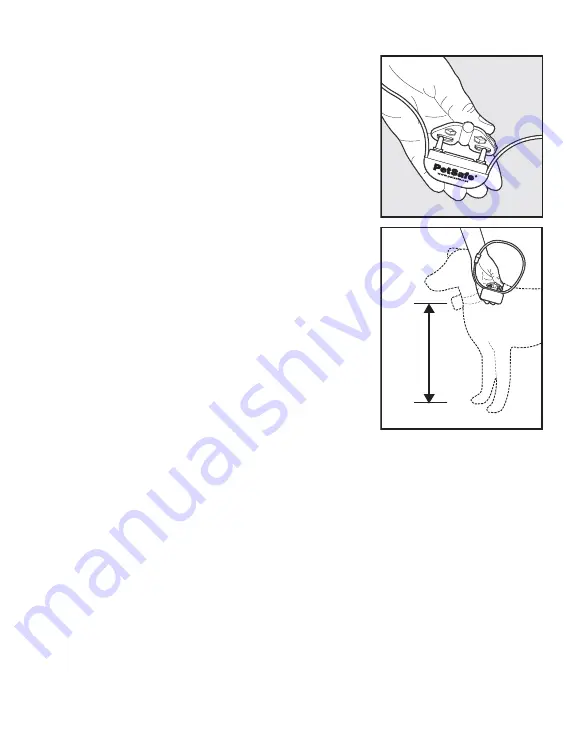
Test the Barrier Area
Keeping your hands away from the Contact Points, use
1.
the edge of the Test Light Tool to turn the receiver battery
door to the ON position.
Hold the Receiver Collar with the Contact Points facing
2.
up. Place the Test Light Tool on the Contact Points so that
the wire in the Test Light Tool touches the Contact Points
(3A). The PetSafe
®
logo on the Receiver Collar should
face the Transmitter.
Hold the Receiver Collar at the approximate height of
3.
your dog’s neck (3B). Start outside of the range and walk
slowly toward the Barrier Transmitter. As you reach the
Barrier Area, the Receiver Collar emits a series of high-
pitched tones. For each tone you hear, you should notice
the Test Light fl ashing which indicates that a Progressive
Static Correction is being delivered. The Receiver Collar’s
tone is easily heard by dogs but may be at a volume level
diffi cult for some humans to hear.
Check the range of the Barrier Area from multiple angles
4.
to ensure you are getting the desired coverage.
Note: Should you fi nd that you are not getting the desired range
at the maximum setting, move the Barrier Transmitter a few feet,
or change from its standing-on-end position to laying fl at. Metal
objects can alter the magnetic fi eld and change the transmitting
signal range. The effect on the range depends on the size and
shape of the objects. Signal range can be reduced if the Barrier
Transmitter is placed on a concrete fl oor, due to steel reinforcement
in the concrete. For best range results, place the Barrier Transmitter
on a nonconductive surface, i.e., wood fl oor or table. Placing the
3A
3B
Barrier Transmitter beneath sofas and beds can reduce the range due to the metal springs altering the
magnetic fi eld.
Step
3
Summary of Contents for Pawz Away ZND-1200
Page 18: ...18 Customer Care Center 1 800 732 2677 ...
Page 19: ...www petsafe net 19 ...


