background image

10 

Customer Care Center 1-800-732-2677

Installation in Glass Doors and Windows

The Big Cat Door is also designed for installation in glass windows and doors. Cutting glass is a skilled job and 
should be done by a professional glazier or glass manufacturer. To install the pet door in glass, mark your pet’s 
shoulder height and location for the pet door using instructions listed in 

Step 1

 under 

Non-Glass Doors

Your glazier will need to cut a circular hole with a diameter of 10 ³/₈ “ (263mm) with the center of the circle 
1¹³⁄₁₆” (46mm) below the shoulder height mark. After the cut-out is made, then the pet door can be installed 
using the installation instructions under 

Non-Glass Doors

 starting with 

Step 5B

.

Sliding Glass Door or  
Window Installation:


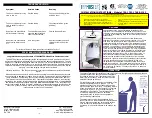
If installing the pet door in a sliding glass 
door or window, the pet door should be 
installed on the inner panel with the 
interior frame on the inside of the house so 
the 4-way lock does not prevent your door 
or window from working properly.  

(See Figure 1)


Installation in Walls

Follow the instructions for 

Non-Glass Doors

 using the enclosed cutting template. Additional skills, tools and 

materials (such as wood framing and hardware) will be required.

4-Way Locking System

The 4-way lock is fitted on the inside of your door and allows you to control your pet’s access in and out of 
your home. Do not use the 4-way lock until your pet is familiar with using the pet door.

Knobs

Locks

In-Only:

 The in-only access option allows your 

pet to enter the pet door but does not allow your 
pet to exit. This access option is useful at nighttime 
or if you need to take your pet to the vet. To set the 
pet door to in-only access, turn the right and left 
knobs to the upright position with the locks inside 
the flap opening.

Out-Only: 

The out-only access option allows your 

pet to exit the pet door but does not allow your pet 
to enter. To set the pet door to out-only access, turn 
the  right and left knobs until positioned over the 
interior side of the flap with the locks positioned 
away from the flap opening.

NOTICE

It is not possible to cut holes in tempered or double pane glass except at the time of manufacture. 

Consult a professional glazier or glass manufacturer to install the pet door in a glass door or window.

Outer Panel

Inner Panel

Pet Door

(exterior frame)

Pet Door

(interior frame with 4-way lock)

Outside of house

Insidee of house

Figure 1

Summary of Contents for HPA11-10888

Page 1: ...mero de modelo HPA11 10888 installation guide guide d installation guía de instalación Please read entire guide before beginning Veuillez lire l intégralité de ce manuel avant de commencer Lea todo este manual antes de comenzar a usar el producto ...

Page 2: ...ts full responsibility for oversight of the opening it creates Power Tools Risk of severe injury follow all safety instructions for power tools Be sure to always wear proper safety equipment The user prior to installation must become familiar with all building codes that may affect the installation of the pet door and determine along with a licensed contractor its suitability in a given installati...

Page 3: ...out of your warranty please register your product within 30 days at www petsafe net By registering and keeping your receipt you will enjoy the product s full warranty and should you ever need to call the Customer Care Center we will be able to help you faster Most importantly PetSafe will never give or sell your valuable information to anyone Complete warranty information is available online at ww...

Page 4: ...e Customer Care Center at 1 877 866 DOGS 3647 or visit the website at www invisiblefence com for more information Tools Needed BIG Cat Door Cutting Template NOTICE When applying cutting template there should be a minimum of 3 between the bottom and sides of the door and the outer edge of the cutting template to maintain the structural integrity of the door NOTICE It is not possible to cut holes in...

Page 5: ...ole from the interior frame to the exterior frame Tunnel Support U shaped piece that holds the plastic core covers to create a tunnel between the interior and exterior frames Installation in Non Glass Doors Determine Pet Door Location 1A Measure and mark your pet s shoulder height on the interior side of door 1B Determine location for the pet door Draw a vertical center line through the shoulder h...

Page 6: ...correctly Helpful Tip Apply masking or painter s tape on bottom of jigsaw and outer edges of drawn template to protect door finish Use a file to remove burrs after drilling and cutting to make cutting and installation easier Helpful Tip Use proper saw blade length and type according to door thickness and material for example a wood blade for a wood door and a metal blade for a metal door Cut slowl...

Page 7: ... 1 13mm 44 mm If cut out thickness T does not line up with a groove on the plastic core cover then cut to next groove that is smaller than the cut out thickness T See illustration 4B Use tunnel support Cut and go to Step 4C 1 2 44 mm 51 mm No cutting of plastic core covers is needed Use tunnel support Go to Step 4C Chart 1 4C Insert the long plastic core cover into channel of U shaped section of t...

Page 8: ... if it needs to be trimmed for your installation To trim screw insert binder post onto end of screw to protect thread Using the binder post as a guide cut screw to correct length with a hacksaw After cutting to length remove the binder post to clean screw threads Repeat process with remaining screws Screw Selection Guide Screw Length Cut Out Thickness T Trimming Instructions screw 15mm 3 16 5mm 14...

Page 9: ... your door and begin training your pet It may help for you to be on one side of the door and your pet on the other Lift or tape open flap and try to talk your pet through the pet door After your pet has gone through a few times allow the flap to touch your pet s back so they will become comfortable using the pet door If your pet will not go through the door tape the flap open until they use it on ...

Page 10: ...ng template Additional skills tools and materials such as wood framing and hardware will be required 4 Way Locking System The 4 way lock is fitted on the inside of your door and allows you to control your pet s access in and out of your home Do not use the 4 way lock until your pet is familiar with using the pet door Knobs Locks In Only The in only access option allows your pet to enter the pet do...

Page 11: ...ns of the terms conditions and notices contained herein Use of this product implies acceptance of all such terms conditions and notices 2 Proper Use This product is designed for use with pets where training is desired The specific temperament of your pet may not work with this product If you are unsure whether this is appropriate for your pet please consult your veterinarian or certified trainer P...

Page 12: ...si Outils électriques Risque de blessure grave conformez vous à toutes les instructions de sécurité relatives aux outils électriques Veillez à porter en tout temps un équipement de sécurité adéquat L utilisateur avant l installation doit se familiariser avec les codes de construction pouvant affecter l installation de la chatière et déterminer en conjonction un entrepreneur autorisé la pertinence ...

Page 13: ...ection maximale de votre garantie veuillez enregistrer votre produit moins de 30 jours suivant l achat sur www petsafe net En enregistrant votre produit et en conservant votre reçu vous bénéficierez d une réponse plus rapide du service à la clientèle en cas de besoin Plus important encore PetSafe ne donnera ou ne vendra jamais vos informations confidentielles à qui que ce soit L information complè...

Page 14: ...et au www invisiblefence com pour plus de détails Tools Needed BIG Cat Door Cutting Template NOTICE When applying cutting template there should be a minimum of 3 between the bottom and sides of the door and the outer edge of the cutting template to maintain the structural integrity of the door NOTICE It is not possible to cut holes in tempered or double pane glass except at the time of manufacture...

Page 15: ...ur jusqu au cadre extérieur Support de tunnel pièce en forme de U qui retient l enveloppe de plastique afin de créer un tunnel entre les cadres intérieur et extérieur Installation dans une porte non vitrée Déterminez le lieu d installation de la chatière 1A Mesurez la hauteur de l épaule de votre animal et faites une marque correspondante sur le côté intérieur de la porte 1B Déterminez l endroit d...

Page 16: ...re s ajuste correctement Astuce utile appliquez un ruban à masquer sur la partie inférieure de la scie sauteuse et les bords extérieurs du gabarit afin de protéger le fini de votre porte Utilisez une lime pour éliminer les ébarbures après avoir percé et découpé ainsi vous faciliterez l installation ultérieure Astuce utile utilisez une lame de scie de longueur et de type convenant à l épaisseur et ...

Page 17: ...eur de coupe T ne s aligne pas avec une rainure de l enveloppe en plastique coupez à la prochaine rainure plus petite que l épaisseur de coupe T Consultez l illustration 4B Utilisez le support de tunnel Coupez et passez à l étape 4C 44 mm 51 mm Aucune coupe de l enveloppe en plastique n est requise Utilisez le support de tunnel Passez à l étape 4C Tableau 1 4C Insérez l enveloppe longue en plastiq...

Page 18: ...ne vis insérez la douille dans l extrémité de la vis afin de protéger le filetage En utilisant la douille comme guide coupez la vis à la bonne longueur à l aide d une scie à métaux Après avoir coupé à la bonne longueur retirez la douille pour nettoyer le filetage des vis Répétez le processus pour les vis restantes Guide de sélection des vis Longueur de la vis Épaisseur de la découpe T Instructions...

Page 19: ...mencez l entraînement de votre animal Vous pourriez être d un côté de la porte tandis que votre animal est de l autre Soulevez ou maintenez le rabat à l aide de ruban adhésif et tentez de parler à votre animal à travers la chatière Une fois que votre animal aura franchi la porte quelquefois laissez le battant retomber doucement sur son dos afin qu il se familiarise avec la sensation Si votre anima...

Page 20: ... n empêche pas votre porte ou votre fenêtre coulissante de fonctionner correctement Consultez la Figure 1 Installation dans un mur Suivez les instructions relatives à l installation dans une Portes non vitrées en utilisant le gabarit de coupe inclus Des compétences outils et matériaux supplémentaires par exemple la charpente en bois et la quincaillerie pourraient être nécessaires Système de verrou...

Page 21: ...d utilisation Ce produit vous est confié à la condition que vous acceptiez sans modification les modalités et les avis contenus aux présentes L utilisation de ce produit est également soumise à l acceptation de ces modalités et avis 2 Utilisation adéquate Le tempérament particulier de votre animal peut ne pas convenir à ce produit Si vous n êtes pas convaincu que cela convienne à votre animal veui...

Page 22: ...vés de la puerta para mascotas Radio Systems Corporation le recomienda que evite el acceso a dicho peligro o quite la puerta para mascotas El panel de cierre o bloqueo si corresponde se incluye con fines estéticos y de ahorro de energía y no como un dispositivo de seguridad Radio Systems Corporation no se responsabilizará por el uso inadecuado de este producto el comprador asume total responsabili...

Page 23: ...n repleta de momentos memorables y de comprensión mutua Nuestros productos y dispositivos de adiestramiento fomentan la protección la enseñanza y el cariño elementos esenciales de una relación que le dejará inolvidables recuerdos Si tiene alguna pregunta sobre nuestros productos o sobre el adiestramiento de su mascota visite nuestro sitio web www petsafe net o comuníquese con nuestro Centro de Ate...

Page 24: ... Tools Needed BIG Cat Door Cutting Template NOTICE When applying cutting template there should be a minimum of 3 between the bottom and sides of the door and the outer edge of the cutting template to maintain the structural integrity of the door NOTICE It is not possible to cut holes in tempered or double pane glass except at the time of manufacture Consult a professional glazier or glass manufact...

Page 25: ...r al marco exterior Soporte del túnel Pieza en forma de U que sostiene las tapas plásticas centrales a fin de crear un túnel entre el marco interior y exterior Instalación en puertas que no son de vidrio Determine la ubicación de la puerta para mascotas 1A Mida la altura del hombro de su mascota y márquela en el lado interno de la puerta 1B Determine la ubicación de la puerta para mascotas Utilice...

Page 26: ... mascotas encaje correctamente Consejo útil Coloque cinta de enmascarar o de pintor en la parte inferior de la sierra de vaivén y en los bordes externos de la plantilla dibujada para proteger la puerta Utilice una lima para eliminar las rebabas después de realizar los agujeros y los cortes para facilitar el corte y la instalación Consejo útil Utilice una hoja de sierra de la longitud y el tipo ade...

Page 27: ...no coincide con una de las ranuras de la tapa plástica central corte la tapa en la siguiente ranura que sea más pequeña que el espesor de la abertura T Ver ilustración 4B Utilice el soporte del túnel Corte y continúe con el Paso 4C 44mm 51mm No es necesario cortar las tapas plásticas centrales Utilice el soporte del túnel Continúe con el Paso 4C Tabla 1 4C Inserte la tapa plástica central larga en...

Page 28: ...emache por el extremo del tornillo para proteger la rosca Utilice el remache como guía y corte el tornillo a la longitud correcta con la sierra para metales Después de cortar el tornillo a la longitud que necesita quite el remache para limpiar la rosca del tornillo Repita el proceso con los tornillos restantes Guía de selección de tornillos Longitud del tornillo Espesor del corte T Instrucciones d...

Page 29: ...uelva a colocar la puerta y comience a adiestrar a su mascota Puede quedarse de un lado de la puerta y su mascota del otro Levante la puerta vaivén o manténgala abierta con cinta y trate de llamar a su mascota para que pase por la puerta Después de que su mascota haya pasado algunas veces deje que la puerta vaivén toque el lomo de su mascota para que se acostumbre a usar la puerta para mascotas Si...

Page 30: ...les adicionales como ser un marco de madera y herrajes Sistema de cierre de 4 posiciones La traba de 4 posiciones se encuentra en la parte interior de la puerta y permite controlar el ingreso y la salida de la mascota del hogar No utilice la traba de 4 posiciones hasta que su mascota esté familiarizada con el uso de la puerta para mascotas Perillas Trabas Sólo para entrar La opción de ingreso únic...

Page 31: ...y observaciones El uso de este producto implica la aceptación de dichos términos condiciones y avisos 2 Uso adecuado Este producto está diseñado para ser utilizado con mascotas a las que se desee adiestrar Según el temperamento de la mascota es posible que este no sea el producto más adecuado a su caso Si tiene dudas de que este sea un producto adecuado para su mascota consulte al veterinario o a ...

Page 32: ...Radio Systems Corporation 10427 PetSafe Way Knoxville TN 37932 1 800 732 2677 www petsafe net 400 1581 1 1 1 2006 Radio Systems Corporation ...

Page 33: ...reated by MJ Initial Creation Date 2 4 15 Approved by LTaylor Date Approved 2 27 15 Program used INDESIGN CC Revision 001 ECO RSC11023 Revision Description Cover and content changes Revision Date 4 1 15 Material 100 grams Color White Printing Black as needed The world leader in pet training products ...

Reviews: