Freedom
™
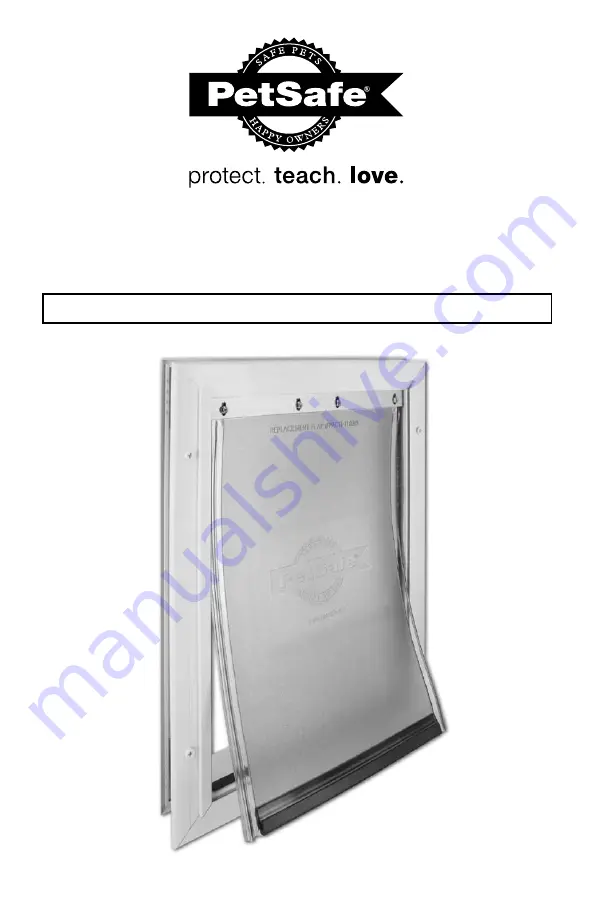
Aluminum Pet Door
Installation Guide for Small, Medium, Large and Extra Large
Please read this entire guide before beginning.
Model Numbers: PPA00-10859, PPA00-10860, PPA00-10861, PPA00-10862
Page 1: ...Freedom Aluminum Pet Door Installation Guide for Small Medium Large and Extra Large Please read this entire guide before beginning Model Numbers PPA00 10859 PPA00 10860 PPA00 10861 PPA00 10862 ...
Page 2: ... created inside or outside of your home which may be accessed through the pet door Radio Systems Corporation recommends that you properly guard access to the hazard or remove the pet door The closing panel or lock if applicable is provided for aesthetic and energy efficiency purposes and is not intended as a security device Radio Systems Corporation will not be liable for unintended use and the pu...
Page 3: ...evel Scissors Safety Glasses Optional Pliers Caulk Tools Needed Closing Panel Interior Frame with Flap Template Installation Guide Exterior Frame Screw Sleeves Small 4 pcs Medium 4 pcs Large 4 pcs X Large 6 pcs Nylon Screws Small 4 pcs Medium 4 pcs Large 4 pcs X Large 6 pcs Kit Includes NOTE The PetSafe Freedom Aluminum Pet Door can be installed in most doors and walls Additional tools and materia...
Page 4: ...sed level surface such as saw horses Helpful Tip Clamp or weigh down the door to prevent it from moving Note The Pet Door can be installed with the door hanging based on your skill level 2C Cut out the correct template size Match the marked lines on the door with the shoulder and center lines on the template Tape the template in place and carefully trace template Make sure to trace underneath tape...
Page 5: ...t at a 90 angle This will prevent the blade from cutting unevenly between interior and exterior areas of door IMPORTANT Make sure there is nothing underneath the door where you will be drilling the holes or cutting out opening Mark Drill Holes For Frame Before putting away the jigsaw place the interior frame frame with the flap inside the cut out and check the fit Then place the exterior frame int...
Page 6: ...ces together with one hand 5C Drop nylon screws through holes in frame and match screw sleeve to bottom side of each screw Pull up screw to position screw sleeve flush into exte rior frame While continuing to hold frames tighten screws until frames come together Optional Caulk around the exterior frame frame without the flap and inside threshold where core frames meet for weather resistance 5D Use...
Page 7: ...nths and stretch in warmer months Easily replace or adjust to ensure a snug fit during seasonal changes Remove bar and flap Slightly move metal bar away from flap Replace new vinyl flap and position horizontally and vertically to fit into door frame Replace existing bar and tighten screws in place Adjust flap horizontally and or vertically to fit into door frame Push bar towards flap and tighten s...
Page 8: ...uch terms conditions and notices 2 Proper Use Includes reviewing the safety information in the Installation Guide 3 Limitations of Liability In no event shall Radio Systems Corporation be liable for any direct indirect punitive incidental special or consequential damages whatsoever arising out of or connected with the use or misuse of this product Buyer assumes all risks and liabilities from the u...