background image

L1050069A


PerkinElmer Ltd, Chalfont Road, Seer Green,  

Beaconsfield, BUCKS, HP9 2FX, United Kingdom. 


Produced in the UK. 


Spectrum 100 and 400 Series  

Right-hand External Beam Option 

Spectrum 100 and 400 Series instruments can be fitted with a Right-hand External Beam 

Option.  

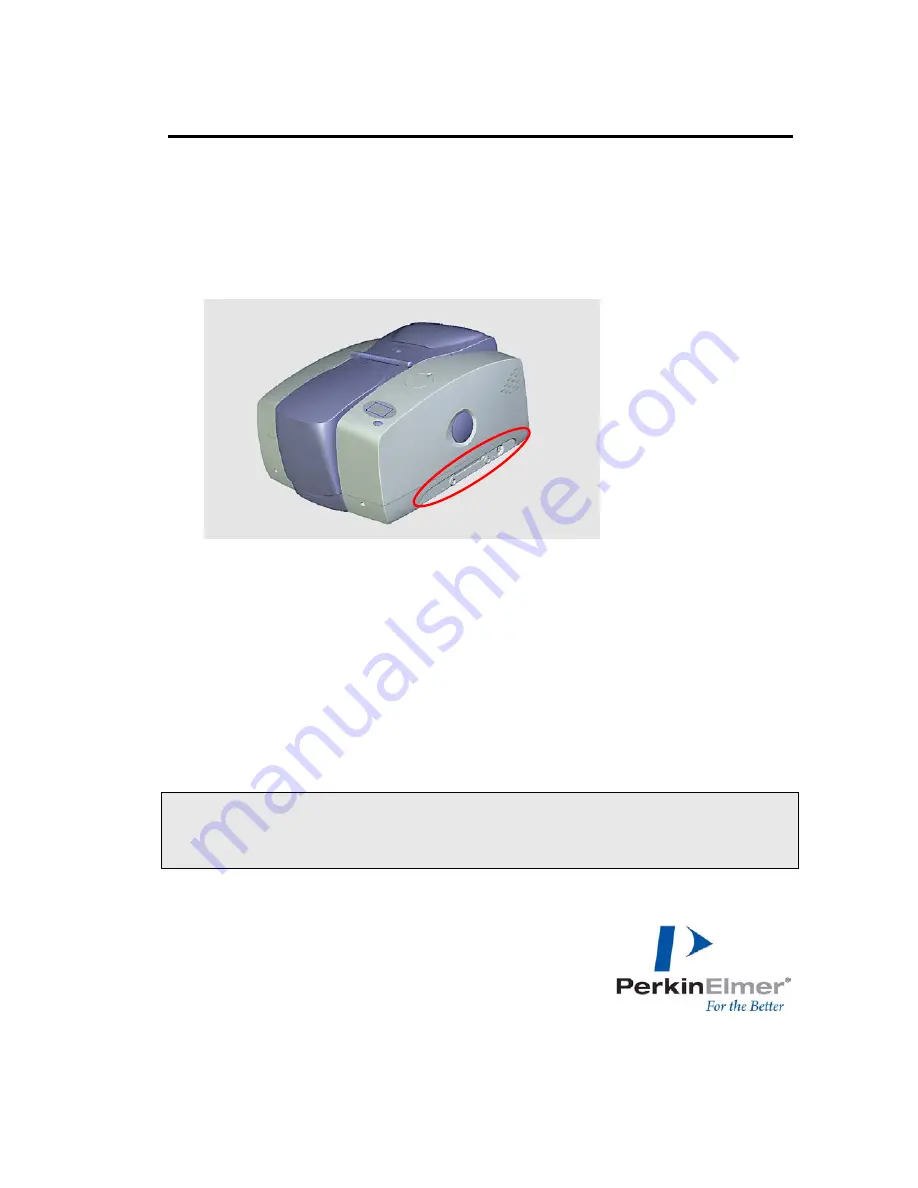
The Right-hand External Beam Option includes: a right-hand beam moveable mirror fitted 

within in the spectrometer, a KBr window, and an external accessory bracket fitted in the 

handhold on the right of the instrument. The bracket allows you to attach and use a pre-

amplifier and detector of your choice. 


Figure 1 Handhold with external accessory bracket fitted 

This document describes how to: 


Fit a different window in the right-hand external beam port. 


Connect a third-party pre-amplifier and detector to the instrument. 


Configure Spectrum or Spectrum Express software to use a third-party external 

detector. 


Use Spectrum or Spectrum Express software to select the accessory. 

NOTE: The Right-hand External Beam Option is installed, in the first instance, by a 

PerkinElmer Service Engineer, who will install the external accessory bracket in the 

handhold on the right of the instrument (if not already fitted) and any internal parts 

required. This external accessory bracket should not be removed. 

Summary of Contents for Spectrum 100 Series

Page 1: ...pre amplifier and detector of your choice Figure 1 Handhold with external accessory bracket fitted This document describes how to Fit a different window in the right hand external beam port Connect a...

Page 2: ...netic interference and electromagnetic compatibility The Right hand External Beam Option is supplied for use as an experimental test bed The user configurable nature of this product means that PerkinE...

Page 3: ...nd leave this port open to atmosphere If the spectrometer is fitted with KBr optics do not exchange the window if the humidity is 45 relative humidity The humidity sensitive optics will be damaged if...

Page 4: ...d instructions refer to the Advanced Maintenance section of the Spectrum 100 Series User s Guide L1050021 or Spectrum 400 Series User s Guide L1050056 These are distributed as pdf files on the Spectru...

Page 5: ...cure the main cover 9 Plug in and switch on the instrument Fitting a Third party Pre amplifier and Detector to the Instrument The EXT R socket on the instrument is a 15 Way High Density D type The con...

Page 6: ...nal running at 4800 n 8 1 Input 7 0 VL 0 V return for digital circuitry 8 5 VL 5 V supply for digital circuitry Do not pull more than 1 A from this pin Output 9 0 VA 0 V analog return for analog circu...

Page 7: ...guration file for use with a third party external detector NOTE It is not necessary to power the instrument to complete this procedure 1 Browse to C pel_apps bin The instrument configuration file is n...

Page 8: ...nfiguration file is opened for editing 6 Right click in the external accessory area to the right of the beampath diagram The Add Port dialog is displayed 7 Select Right Mid in the Select Site pane sel...

Page 9: ...t Type pane and then click Install For information on the options available to you see Choosing the correct detector type on page 10 The Add Detector dialog closes and becomes 11 Right click The Add m...

Page 10: ...ed Custom MIR 15000 370 15 secs 0 2 cm s Custom NIR 15000 1250 15 secs 0 2 cm s Custom FIR 720 30 15 secs 1 0 cm s See Adjusting the default Custom detector settings on page 10 for details of how to a...

Page 11: ...rum online help Stabilization time The time required in seconds for the detector to settle after the infrared beam is directed onto it that is after the beampath is changed to use the external detecto...

Page 12: ...original internal detector configuration file as C cfg NOTE If a backup of the original configuration file was not made uninstall the instrument and then re install it using the configuration disk su...

Page 13: ...g you that the detector may be damaged by the NIR beam You should only select the Yes option to continue if an attenuator has been fitted in the beam or you are confident that the detector can withsta...

Page 14: ...lect the Setup menu and then click Instrument 2 Select the Setup Instrument BeamPath tab 3 Select Right external as the Beam Location from the drop down list The external detector is selected NOTE The...

Page 15: ...ed The Display tab is displayed OR If you have Spectrum Express software switch to Monitor by clicking on the Measurement toolbar and then click Energy to display the signal detected The Live tab is d...

Reviews: