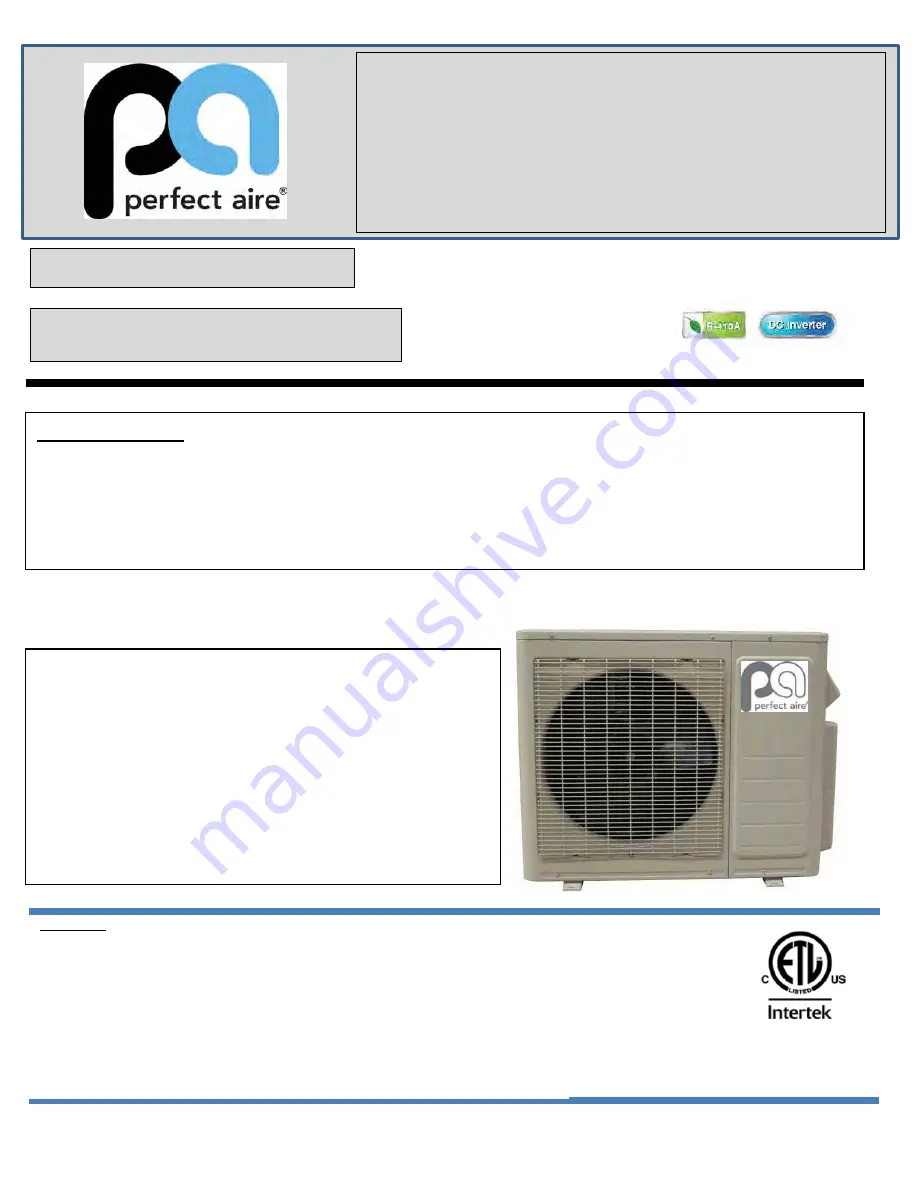
Perfectaire 1PAMSH18-MZO2-16 Service Manual Download Page 1

Multi outdoor units 

SERVICE MANUAL


Multi zone 

CONDENSING UNITS 

Revision B:   

  ODMI-C1-1511 


Model Numbers:

WARNING 

Installation MUST conform with local building codes or, in the absence of local
codes, with the National Electrical Code NFPA70/ANSI C1-1993 or current edition
and Canadian Electrical Code Part1 CSA C.22.1.

The information contained in the manual is intended for use by a qualified service
technician familiar with safety procedures and equipped with the proper tools and
test instruments

Installation or repairs made by unqualified persons can result in hazards to you
and others.

Failure to carefully read and follow all instructions in this manual can result in
equipment malfunction, property damage, personal injury and/or death.

Table of Contents 

1. Indoor Unit Combination

2. Suggested Indoor Unit Model Numbers

3. Dimension Of Outdoor Unit

4. Refrigerant Cycle Diagram

5. Installation Details

6. Electronic Function

7. Wiring Diagrams

8. Trouble Shooting

9. Disassembly Instructions

1PAMSH18-MZO2-16

1PAMSH27-MZO3-16

1PAMSH36-MZO4-16

Summary of Contents for 1PAMSH18-MZO2-16

Page 1: ...with safety procedures and equipped with the proper tools and test instruments Installation or repairs made by unqualified persons can result in hazards to you and others Failure to carefully read and follow all instructions in this manual can result in equipment malfunction property damage personal injury and or death Table of Contents 1 Indoor Unit Combination 2 Suggested Indoor Unit Model Numbe...

Page 2: ... the system for many years 14 5 6 Procedure when servicing the indoor unit refrigeration circuit 14 5 7 Evacuation after servicing the outdoor unit refrigeration circuit 15 6 Electronic Function 16 6 1 Abbreviation 16 6 2 Electric control working environment 16 6 3 Main Protection 17 6 4 Control and Functions 18 7 Wiring Diagrams 23 8 Troubleshooting 38 8 1Safety 38 8 2Indoor Unit Error Display 39...

Page 3: ... Model 1PAMSH27 MZO3 16 W210 metal plate 113 Model 1PAMSH36 MZO4 16 W520 metal plate 128 ...

Page 4: ...oor Ceiling Oasis or Duct unit 7 12 7 18 9 9 9 12 9 18 12 12 12 18 7 7 7 7 7 9 7 7 12 7 7 18 7 9 9 7 9 12 7 9 18 7 12 12 9 9 9 9 9 12 9 12 12 Multi DC Outdoor Unit Nominal capacity Suggested Combination Limit 1 drive 3 30K 8 0kW 7 12 There should be only one Floor Ceiling or Duct unit 7 18 9 9 9 12 9 18 12 12 12 18 18 18 7 7 7 7 7 9 7 7 12 7 7 18 7 9 9 7 9 12 7 9 18 7 12 12 7 12 18 9 9 9 9 9 12 9 ...

Page 5: ... 48K 14kW 18 18 None 18 24 24 24 9 9 18 9 9 24 9 12 12 9 12 18 9 12 24 9 18 18 9 18 24 9 24 24 12 12 12 12 12 18 12 12 24 12 18 18 12 18 24 12 24 24 18 18 18 18 18 24 9 9 9 9 9 9 9 12 9 9 9 18 9 9 9 24 9 9 12 12 9 9 12 18 9 9 12 24 9 9 18 18 9 9 18 24 9 12 12 12 9 12 12 18 9 12 12 24 9 12 18 18 9 18 18 18 12 12 12 12 12 12 12 18 12 12 12 24 12 12 18 18 9 9 9 9 9 9 9 9 9 12 9 9 9 9 18 9 9 9 9 24 9 ...

Page 6: ...2 Suggested Indoor Unit Model Numbers ...

Page 7: ......

Page 8: ...Dimension mm in W D H W1 A B 1PAMSH18 MZO2 16 845 33 3 320 12 6 700 27 6 908 35 7 560 22 335 13 2 1PAMSH27 MZO3 16 900 35 4 315 12 4 860 33 9 980 38 6 590 23 2 333 13 1 1PAMSH36 MZO4 16 990 39 345 13 6 965 38 1075 42 3 624 24 6 366 14 4 ...

Page 9: ......

Page 10: ...LIARY B LIQUID VALVE B GAS VALVE B Accumulator T2B A Evaporator temp sensor outlet T2B B 5 2 Refrigeration circuit drawing of inverter 1 drive 3 type LIQUID VALVE A GAS VALVE A HEAT EXCHANGE EVAPORATOR HEAT EXCHANGE CONDENSER Compressor 4 WAY VALVE COOLING HEATING T2 Evaporator temp sensor middle T1 Room temp sensor T3 Condenser temp sensor T5 Discharge temp sensor T4 Ambient temp sensor INDOOR OU...

Page 11: ...D Accumulator High pressure switch Low pressure switch T2B A Evaporator temp sensor outlet T2B B T2B C T2B D 5 4 Refrigeration circuit drawing of inverter 1 drive 5 type LIQUID VALVE A GAS VALVE A HEAT EXCHANGE EVAPORATOR HEAT EXCHANGE CONDENSER COOLING HEATING T2 Evaporator temp sensor T1 Room temp sensor T3 Condenser temp sensor T4 Ambient temp sensor INDOOR OUTDOOR EXV A CAPILIARY A CHECK VALVE...

Page 12: ...l refrigera nt charge g 15 x length for all rooms 15 15 x length for all rooms 22 5 15 x length for all rooms 30 15 x length for all rooms 37 5 o z 0 161 x length for all rooms 49 2 0 161 x length for all rooms 73 8 0 161x len gth for all rooms 98 4 0 161x len gth for all rooms 123 Caution Refrigerant pipe diameter is different according to indoor unit to be connected When using the extension pipe...

Page 13: ...d and repaired Follow the leak checking procedure as mentioned before If the vacuum is achieved close the low pressure gauge handle off and shut the vacuum pump off Recheck the reading after 10 minutes the vacuum may change slightly this is normal 7 The system is now dry and free of contaminates refrigerant pressure should now be added to the system from a source other than the system before openi...

Page 14: ...he refrigerant container to pressurize the line now loosen that hose at the manifold for a second and purge that line 4 Set the refrigerant container on an electronic charging scale and record the weight or zero the scale depending on the scale used Next determine the refrigerant charge to be added 5 Start the unit in the cooling mode and lower the set point so the unit won t shut off during the c...

Page 15: ...indicate 0 1Mpa after pumping 30 minutes it should be pumped 20 minutes more If the pressure can t achieve 0 1Mpa after pumping 50 minutes please check if there are some leakage points Fully close the handle Lo valve of the manifold valve and stop the operation of the vacuum pump Confirm that the gauge needle does not move approximately 5 minutes after turning off the vacuum pump Turn the flare nu...

Page 16: ...ght disconnect the charge hose from the 3 way valve s service port immediately If the system has been charged with liquid refrigerant while operating the air conditioner turn off the air conditioner before disconnecting the hose 6 Mounted the valve stem caps and the service port Use torque wrench to tighten the service port cap to a torque of 18N m 13 27 ft lbs Always leak check after servicing th...

Page 17: ...or current limit protection If the compressor current exceeds the current limit value for 10 seconds the compressor frequency will be limited as below table Cooling mode Current frequency Hz Current limit value A Frequency limit COOL_F16 ICOOLLMT12 Decrease the frequency to COOL_F4 and run at COOL_F4 for 3 minutes After that the frequency will be adjusted according to the capacity demand and rise ...

Page 18: ...e indoor units will keep the current running mode 6 3 11 Compressor preheating functions Preheating permitting condition If T4 outdoor ambient temperature 3 37 4 and newly powered on or if T4 3 37 4 and compressor has stopped for over 3 hours the compressor heating cable will work Preheating mode A weak current flow through the coil of compressor from the wiring terminal of compressor then the com...

Page 19: ... outdoor ambient temp 43 41 38 T4LimFre1_ADD No limit T4LimFre2_ADD T4LimFre3_ADD 42 39 37 49 46 T4LimFre4_ADD T4LimFre5_ADD 48 45 Heating mode T1 Ts 4 0 a 3 1 1 3 1 2 0 b c d e f 2 Capacity area a b c d e f Norm code N 3 2 1 5 1 0 5 0 Model 9K 12K 18K HP 1 0 1 2 1 5 Plus all the indoor capacity request together then modify it by T4 When there s only one indoor unit Heating Outdoor temperature T4 ...

Page 20: ...e of following items is satisfied defrosting will stop and the machine will turn to normal heating mode T3 TempQuitDefrost_ADD The defrosting time achieves 10min Turn to other modes or off For 1PAMSH18 MZ O2 16 Condition of defrosting If any one of the following items is satisfied AC will enter the defrosting mode After the compressor starts up and keeps running mark the minimum value of T3 from t...

Page 21: ...High Low 25 20 15 low ambient cooling For 1PAMSH18 MZO2 16 1PAMSH36 MZO4 16 T4 A DC_FAN_HI_SPD_ADD B DC_FAN_MID_SPD_ADD C DC_FAN_MIN_SPD_ADD D DC_FAN_SLOW_SPD_ADD E DC_FAN_SSLOW_SPD_ADD 23 22 20 28 19 17 26 25 Outdoor fan speed control logical low ambient cooling When T4 15 59 and T3 30 86 the unit will enter into low ambient cooling mode The outdoor fan will choose speed according to T3 When T3 3...

Page 22: ... valve needs more 16p open If the T2B average the relevant valve s open range remains If the T2B average the relevant valve needs more 16p close This modification will be carried out every 2 minutes 6 4 4 2 Heating mode The initial open angle of EXV is 250P adjustment range is 100 350p When the unit start to work for 3minutes the outdoor will receive indoor units of capacity demand T2 information ...

Page 23: ...7 Wiring Diagrams 8 1 Wiring diagram of 1 drive 2 outdoor 1PAMSH18 MZO2 16 ...

Page 24: ...PCB board of 1PAMSH18 MZ O2 16 ...

Page 25: ...IPM board of 1PAMSH18 MZO2 16 ...

Page 26: ......

Page 27: ...8 2 Wiring diagram of 1 drive 3 outdoor 1PAMSH27 MZO3 16 ...

Page 28: ......

Page 29: ......

Page 30: ...PCB board of 1PAMSH27 MZO3 16 ...

Page 31: ...IPM board of 1PAMSH27 MZO3 16 ...

Page 32: ...8 3 Wiring diagram of 1 drive 4 outdoor 1PAMSH36 MZO4 16 ...

Page 33: ...PCB board of 1PAMSH36 MZO4 16 ...

Page 34: ...IPM board of 1PAMSH36 MZO4 16 ...

Page 35: ...PFC board of 1PAMSH36 MZO4 16 ...

Page 36: ...8 4 Wiring diagram of 1 drive 5 outdoor ...

Page 37: ......

Page 38: ... capacitors in PCB and relative circuit in outdoor unit even shut down the power supply electricity power still are kept in capacitors do not forget to discharge the electricity power in capacitor The value of resistance is about 1500 ohm to 2000 ohm ...

Page 39: ...tion between indoor and outdoor units E2 E2 Zero crossing signal error E3 Indoor fan speed has been out of control E5 Open circuit or short circuit of outdoor temperature sensor or outdoor EEPROM malfunction E0 E4 E6 Open circuit or short circuit of T1 or T2 temperature sensor P0 IPM module protection or IGBT over strong current protection P6 P1 Voltage protection E5 P2 Temperature protection of c...

Page 40: ...r fan speed has been out of control flash at 5Hz light X extinguished flash at 0 5Hz Operation Timer De frost Alarm Failure X X X Open or short circuit of T1 temperature sensor X X X Open or short circuit of T2 temperature sensor X X X Communication malfunction between indoor and outdoor units X X X Water level alarm malfunction X X Indoor EEPROM malfunction X X IPM module protection X X Open or s...

Page 41: ...lash at 2 5Hz light X extinguished flash at 1Hz Operatio n Timer De frost Alarm Failure Display ODU Error code X X X Open or short circuit of T1 temperature sensor E0 X X X Open or short circuit of T2 temperature sensor E1 X X X Communication malfunction between indoor and outdoor units E2 E2 X X X Water level alarm malfunction E3 X X Indoor EEPROM malfunction E4 X X IPM module protection E5 P6 X ...

Page 42: ...es F3 Compressor discharge pipe sensor open or short circuit E4 5 times F4 Outdoor EEPROM malfunction E0 6 times F5 Outdoor fan has been out of control E8 7 times F6 Indoor unit coil outlet temp sensor open or short circuit E4 1 times P0 Inverter module IPM malfunction or IGBT over strong current protection P6 2 times P1 Voltage High voltage or low voltage protection E5 3 times P2 High temperature...

Page 43: ... Off 0 Fan only 1 Cooling 2 Heating 3 Forced cooling 4 3 A indoor unit capacity The capacity unit is horse power If the indoor unit is not connected the digital display tube will show 9K 1HP 12K 1 2HP 18K 1 5HP 4 B indoor unit capacity 5 C indoor unit capacity 6 D indoor unit capacity 7 E indoor unit capacity 8 A Indoor unit capacity demand code Norm code HP 9K 1HP 12K 1 2HP 18K 1 5HP 9 B Indoor u...

Page 44: ...porator temp T2C 30 D indoor unit evaporator temp T2D 31 E indoor unit evaporator temp T2E 32 Condenser pipe temp T3 33 Outdoor ambient temp T4 34 Compressor discharge temp T5 The display value is between 30 129 degree If the temp is lower than 30 degree the digital display tube will show 30 If the temp is higher than 99 degree the digital display tube will show single digit and tens digit For exa...

Page 45: ...ve displays between running frequency and PH each displays 0 5s During the oil return process The LED displays RO or alternative displays between running frequency and RO each displays 0 5s In low ambient cooling mode the LED displays LC or alternative displays between running frequency and LC each displays 0 5s In forced cooling mode the LED displays FC or alternative displays between running fre...

Page 46: ...ut of control Only for DC fan motor models F5 F1 No A Indoor unit coil outlet temp sensor or connector of sensor is defective F2 No B Indoor unit coil outlet temp sensor or connector of sensor is defective F3 No C Indoor unit coil outlet temp sensor or connector of sensor is defective F4 No D Indoor unit coil outlet temp sensor or connector of sensor is defective P0 P2 P2 P3 P1 P1 High pressure pr...

Page 47: ...oting Supposed causes If the EEPROM chip is welded on PCB replace the PCB directly Otherwise check whether the EEPROM chip plugged in PCB well Yes No Yes Insert the EEPROM well Replace the indoor PCB Shut off the power supply and turn it on 1 minute later Is it still displaying the error code EEPROM a read only memory whose contents can be erased and reprogrammed using a pulsed voltage For the loc...

Page 48: ...een indoor and outdoor units diagnosis and solution Malfunction decision conditions Indoor unit does not receive the feedback from outdoor unit during 120 seconds Supposed causes Wiring mistake Indoor or outdoor PCB faulty Trouble shooting ...

Page 49: ... remote controller Is all indoor unit display Turn off the all indoor units Is IPM power LED or operating LED lamp On Refer PIC2 Yes A Is all the wiring between terminal and Indoor PCB connect ok No Yes A No Reconnect the wiring Is indoor units number correct Check on the outdoor check point 2 for dual zone 3 for tri zone 4 for qua zone Refer PIC 4 Yes No first time Yes Yes Change the Indoor PCB P...

Page 50: ... of outdoor unit The red pin of multimeter connects with L2 port while the black pin is for S port When AC is normal running the voltage will move alternately between positive value and negative value Pic 2 IPM for dual tri qua zone Self Check OK Power some modles Operating ...

Page 51: ...int button press 1 time for check how many indoor units are connected 1PAMSH36 MZO4 16 Check point button press 18 times to check how many indoor units are connected PIC3 Main board LED when power on and unit standby ...

Page 52: ... signal feedback for 4 minutes or the zero crossing signal time interval is abnormal Supposed causes Connection mistake PCB faulty Trouble shooting Check if the connections and power supply is normal Correct the connections Turn on the unit when the power supply is good No Yes Indoor main PCB is defective Replace indoor main PCB ...

Page 53: ...splaying the error code Shut off the power supply rotate the fan by hand Does it rotate properly The unit operates normally Find out the cause and have it solved For example check whether the fan is blocked or the bearing is broken Check the wires of fan motor Are all the connections good No Yes No Correct the connections No Yes Check whether the main PCB is normal through index 2 Yes Yes Check wh...

Page 54: ...d need to be replaced 2 Indoor DC fan motor control chip is inside fan motor Power on and when the unit is in standby measure the voltage of pin1 pin3 pin4 pin3 in fan motor connector If the value of the voltage is not in the range showing in below table the PCB must have problems and need to be replaced For other models DC motor voltage input and output NO Color Signal Voltage 1 Red Vs Vm 200V 38...

Page 55: ...n 4 94V the LED will display the failure Supposed causes Wiring mistake Sensor faulty PCB faulty Trouble shooting Check the connections between temperature sensor and PCB Are the connections good Correct the connections No Yes Yes Replace indoor or outdoor PCB Replace the sensor Check the resistance value of the sensor via Appendix 1 and Appendix 2 Is it normal No ...

Page 56: ...lfunction decision conditions When the voltage signal that IPM send to compressor drive chip is abnormal the display LED will show P6 and AC will turn off Supposed causes Wiring mistake IPM malfunction Outdoor fan ass y faulty Compressor malfunction Outdoor PCB faulty Trouble shooting ...

Page 57: ...n work normally No Replace the compressor check whether the system can work normally Check whether the lines in E part box are connected tightly Yes Connect it tightly check ok or not No No Yes No Replace the bridge rectifiers Check whether the bridge rectifiers are normal Use the multimeter to measure the resistance between each two terminals check whether there is the condition that value of res...

Page 58: ... about 187 253VAC Check the power supply Check whether the voltage of IPM board P and N is normal DC277 356V for 18 27KBtu h DC277 410V for 36KBtu h Replace bridge rectifiers and then check whether the system can run normally Only for qua zone Replace IPM board and then check whether the system can run normally Replace outdoor main board Yes No No No No Yes Trouble is solved Yes Yes ...

Page 59: ...ressor operates Whether refrigerant circulation volume is normal Whether abnormality is the same after gas charging Yes No No Reconnect and retest No Check refrigerant system such as clogging of capillary etc No Whether the connection is good Replace the outdoor main PCB Yes Replace the protector No Yes Charge refrigerant Whether protector is normal If protector is normal resistance 0 8 4 1 9 Inve...

Page 60: ...Insert the water level switch well Insert the water level switch well If the water level switch is broken If the water level switch is broken Yes Replace the water level switch Replace the water level switch Replace the water pump If malfunction is still not solved Replace the water pump If malfunction is still not solved Yes No Yes Replace the indoor main PCB Replace the indoor main PCB Power off...

Page 61: ... or fan mode and indoor unit B is set to heating mode then A will change to off and B will work in heating mode Suppose Indoor unit A working in heating mode and indoor unit B is set to cooling mode or fan mode then B will change to stand by and A will be no change Cooling mode Heating Mode Fan Off Cooling mode No Yes No No Heating Mode Yes No Yes No Fan No Yes No No Off No No No No No No mode con...

Page 62: ...s Installation mistake PCB faulty Trouble shooting Yes Replace the outdoor main PCB Replace the outdoor main PCB Power off then restart the unit 3 minutes later Power off then restart the unit 3 minutes later Outdoor EEPROM malfunction Outdoor EEPROM malfunction EEPROM a read only memory whose contents can be erased and reprogrammed using a pulsed voltage For the location of EEPROM chip please ref...

Page 63: ...tion Error Code E2 Malfunction decision conditions Indoor unit does not receive the feedback from outdoor unit during 120 seconds or outdoor unit does not receive the feedback from any one indoor unit during 180 seconds Supposed causes Wiring mistake Indoor or outdoor PCB faulty Trouble shooting ...

Page 64: ...r unit by remote controller Is all indoor unit display Turn off the all indoor units Is IPM power LED or operating LED lamp On Refer PIC2 Yes A Is all the wiring between terminal and Indoor PCB connect ok No Yes A No Reconnect the wiring Is indoor units number correct Check on the outdoor check point 2 for dual zone 3 for tri zone 4 for qua zone Refer PIC 4 Yes No first time Yes Yes Change the Ind...

Page 65: ...t and S port of outdoor unit The red pin of multimeter connects with L2 port while the black pin is for S port When AC is normal running the voltage will move alternately between positive value and negative value Pic 2 IPM For dual tri zone Self Check Operating ...

Page 66: ...PIC 4 Check point button press 1 time for check how many indoor units are connected Self Check Power Operating PIC3 Main board LED when power on and unit standby Pic 2 IPM For qua zone ...

Page 67: ...g Communication malfunction between IPM board and outdoor main board Is there at least one LED in the IPM board light Check the signal wire between the IPM module and the main board is it connected good Reconnect and retry Is error still display Replace IPM board and then check whether the system can run normally Replace the electric control box No No No No Yes Trouble is solved No Yes Replace out...

Page 68: ... test the DC voltage between black pin and white pin of signal wire The normal value should be around 5V Use a multimeter to test the DC voltage between black pin and red pin of signal wire The normal value should be around 12V ...

Page 69: ...nditions If the sampling voltage is lower than 0 06V or higher than 4 94V the LED will display the failure Supposed causes Wiring mistake Sensor faulty PCB faulty Trouble shooting Check the connections between temperature sensor and PCB Are the connections good Correct the connections No Yes Yes Replace indoor or outdoor PCB Replace the sensor Check the resistance value of the sensor via Appendix ...

Page 70: ...oltage protection Check the voltage of outdoor unit power supply whether the voltage between L L1 and N L2 is about 187 253VAC Check the power supply Check whether the voltage of IPM board P and N is normal DC277 356V for 18 27KBtu h DC277 410V for 36KBtu h Replace bridge rectifiers and then check whether the system can run normally Only for qua zone Replace IPM board and then check whether the sy...

Page 71: ...IPM for dual tri zone IPM for qua zone P N for dual tri zone ...

Page 72: ...P N for qua zone ...

Page 73: ...bridge rectifier for dual tri zone bridge rectifier for qua zone ...

Page 74: ...Remark Measure the DC voltage between and port The normal value should be 190V 250V ...

Page 75: ...uble shooting PFC module protection Check whether the connecting line between main board and the PFC module IPM module is connected tightly Yes Check whether the voltage range of P N on IPM module is normal DC277 356V for 18 27KBtu h DC277 410V for 36KBtu h No Check whether the inductance of PFC module is good If the inductance is good the resistance of the two ports is 0 Yes Replace the inductanc...

Page 76: ...Two ports of the inductance Inductance ...

Page 77: ......

Page 78: ...an by hand Does it rotate properly Shut off the power supply rotate the fan by hand Does it rotate properly The unit operates normally The unit operates normally Find out the cause and have it solved For example whether the fan is blocked or the screws which fix the fan are tighten Find out the cause and have it solved For example whether the fan is blocked or the screws which fix the fan are tigh...

Page 79: ...pin3 pin4 pin3 in fan motor connector If the value of the voltage is not in the range showing in below table the PCB must have problems and need to be replaced DC motor voltage input and output NO Color Signal Voltage 1 Red Vs Vm 200 380V 2 3 Black GND 0V 4 White Vcc 13 5 16 5V 5 Yellow Vsp 0 6 5V 6 Blue FG 13 5 16 5V Vs Vcc ...

Page 80: ...Vsp FG ...

Page 81: ...later Check whether the temperature of compressor top is more than 100 Check whether the temperature of compressor top is more than 100 No Check the refrigerant volume charge Check the refrigerant volume charge Recharge the correct refrigerant volume Recharge the correct refrigerant volume Refrigerant system is blocked such as capillary or welded point of pipes Refrigerant system is blocked such a...

Page 82: ......

Page 83: ...d solution Only for 1PAMSH36 MZO4 16 Error Code P1 Malfunction decision conditions If the sampling voltage is not 5V the LED will display the failure Supposed causes Wiring mistake Over load protector faulty System block Outdoor PCB faulty Trouble shooting ...

Page 84: ...0 Check whether the outdoor ambient temperature is higher than 50 No Stop the unit Stop the unit Yes Check if the outdoor unit ventilation is good Check if the outdoor unit ventilation is good Yes Make the outdoor unit ventilate well Make the outdoor unit ventilate well Check whether the heat exchanger is dirty Check whether the heat exchanger is dirty No Clean the heat exchanger Clean the heat ex...

Page 85: ......

Page 86: ...d solution Only for 1PAMSH36 MZO4 16 Error Code P2 Malfunction decision conditions If the sampling voltage is not 5V the LED will display the failure Supposed causes Wiring mistake Over load protector faulty System block Outdoor PCB faulty Trouble shooting ...

Page 87: ...e low pressure protector is broken Check whether the outdoor ambient temperature is too low Check whether the outdoor ambient temperature is too low No Stop the unit Stop the unit Yes Open fully valve core of high pressure valve Open fully valve core of high pressure valve No Check whether valve core of high pressure valve is opened Check whether valve core of high pressure valve is opened Check i...

Page 88: ......

Page 89: ...is higher than 50 Judge 2 Check whether the outdoor ambient temperature is higher than 50 No Stop the unit Stop the unit Yes Judge 3 Check whether the outdoor unit is bad ventilation Judge 3 Check whether the outdoor unit is bad ventilation No Make the outdoor unit ventilate well Make the outdoor unit ventilate well Yes Judge 5 The refrigerant pipe is blocked Judge 5 The refrigerant pipe is blocke...

Page 90: ......

Page 91: ...essor discharge temp sensor and PCB according to wiring diagrams Check whether the connection is right between compressor discharge temp sensor and PCB according to wiring diagrams Measure the resistance value of compressor discharge temp sensor If the value is not normal is normal refer to the Appendix 2 Measure the resistance value of compressor discharge temp sensor If the value is not normal i...

Page 92: ... ambient temperature is higher than 50 No Stop the unit Stop the unit Yes Check if the outdoor unit ventilation is good Check if the outdoor unit ventilation is good Yes Make the outdoor unit ventilate well Make the outdoor unit ventilate well Check whether the heat exchanger is dirty Check whether the heat exchanger is dirty No Clean the heat exchanger Clean the heat exchanger Yes Check whether t...

Page 93: ...unction decision conditions When the voltage signal that IPM send to compressor drive chip is abnormal the display LED will show P6 and AC will turn off Supposed causes Wiring mistake IPM malfunction Outdoor fan ass y faulty Compressor malfunction Outdoor PCB faulty Trouble shooting ...

Page 94: ...place the compressor check whether the system can work normally Check whether the lines in E part box are connected tightly Yes Connect it tightly check ok or not No No Yes No Replace the bridge rectifiers Check whether the bridge rectifiers are normal Use the multimeter to measure the resistance between each two terminals check whether there is the condition that value of resistance is 0 Check wh...

Page 95: ...on operating indoor unit frosts When heating non operating indoor unit get warm Supposed causes EXV faulty Wire and tubing connected in reverse Check of EXV please refer to part 6 in 9 5 Trouble Criterion Of Main Parts Notice If you replace outdoor main PCB of 1PAMSH27 MZO3 16 you need to check whether the PCB isproduced before Apr 2013 If yes you need to short connect OLP connector Otherwise the ...

Page 96: ...door fan motor YSK27 4G YSK68 4B YSK27 4G YSK68 4B Model Indoor fan motor YDK45 6B YDK45 6B WZDK37 38G WZDK37 38G Model Indoor fan motor YSK25 6L YSK25 6L WZDK55 38GS W WZDK55 38GS W Model MFAU 12HRFN1 M Indoor fan motor RD 280 20 8A RD 280 20 8A Outdoor unit Model 1PAMSH18 MZO2 16 1PAMSH27 MZO3 16 1PAMSH36 MZO4 16 Compressor DA130S1C 20FZ DA150S1C 20FZ DA250S2C 30MT TNB306FPGMC L Outdoor fan moto...

Page 97: ... measure the resistance value with a tester Temperature Sensors Room temp T1 sensor Indoor coil temp T2 sensor Outdoor coil temp T3 sensor Outdoor ambient temp T4 sensor Compressor discharge temp T5 sensor Measure the resistance value of each winding by using the multi meter ...

Page 98: ... 0 40060 3 41 5878 37 5 87359 77 1 29078 117 0 38991 2 39 8239 38 5 62961 78 1 25423 118 0 37956 1 37 1988 39 5 39689 79 1 21330 119 0 36954 0 35 2024 40 5 17519 80 1 17393 120 0 35982 1 33 3269 41 4 96392 81 1 13604 121 0 35042 2 31 5635 42 4 76253 82 1 09958 122 0 3413 3 29 9058 43 4 57050 83 1 06448 123 0 33246 4 28 3459 44 4 38736 84 1 03069 124 0 32390 5 26 8778 45 4 21263 85 0 99815 125 0 31...

Page 99: ... 8 084 115 2 422 4 222 8 36 34 32 76 7 82 116 2 357 3 211 4 37 32 94 77 7 566 117 2 294 2 200 7 38 31 62 78 7 321 118 2 233 1 190 5 39 30 36 79 7 086 119 2 174 0 180 9 40 29 15 80 6 859 120 2 117 1 171 9 41 28 81 6 641 121 2 061 2 163 3 42 26 9 82 6 43 122 2 007 3 155 2 43 25 86 83 6 228 123 1 955 4 147 6 44 24 85 84 6 033 124 1 905 5 140 4 45 23 89 85 5 844 125 1 856 6 133 5 46 22 89 86 5 663 126...

Page 100: ... 23 24 25 26 27 28 29 30 31 32 33 34 35 74 76 78 80 82 84 86 88 90 92 94 96 98 2 Compressor check Measure the resistance value of each winding by using the tester Position Resistance Value DA130S1C 20FZ DA150S1C 20FZ DA250S2C 30MT TNB306FPGMC L Blue Red 0 95Ω 20 0 95Ω 20 0 55Ω 20 0 53Ω 20 ...

Page 101: ...stance value Red Black Several MΩ Red Black Several MΩ P N U N U V V W W Red 4 AC Fan Motor Measure the resistance value of each winding by using the tester Position Resistance Value RPG20B RPG28H Black Red 381Ω 8 20 Brand Weiling 342Ω 8 20 Brand Dayang 183 6Ω 8 20 Brand Weiling 180Ω 8 20 Brand Wolong White Black 267Ω 8 20 Brand Weiling 253Ω 8 20 Brand Dayang 206Ω 8 20 Brand Weiling 190Ω 8 20 Bran...

Page 102: ...Ω 8 20 Yellow Blue 76Ω 8 20 19Ω 8 20 252Ω 8 20 88Ω 8 20 150Ω 8 20 374 3Ω 8 20 138Ω 8 20 5 4 way valve 1 Power on use a digital tester to measure the voltage when the unit operates in cooling it is 0V When the unit operates in heating it is about 230VAC If the value of the voltage is not in the range the PCB must have problems and need to be replaced 2 Turn off the power use a digital tester to mea...

Page 103: ...6 EXV check Disconnect the connectors ...

Page 104: ...Resistance to EXV coil Color of lead wire Normal Value Red Blue About 50Ω Red Yellow Brown Orange Brown White ...

Page 105: ...Red Blue Red Yellow ...

Page 106: ...Brown Orange Brown White ...

Page 107: ...wer breaker 2 Remove the screws of top cover and remove the top cover 9 screws 3 Remove the screws of right front side panel and remove the right front side panel 2 screws 4 Remove the screws of front panel and remove the front panel 9 screws Screws of top cover Screws of top cover Screws of right front side panel Screws of front panel Screws of front panel Screws of right rear panel ...

Page 108: ... fourteen screws of right rear panel and remove the right rear panel 2 Fan ass y How to remove the fan ass y 1 Remove the top cover right front side panel and front panel from item 1 step 1 4 2 Remove the hex nut fixing the fan 3 Remove the fan Screws of big handle Screws of terminal board Screws of water collector Screws of right rear panel ...

Page 109: ...ing four fixing screws 3 Electrical parts How to remove the electrical parts 1 Perform work of item 1 2 2 Remove the ten screws fixing the IPM board 3 Unfasten the connector of the reactor 4 Unfasten the connector of the compressor 5 Disconnect following 5 pieces of connection wires and connectors between IPM and PCB IPM board PCB board 4s cr e w s ...

Page 110: ...tors CN17 T3 T4 temp sensor 2p 2p white CN7 Tdischarge temp sensor 2p white CN15 T2B A B temp sensor 2p 2p white CN18 CN19 Electronic expansive valve A B 6p 6p red red CN25 CN23 S A S B 3p 3p white white Wires CN1 CN2 4 way valve blue blue CN5 CN6 Crankcase heating cable red red CN3 L IN red CN4 N IN black CN17 CN7 CN15 CN18 CN19 CN25 CN23 CN1 CN2 CN5 CN6 CN3 CN4 ...

Page 111: ...the electrical control box and partition plate 3 Extract refrigerant gas 4 Remove the sound insulation material and crankcase heating cable 5 Remove terminal cover of compressor and disconnect wires of compressor thermo and compressor from the terminal 6 Remove the discharge pipe and suction pipe with a burner 7 Remove the hex nuts and washers fixing the compressor to bottom plate 8 Lift the compr...

Page 112: ...ay valve How to remove the 4 way valve 1 Perform work of item 1 2 2 Extract refrigerant gas 3 Remove the electrical parts from item 3 4 Remove fixing screw of the coil and remove the coil 5 Detach the welded parts of 4 way valve and pipe 7 The expansion valve How to remove the expansion valve 1 Perform work of item 1 2 2 Remove the electrical parts from item 3 3 Remove the coils 4 Detach the welde...

Page 113: ...front side panel and remove the right front side panel 2 screws 4 Remove the screws of front panel and remove the front panel 9 screws 5 Remove the screws of big handle and remove the big handle 4 screws 6 Remove two screws of terminal board two screws of water collector and twelve screws of right rear panel and remove the right rear panel Screws of right rear panel Screws of top cover Screws of f...

Page 114: ...cover right front side panel and front panel from item 1 step 1 4 2 Remove the hex nut fixing the fan 3 Remove the fan 4 Remove the electrical control box cover Screws of big handle Screws of right rear panel Screws of terminal board Screws of water collector ...

Page 115: ... Note There are two kinds of screws Please pay attention to it when install the fan motor 3 Electrical parts How to remove the electrical parts 1 Perform work of item 1 2 2 Remove the ten screws fixing the IPM board 3 Unfasten the connector of the reactor 4 Unfasten the connector of the compressor IPM board PCB board 4s cr e w s ...

Page 116: ...er parts Connectors CN17 T3 T4 temp sensor 2p 2p white CN7 Tdischarge temp sensor 2p white CN12 Ttop temp sensor 2p white CN15 T2B A B C temp sensor 2p 2p 2p white CN18 CN19 CN22 Electronic expansive valve A B C 6p 6p 6p red red red CN25 CN23 CN20 S A S B S C 3p 3p 3p white white white Wires CN1 CN2 4 way valve blue blue CN5 CN6 Crankcase heating cable red red CN3 L1 IN red CN7 CN15 CN17 CN18 CN19...

Page 117: ...f item 1 2 3 2 Remove the electrical control box and partition plate 3 Extract refrigerant gas 4 Remove the sound insulation material and crankcase heating cable 5 Remove terminal cover of compressor and disconnect wires of compressor thermo and compressor from the terminal 6 Remove the discharge pipe and suction pipe with a burner 7 Remove the hex nuts and CN1 CN2 CN3 CN5 CN6 CN4 CN20 CN23 CN25 ...

Page 118: ...inductance 4 Disconnect two pieces of wires connected from the cover of inductance 5 Remove two screws of reactor and remove the reactor 6 The 4 way valve How to remove the 4 way valve 1 Perform work of item 1 2 2 Extract refrigerant gas 3 Remove the electrical parts from item 3 4 Remove fixing screw of the coil and remove the coil 5 Detach the welded parts of 4 way valve and pipe Screws of cover ...

Page 119: ...nsion valve How to remove the expansion valve 1 Perform work of item 1 2 2 Remove the electrical parts from item 3 3 Remove the coils 4 Detach the welded parts of expansion valves and pipes Coils Expansion valves ...

Page 120: ... front side panel and remove the right front side panel 2 screws 4 Remove the screws of front panel and remove the front panel 10 screws 5 Remove the screws of big handle and remove the big handle 2 screws 6 Remove two screws of terminal board and eleven screws of right rear panel and remove the right rear panel Screws of top cover Screws of right front side panel Screws of right rear panel Screws...

Page 121: ...Screws of front panel Screws of right rear panel Screws of top cover ...

Page 122: ...trical control box cover 5 Disconnect the fan motor connector CN37 5p white from the PCB board 6 Remove the fan motor after unfastening six fixing screws 3 Electrical parts How to remove the electrical parts 1 Perform work of item 1 2 2 Remove the ten screws fixing the IPM board 3 Unfasten the connector of the reactor 4 Unfasten the connector of the compressor IPM board PCB board 4s cr e w s ...

Page 123: ...5 Disconnect following 5 pieces of connection wires and connectors between IPM and PCB L OUT red N OUT blue CN38 2p white CN21 5p white CN39 2p blue ...

Page 124: ...e CN18 CN19 CN22 Electronic expansive valve A B C 6p 6p 6p red red red CN25 CN23 CN20 S A S B S C 3p 3p 3p white white white Wires CN1 CN2 4 way valve blue blue CN5 CN6 Crankcase heating cable red red CN3 L1 IN red CN4 N IN black 8 Disconnect the grounding wire yellow green after removing the big handle and the right rear panel 9 Remove the PCB board CN7 CN15 CN17 CN18 CN19 CN22 CN1 CN2 CN3 CN5 CN...

Page 125: ...gerant gas 4 Remove the sound insulation material and crankcase heating cable 5 Remove terminal cover of compressor and disconnect wires of compressor thermo and compressor from the terminal 6 Remove the discharge pipe and suction pipe with a burner 7 Remove the hex nuts and washers fixing the compressor to bottom plate 8 Lift the compressor ...

Page 126: ... of wires connected from the cover of inductance 5 Remove two screws of reactor and remove the reactor 6 The 4 way valve How to remove the 4 way valve 1 Perform work of item 1 2 2 Extract refrigerant gas 3 Remove the electrical parts from item 3 4 Remove fixing screw of the coil and remove the coil 5 Detach the welded parts of 4 way valve and pipe Screws of cover of inductance Screws of reactor Co...

Page 127: ...nsion valve How to remove the expansion valve 1 Perform work of item 1 2 2 Remove the electrical parts from item 3 3 Remove the coils 4 Detach the welded parts of expansion valves and pipes Coils Expansion valves ...

Page 128: ...ront side panel and remove the right front side panel 2 screws 4 Remove the screws of front panel and remove the front panel 10 screws 5 Remove the screws of big handle and remove the big handle 4 screws 6 Remove two screws of terminal board two screws of water collector and thirteen screws of right rear panel and remove the right rear panel Screws of top cover Screws of front panel Screws of righ...

Page 129: ...Screws of big handle Screws of right rear panel Screws of water collector Screws of terminal board ...

Page 130: ... unfastening four fixing screws 3 Electrical parts How to remove the electrical parts 1 Perform work of item 1 2 2 Disconnect the following connection wires and connectors on the IPM P red connected to P2 on PCB N blue connected to P4 on PCB UVW blue red black connected to compressor CN1 5p white connected to CN7 on PCB CN202 2p white connected to CN8 on PFC CN3 2p white connected to CN34 on PCB 3...

Page 131: ...CN12 blue red connected to rectifier and red blue connected to P1 and P3 on PCB CN7 4p red connected to CN11 on PCB CN8 2p white connected to CN202 on IPM 5 Remove the PFC board after remove the two screws 6 Disconnect four wires red blue from PFC and black red from PCB then the rectifier can be removed CN7 CN8 CN12 R CN12 C ...

Page 132: ...ase heating cable CN11 4p red connected to CN7 on PFC CN13 T2B A B C D temp sensor 2p 2p 2p 2p white CN33 Tdischarge temp sensor 2p white CN8 T3 T4 T3 T4 temp sensor 2p 2p white CN9 High and low pressure switch 2p 2p white CN18 CN19 CN20 CN21 electronic expansive valve A B C D 6p 6p 6p 6p red red red red CN27 CN28 CN29 CN30 S A B C D 3p 3p 3p 3p white white white white CN1 CN2 red black connected ...

Page 133: ...ate 3 Extract refrigerant gas 4 Remove the sound insulation material and crankcase heating cable 5 Remove terminal cover of compressor and disconnect wires of compressor thermo and compressor from the terminal 6 Remove the discharge pipe and suction pipe with a burner 7 Remove the hex nuts and washers fixing the compressor to bottom plate 8 Lift the compressor CN1 CN2 ...

Page 134: ...4 Remove fixing screw of the coil and remove the coil 5 Detach the welded parts of 4 way valve and pipe 6 The expansion valve How to remove the expansion valve 1 Perform work of item 1 2 2 Remove the electrical parts from item 3 3 Remove the coils 4 Detach the welded parts of expansion valves and pipes Coil Welded parts Expansion valves Coils ...

Page 135: ...panel and remove the right front side panel 2 screws 4 Remove the screws of front panel and remove the front panel 10 screws 5 Remove the screws of big handle and remove the big handle 4 screws 6 Remove two screws of terminal board two screws of water collector and thirteen screws of right rear panel and remove the right rear panel Screws of top cover Screws of front panel Screws of right front si...

Page 136: ...Screws of front panel Screws of big handle Screws of right rear panel ...

Page 137: ...el from item 1 step 1 4 2 Remove the hex nut fixing the fan 3 Remove the fan 4 Remove the electrical control box cover after remove 5 screws 5 Disconnect the fan motor connector CN7 CN11 5p white on the IPM PFC board 6 Remove the fan motor after unfastening four fixing screws Screws of terminal board ...

Page 138: ...ect to of rectifier CN6 black connect to of rectifier CN3 yellow connect to reactor UVW blue red black connected to compressor CN55 5p white connect to CN5 on PCB CN9 7p white connect to CN6 on PCB CN7 5p white connect to DC fan 1 CN11 5p white connect to DC fan 2 5 Remove the IPM PFC board assembly after removing the 4 screws Screws of IPM PFC board IPM PFC board PCB board UVW to compressor CN3 C...

Page 139: ...ite for EXV of system A B C D E and F CN11 12p white T2B sensor of system A B C D E and F CN12 2p white Tp discharge temperature sensor CN10 4p white high pressure red and low pressure yellow switch CN9 4p white T3 condenser temperature and T4 ambient temperature sensor CN7 CN13 CN16 CN21 CN29 C N37 3p white power inputs and communication wire of system A B C D E and F 7 Remove the PCB board assem...

Page 140: ...ires of compressor thermo and compressor from the terminal 6 Remove the discharge pipe and suction pipe with a burner 7 Remove the hex nuts and washers fixing the compressor to bottom plate 8 Lift the compressor 5 The 4 way valve How to remove the 4 way valve 1 Perform work of item 1 2 2 Extract refrigerant gas 3 Remove the electrical parts from item 3 4 Remove fixing screw of the coil and remove ...

Page 141: ...nsion valve How to remove the expansion valve 1 Perform work of item 1 2 2 Remove the electrical parts from item 3 3 Remove the coils 4 Detach the welded parts of expansion valves and pipes Expansion valves Coils ...

Reviews: