


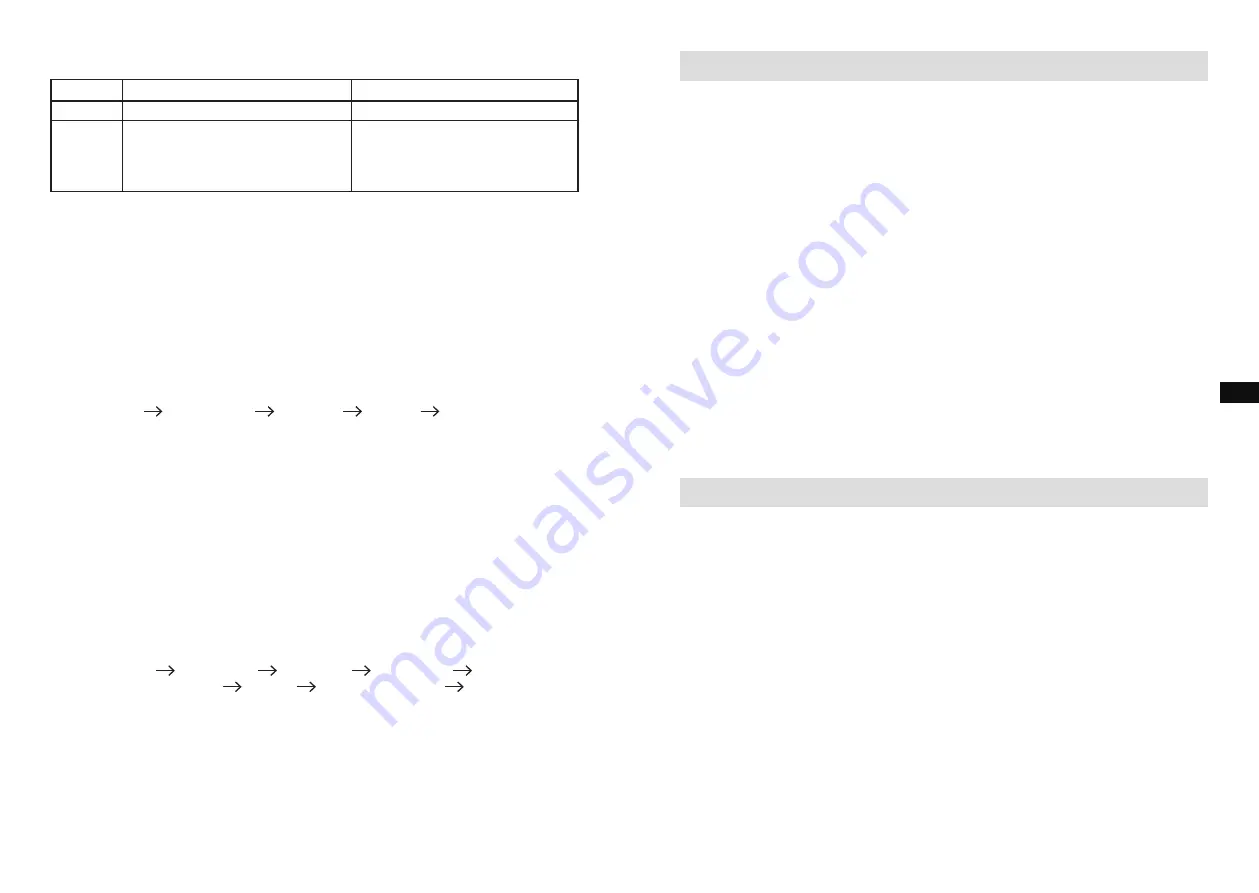
The radio supports a limited number of folders and files in the searching:
Mode
Max. no. of folders supported
Max. no. of files supported
Stop
999 (with folder name)
9999 (with file name)
Play 999
9999
(1-99 with folder name)
(1-999 with file name)
(100-999 without folder name)
(1000-9999 without file name)
Play mode
During USB memory device or SD card is playing,
1. Press the
MENU button
,
2. Rotate the
TUNING/SEEK knob
until the display shows “Play mode”. Press the
TUNING/SEEK knob
.
3. Rotate the
TUNING/SEEK knob
to the desire play mode and press the
TUNING/
SEEK knob
to confirm.
The radio will step through the following options:
Repeat 1
Repeat Folder
Repeat All
Random
Normal Play
Repeat 1
Repeatedly play the file you are listening to.
Repeat Folder Repeatedly play the files within the folder you are listening to.
Repeat All
Repeatedly play all files in the USB memory device or SD card.
Random
Play all files in the USB or SD card once in random order.
The selected Play Mode is indicated on the right of the top line of the display by an icon.
No icon is shown when in Normal Play mode.
Information function
During USB memory device or SD card playback, press the
INFO button
to cycle
through the following information (only if this information is present with the file on the
memory device):
File name (song)
Folder name
Artist name
Album name
Total no. of files
on the USB stick or SD card
Bit Rate
Clock time and Date
Normal playback
status (play time)
AUX IN MODE
A 3.5mm stereo
Aux In socket
is provided on the side behind the rubber cover, for
connecting an external audio device such as MP3 player or CD player (not included with
this radio).
1. Connect an audio SOURCE to the
Aux In socket
on the backside of the radio.
2. Press the
SOURCE button
to select AUX input. Display will show “AUX IN”.
3. Play the external player.
4. Adjust the volume of both the radio and the player for comfortable listening.
5. After use, close the rubber cover to prevent moist or dust from entering into the
sockets and radio.
Notes
: Never use the AUX-IN socket in rainy or moist conditions to prevent moist from
entering the radio. Keep the rubber cover closed under these conditions.
The Auto-Power management function will be activated in AUX mode. If there is no
signal* from the AUX input jack for a period over 15 minutes, the unit will automatically
switch to standby mode. The operation indicator and the LCD will go off in such case.
Pressing the
ON/OFF button
will wake up the unit.
* Also when the incoming signal from the external device is too low and cannot be
detected for a period of over 15 minutes by the Auto-Power management, the radio will
switch to standby mode.
To prevent this raise the output level of the external device enough to be detected.
SETTING THE CLOCK
The clock can only be set when the radio is in standby mode. If no buttons are pressed
for 5 seconds, the radio will exit the clock setup and the setting is cancelled.
1. Press and hold the
TUNING/SEEK knob
for 12 seconds until the hour digits flash
on the display.
2. Rotate the
TUNING/SEEK knob
to set the hour.
3. Press the
TUNING/SEEK knob
to confirm, the minute digits flash.
4. Rotate the
TUNING/SEEK knob
to set the minute.
5. Press the
TUNING/SEEK knob
to confirm, the day flashes on the display.
6. Rotate the
TUNING/SEEK knob
to set the current day.
7. Press the
TUNING/SEEK knob
to confirm, the month flashes.
8. Rotate the
TUNING/SEEK knob
to set the current month.
9. Press the
TUNING/SEEK knob
to confirm, the year will then flash on the display.
10. Rotate the
TUNING/SEEK knob
to set the current year.
11. Press the
TUNING/SEEK knob
to confirm, “SYNCLOCK ON” flashes.
12. Rotary the
TUNING/SEEK knob
to select “SYNCLOCK ON” or “SYNCLOCK OFF”.
13. Press the
TUNING/SEEK knob
to confirm and finish the clock setting.
GB
20
19


