8
7
6
4
2
5
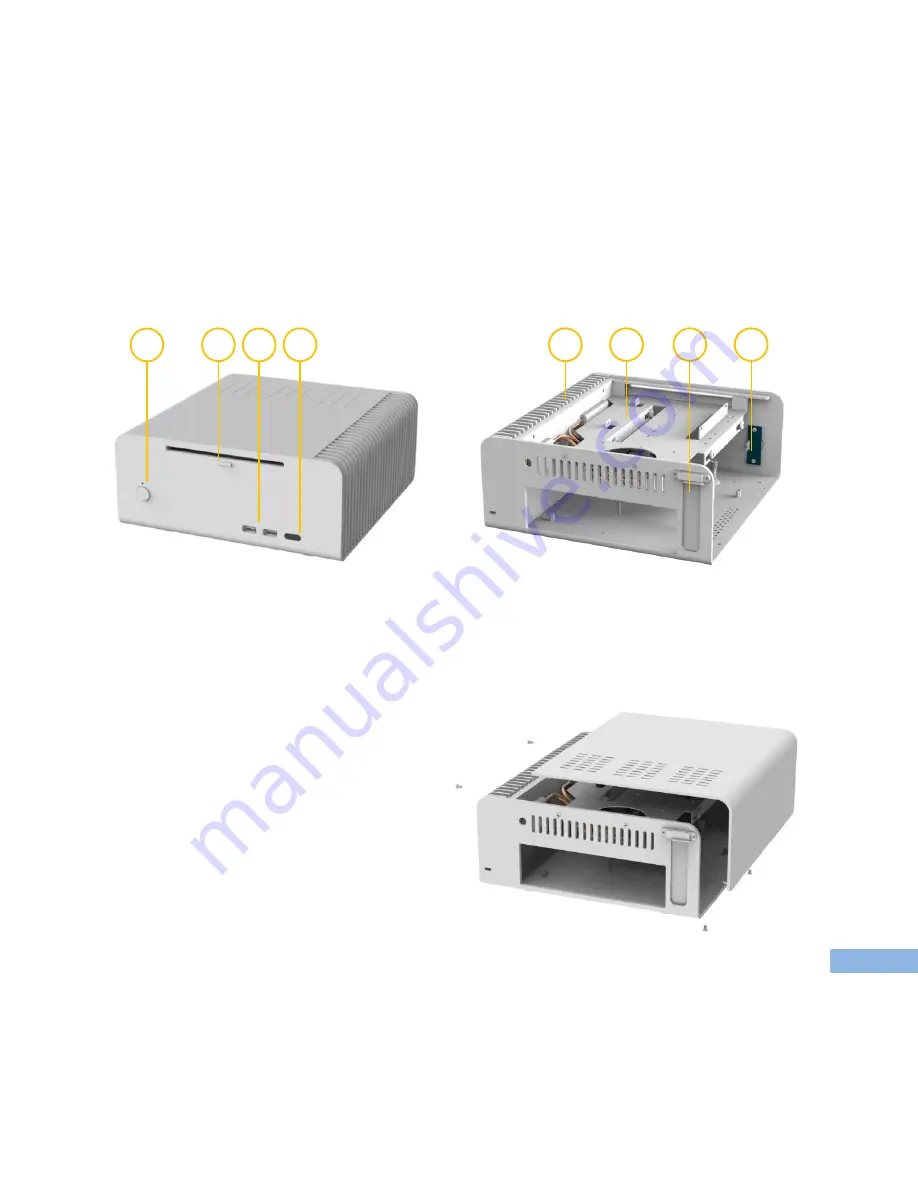
Overview
1
Power Button & LED
2
ODD Eject Button (FLM-8)
3 USB Ports 2.0 & 3.0 on the side
4
IR Receiver Window
5
Heat Sinks
6
HDD/ODD tray
7
PCI Expansion Slot
8
Power Button PCB
Removing top panel.
Attention:
Our chassis are built with very small gaps
between front, top and back, so please be careful
when removing and reinstalling top panel. To
avoid scratches, please loose two screws in the
back and three screws in the bottom.
P4-12
3
1
Summary of Contents for FLM-7
Page 1: ...2014...


