


Doc Date: November 1, 2018 Version: 1.4.0
©Perenio IoT spol s r.o. All Rights Reserved
2
back by clockwise rotating it into the bracket.
3. Log in to the User account of the Perenio
Smart Building Management System
app and proceed with the following actions:
• Click on the icon in the right upper corner of the
“Devices” tab and select “Add new device”;
• Click on the “Sensors” button in the list;
• Select the CG to which the Smoke Sensor shall
be connected (The screen will be displayed if
more than one CG is connected to this location).
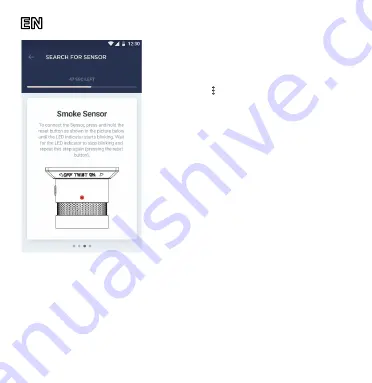
4. As soon as the Control Gateway starts
searching for sensors, press and hold the reset
button on the Smoke Sensor until the LED
flashes. When it stops flashing, press and hold
the reset button until the LED flashes again.
NOTE. When first connected, the Smoke Sensor
should be placed at a distance of not more than
4.5 m from the Control Gateway.
5. Upon successful connection to the
Control Gateway, enter the Sensor name
and select the room where it is to be
installed (or create a new room).
6. Install the Sensor in the required place using screws or the 3M tape.
The Smoke Sensor is successfully connected!
SAFETY OPERATION RULES
1.
The User shall observe recommendations on ceiling installation, as well as storage and transportation conditions, and working temperature ranges as
specified in the Installation and Operation Manual.
2.
The device must not be installed outdoors or exposed to moisture, dust, marine air, etc.
3.
It is not allowed to drop, throw or disassemble the device, as well as attempt to repair it on one’s own.
For details on the device description, certificates, warranty and quality issue companies, as well as the Perenio Smart Building Management System
app functionality, see relevant Installation and Operation Manuals available for downloading at
perenio.com


