Pentair 123343 Owner'S Manual Download Page 4

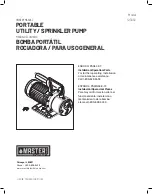
For parts or assistance, call Master Plumber Customer Service at 

1-800-628-9439

Installation 4

SPECIFICATIONS

Power Supply Required. ......................................... .115 Volts
Nameplate Amps .......................................................... 9.8A
Circuit Requirement (minimum) ........................... 15.0 Amps
Discharge Adapter .........................1" NPT x 3/4” garden hose

BEFORE YOU INSTALL YOUR PUMP

Pump clean water only with this pump.
NOTICE: This unit is not designed for applications involving 

salt water or brine! Use with salt water or brine will void 

warranty.
To avoid clogging the pump and damaging the shaft seal, do 

not pump water containing solids, foreign material, sand, silt, 

or abrasives. Always have the suction strainer installed when 

the pump is operating. Failure to use a strainer may cause 

the pump to fail and void the warranty.
Clean the strainer and flush out the pump after each 

use.  Make sure all of the hose and pipe connections in 

the suction line are tight. An air leak in the suction line 

will prevent the pump from priming and reduce pump 

performance.
To prevent damage to pump materials, do not use pipe joint 

compounds on pump ports. Use only teflon tape or Plasto-

Joint-Stik* to seal the threads.
Tighten all of the piping joints to the pump hand tight +1-1/2 

turns only. Overtightening may break the pump and will void 

the warranty.
Do not allow the pump or any system component to freeze. 

Freezing will void the warranty.
Periodically inspect the pump and the system components.

PRIMING THE PUMP

All suction connections must be airtight. Make sure the 

suction lift is not more than 25 feet (7.6M). 
NOTICE: 'Priming' refers to the pump expelling all air in the 

system and beginning to move water from its source out 

into the system. It does not refer only to pouring water into 

the pump (although pouring water in is usually the first step).

Burn Hazard. NEVER run the pump dry. 

Running the pump without water may cause 

pump to overheat, damaging seal and possibly causing 

burns to persons handling the pump. Running pump without 

water can damage the impeller and may damage the seal, 

causing leaking or flooding, and will void the warranty. Fill 

the pump with water before starting it.

Follow the steps below.
1.  Remove the priming plug.
2.  Make sure the suction and the discharge valves and any 

hoses on the discharge side of the pump are open.

3.  Fill the pump and suction pipe with water 

4.  Replace the priming plug, using Teflon tape on the 

thread; tighten the plug.


NOTICE: If a priming tee and plug have been provided 

for a long horizontal run, be sure to fill the suction pipe 

through this tee and replace the plug. (Use Teflon tape 

on the plug.)

5.  Start the pump; water should be produced in 10 minutes 

or less. The time will depend on the depth to water. If 

no water is produced within 10 minutes, stop the pump, 

release all the pressure, remove the priming plug, refill 

the ports and pipe and try again.

Pumping From Lakes, Streams, and Ponds  

(See Figure 1)

Locate the pump as near as possible (vertically) to the 

water source, to keep the suction lift (distance from the 

water to the pump) as low as possible. Place the pump 

on level support. Protect against excess moisture and 

flooding.
Long pipe runs and many fittings increase friction and 

reduce flow. Use the smallest possible number of fittings 

and the shortest possible run for piping. 
Support the weight of the pipe. 
Be sure the water is clear of debris which can clog the 

pump, such as sand, dirt, or scale. Be sure the foot valve 

and the pipe are clean and in good condition; scale or dirt 

in the foot valve can cause the valve to leak. Valve leakage 

may cause the pump to lose its prime, which can result in 

pump failure.

PERFORMANCE


Output Pressure 


Maximum

 Model 

10 

20 

30 

40 

50 

PSI

 123343 

10 

8.5 

8.0 

7.5 

7.0 

6.0 

80

Figure 1: Typical installation

6128 1109

Hose Adapters

115V, GFCI
Protected,
Grounded 
Outlet Box

Discharge Line
(Reinforced Hose 
or Rigid Pipe)

Suction Line
(Reinforced Hose 
or Rigid Pipe)

Priming Cap

Drain Cap

Foot Valve (One-way valve)
with strainer (clean frequently)

* Lake Chemical Co., Chicago, Illinois

Summary of Contents for 123343

Page 1: ...eration Parts For further operating installation or maintenance assistance Call 1 800 628 9439 ESPAÑOL PÁGINAS 8 13 Instalación Operación Piezas Para mayor información sobre el funcionamiento instalación o mantenimiento de la bomba Llame al 1 800 628 9439 Model 123343 2018 TRU590 09 17 18 Chicago IL 60631 Phone 1 800 628 9439 www masterplumberpump com ...

Page 2: ...sing Check with your local health de part ment for testing pro ce dures 7 Complete pump and piping must be protected against freezing Freezing will cause damage and void the warranty 8 This pump is not designed nor intended for the pumping of chemicals or corrosive liquids Pump water only with this pump 9 Do not run pump dry If the pump is dry damage will result and void the warranty ELECTRICAL SA...

Page 3: ...ump s cord tag and original receipt of purchase to the retail store Dispose of the pump according to local disposal ordinances Exceptions to the Twenty Four 24 Month Limited Warranty Product Warranty Period Drill Pump 90 Days MiniVac Pump 12 Volt MiniVac Pump Engine Drive Self Priming Pump Jet Pumps Jet Pump and Tank System Sprinkler Pumps 1 Year Portable Transfer Pump 4 Submersible Well Pumps 3 Y...

Page 4: ...persons handling the pump Running pump without water can damage the impeller and may damage the seal causing leaking or flooding and will void the warranty Fill the pump with water before starting it Follow the steps below 1 Remove the priming plug 2 Make sure the suction and the discharge valves and any hoses on the discharge side of the pump are open 3 Fill the pump and suction pipe with water 4...

Page 5: ...harge The pump can supply up to 3 4 sprinklers depending on GPM output of the sprinklers Electrical Hazardous voltage Risk of dangerous or fatal electric shock Plug the pump into a 115 Volt 60 Cycle Ground Fault Circuit Interrupter GFCI protected grounded outlet only The pump is equipped with a 3 wire grounded cord and plug Do not modify or remove the plug Make sure the pump circuit meets the Nati...

Page 6: ...tions on suction line and shaft seal with soapy water 2 Water level below suction pipe inlet 2 Lower suction line into water and re prime If receding water level in well exceeds 25 7 6M a deep well pump is needed Impeller is plugged Clean impeller Foot valve is stuck shut Replace the foot valve Pipes are frozen Thaw pipes Foot valve and or strainer are Raise the foot valve and or strainer above bo...

Page 7: ...P0170 11 Handle 1 101P1450 12 Washer Handle 1 121P1500 13 Screw Handle 1 121P1600 14 Lock Nut Handle 1 121P0950 15 Water Singer 1 102P0540 16 Handle Grip Handle 1 102P1650 17 Fan Cooling 1 102P0570 18 Fan Cover 1 721S1090 19 Power Cord 1 191P0560 20 Screws Capacitor Holder 11 121P2060 21 Grounding Lug 1 171P4070 22 Capacitor Box W Cover 1 102P2830 23 Capacitor 1 171P5430 24 O Ring Capacitor Box 1 ...

Page 8: ...ocal 7 Tanto la bomba como los tubos deben estar protegidos contra heladas Las heladas provocarán daños y anularán la garantía 8 Esta bomba no ha sido diseñada ni concebida para bombear sustancias químicas o líquidos corrosivos Bombee sólo agua con esta bomba 9 No deje marchar la bomba en seco Si la bomba está seca ocurrirán daños y la garantía quedará anulada SEGURIDAD ELÉCTRICA La bomba viene pr...

Page 9: ...os fines de la garantía devuelva la etiqueta del cordón de la bomba y el recibo de compra original a la tienda minorista Descarte la bomba cumpliendo con todas las normas locales que correspondan para su eliminación Excepciones para la Garantía Limitada de veinticuatro 24 Meses Producto Período de garantía Bomba a taladro 90 días Bomba MiniVac Bomba MiniVac de 12 voltios Bomba autocebadora a motor...

Page 10: ...undaciones y la garantía quedará anulada Llene la bomba con agua antes de activarla Siga los pasos siguientes 1 Saque el tapón de cebadura 2 Asegúrese de que las válvulas de aspiración y de descarga y toda manguera del lado de la descarga de la bomba estén abiertas 3 Llene la bomba y la tubería de aspiración con agua 4 Vuelva a colocar el tapón de cebadura usando cinta de teflón en la rosca apriet...

Page 11: ...res Información eléctrica Tensión peligrosa Riesgo de choque eléctrico peligroso o fatal Enchufe la bomba solamente en un tomacorriente de 115 60 de ciclo conectado a tierra y protegido por un disyuntor de escape a tierra GFCI La bomba viene equipada con un cordón y enchufe trifilar con conexión a tierra No modifique ni saque el enchufe Asegúrese de que el circuito de la bomba cumpla con las norma...

Page 12: ...debajo de la 2 Baje la línea de aspiración dentro del agua y vuelva a cebar Si el nivel admisión de la tubería de aspiración del agua que se retira supera los 25 7 6 m se necesitará una bomba para pozos profundos El impulsor está obstruido Limpie el impulsor La válvula de pie está atascada en Reemplace la válvula de pie la posición cerrada Las tuberías están congeladas Descongele las tuberías La v...

Page 13: ...21P1500 13 Tornillo Manija 1 121P1600 14 Contratuerca Manija 1 121P0950 15 Deflector del agua 1 102P0540 16 Agarradera de la manija Manija 1 102P1650 17 Ventilador refrigerante 1 102P0570 18 Cubierta del ventilador 1 721S1090 19 Cordón eléctrico 1 191P0560 20 Tornillos Soporte del capacitor 11 121P2060 21 Saliente de puesta a tierra 1 171P4070 22 Caja del capacitor con cubierta 1 102P2830 23 Capac...

Page 14: ...THIS PAGE INTENTIONALLY LEFT BLANK ...

Page 15: ...THIS PAGE INTENTIONALLY LEFT BLANK ...

Page 16: ......

Reviews: