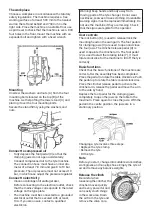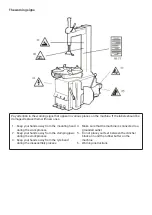
Pump the tyre
Check that the tyre is in good condition and make
sure that there is no damage before starting
pumping. Install the valve core if removed. Keep
your hands and body as far away from the tyre as
possible. Inflate the tyre with short inflations, while
checking the tyre pressure. Do not inflate the tyre
with lower or higher air pressure than
recommended by the tyre manufacturer.
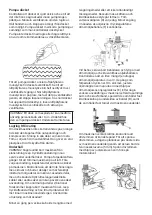
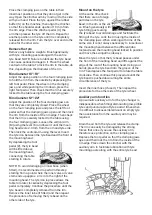
To inflate the tyre, connect the air filler nozzle to
the tyre valve stem. Make sure that the air filler
nozzle is completely depressed over the threads of
the valve stem. When the air filler nozzle is in place,
lock it to the valve stem by releasing the locking
device. As soon as the tyre has reached the correct
tyre pressure, loosen the air filler nozzle from the
valve stem and screw on the valve cap.
WARNING! A tyre that explodes can cause
serious personal injury or even death of the
person inflating the tire. Do not underestimate
the danger.
Storage
If the tyre machine is not to be used for a long time,
it must be disconnected from the mains voltage
and the compressor. Lubricate all parts that can
rust. Drain the oil and drain the water filter. Hang
over a large plastic bag to protect from dust.
Maintenance
WARNING! Always disconnect the machine from
the electrical connection respective compressed
air connection before service or maintenance.
Pump the foot pedal several times to empty the
machine of all air. Before each use, inspect the
general condition of the machine. Check that
there are no loose screws and bolts, parts that are
incorrectly aligned, moving parts such as notches,
damaged parts, loose and damaged compressed
air hoses/electrical cables or other things that can
affect safe use. If abnormal noises or vibrations
occur, disconnect the machine from the electrical
or compressed air connection and make sure the
problem is resolved before using the machine aga
-
in. Do not use damaged equipment!
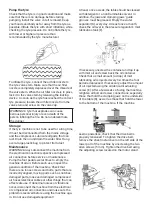
At least once a week, the table should be cleaned
with detergent or a non-flammable solvent. In
addition, the jaws and clamping jaws’ guide
grooves must be greased. Empty the water
separator (D) every day. At least once a month,
check the oil level in the pressure regulator’s mist
lubrication tank (F).
If necessary, unscrew the container and top it up
with mist oil and screw back the oil container.
Check that a small amount (a drop) of mist
lubricating oil is injected every 3-4 times the foot
pedal is depressed. If necessary, adjust the amount
of oil injected using the oil lubricator adjusting
screw (E). After a few weeks of using the machine,
retighten all bolt and screw connections, especially
those that hold the clamping jaws on the underside
of the table (B), as well as those that hold the tower
to the bottom of the machine. If the machine
seems powerless, check that the drive belt is
properly tensioned. To tighten the drive belt,
remove the sheet metal cover on the left side of the
lower part of the machine by unscrewing the two
allen screws (5 mm). Tighten the drive belt using
the adjusting screw located on the motor stand.
Summary of Contents for 32836
Page 1: ...Tyre changer U 2011 D ckmaskin U 2011 Item No 32836...
Page 8: ...Varningsskyltarna...
Page 9: ......
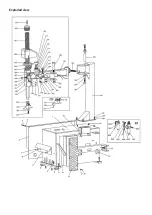
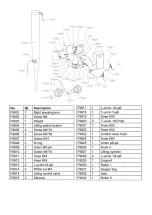
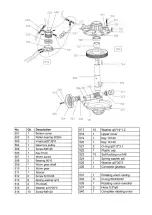
Page 16: ...Exploded view...
Page 17: ......
Page 18: ......
Page 19: ......
Page 20: ......
Page 21: ......
Page 22: ......
Page 23: ......
Page 24: ......
Page 25: ...Electrical circuit diagram...
Page 26: ...Pneumatic diagram...
Page 28: ......
Page 29: ......


