background image

11

Note:  When Port 1 is in use, do not use the uplink port.  Also, do not plug a

phone jack connector into any RJ-45 port. This may damage the switching

hub.

4. Verify that either the Link/Act LED or 100M LED of the port is turned on

(or blinking).  The Link/Act LED illuminates if a valid 10BASE-T link is

established.  Similarly, the 100M LED is turned on if a 100BASE-TX

device is attached to the device. 

You can connect an additional hub to the FX-05SC via a twisted-pair cable

to increase the total number of ports (nodes in your network).  This scheme

is called 

cascading

1. Prepare a straight-through cable with RJ-45 plugs.  Cable type must be

Category 5 if you are adding a device with 100BASE-TX support.  If the

other device is for 10Mbps connection, you may use Category 3 or

g r e a t e r. (Network cables available from PCI: UTP-xx-05, UTP-xx-DT,

STP-xx-05)

FX-05SC

10

FX-05SC

2

5

Cascading to an Additional Hub or a Switch

2-1  Connecting by RJ-45 Ports

1. Attach the supplied AC power adapter to the power jack on the rear

panel.

2. Connect the power adapter to a wall outlet. 

3. Verify that the Power LED on the front panel is turned on.

Note:

Please make sure to use the AC adapter included in the product package.

The warranty does not cover any damage incurred by the use of any another

AC adapter.

1. Install a 10BASE-T/ 100BASE-TX network adapter card and driver in

each computer you want to network.

2. Prepare a twisted-pair cable with RJ-45 plugs at both ends.  Cable length

should not exceed 100 meters, and cable type must be Category 5 if you

are using a 100BASE-TX network card.  If the network card is for

10Mbps connection, you may use Category 3 or greater.  (Network cables

available from PCI: UTP-xx-05, UTP-xx-DT, STP-xx-05)

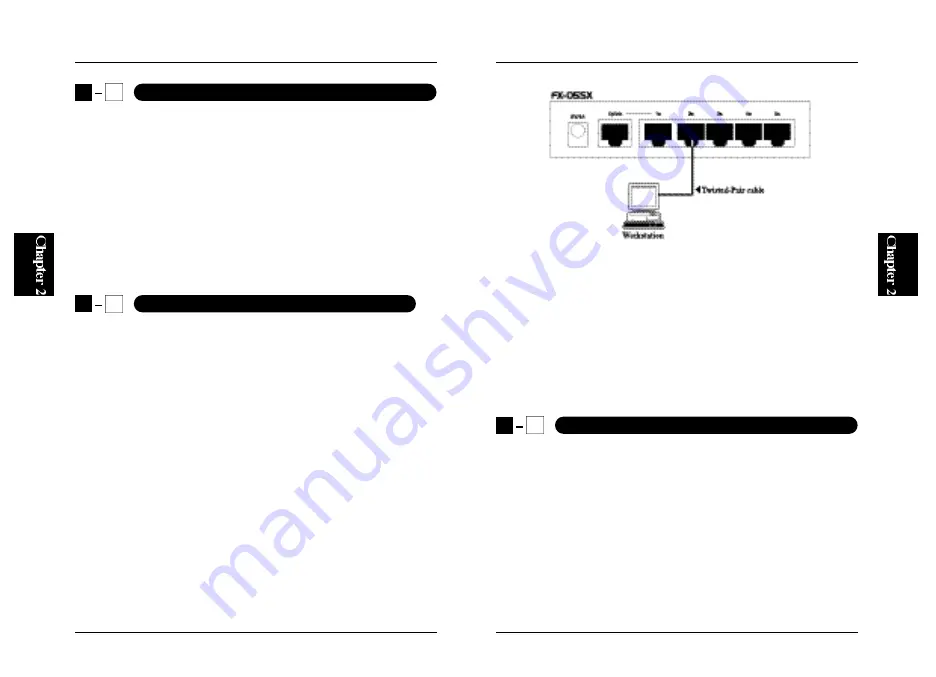
3. Attach one end of the cable to the RJ-45 port on the computer

s network

adapter, and the other end to any of Port 1-5 of FX-05SC.  Using the hub

in a stand-alone configuration, you can network up to 5 computers.

2

3

Connecting the Power Cable to FDX-16S/24S/32S

2

4

Connecting Computers to the FX-05SC

Summary of Contents for FX-05SC

Page 1: ...da Takahashi Bldg 1 7 Kanda Sudacho Chiyoda Ku Tokyo 101 0041 Japan Tel 81 3 3256 9091 Fax 81 3 3256 9207 TAIWAN http www planex com tw E mail info planex planex com tw 11F No 190 Chung Cheng Rd Hsin...

Page 2: ......

Page 3: ...ople as well as the appliance itself When mounting the product to a wall or shelf be sure to follow the manufacturer s instructions You may only use a mounting kit approved by the manufacturer Slots a...

Page 4: ...change in performance indicating a need of repair When replacement parts are required be sure to obtain parts specified by the manufacturer Unauthorized substitutions may result in fire electric shoc...

Page 5: ...onmental Requirements Installing the Switching Hub Connecting the Power Cable to the Switch Connecting Computers to FX 05SC 10 Cascading to an Additional Hub or a switch 1 1 2 3 4 5 1 1 2 3 4 5 Append...

Page 6: ...hen combined with a network adapter with Flow Control support ex FNW 9802 T the switch can perform Flow Control in 200M full duplex Provides five RJ 45 STP ports for 100BASE TX 10BASE T connection Com...

Page 7: ...s detected on the port 1 4 Parts Terminology 1 1 Front Panel LED indicators for monitoring the status of each port and the network Provides one uplink port for cascading to another hub Fan less quiet...

Page 8: ...to include this information in your user registration form This number is also required for all technical support services 1 3 Bottom View Rear Panel Port 1 5 RJ 45 ports for 100BASE TX 10BASE T conne...

Page 9: ...nt to one of the ports immediately after its destination address is discerned Since packets themselves are not inspected some error packets may leave the switch among normal packets In contrast Store...

Page 10: ...any dirt by a vacuum cleaner etc Always place the product on a level surface ex desktop Avoid placement on an unstable or uneven surface 8 FX 05SC Chapter 2 Installation 2 1 Environmental Requirement...

Page 11: ...ch 2 1 Connecting by RJ 45 Ports 1 Attach the supplied AC power adapter to the power jack on the rear panel 2 Connect the power adapter to a wall outlet 3 Verify that the Power LED on the front panel...

Page 12: ...one end of the cable to the uplink port on the FX 05SC 3 Connect the other end of the cable to any of the 100BASE TX 10BASE T RJ 45 ports on the other device The Link Act LED illuminates if a valid 10...

Page 13: ...reseller for assistance 2 Perform the following tests Please check whether the RJ 45 cable is functional Replace with another working cable and see whether the condition can be improved Be sure to us...

Page 14: ...or Full Duplex mode There is a non standardized technology called Auto sensing Unlike Auto negotiation Auto sensing detects only the 10BASE T 100BASE TX speed modes CANNOT recognize the duplex modes...

Page 15: ...plied to 10BASE T cascading Please see the table below and Figure C 1 and C 2 for more information on cascading limitations for 10BASE T 100BASE TX networks A switching hub can be inserted in the netw...

Page 16: ...21 C 3 The limitation of cascading switching hub FX 05SC 20 FX 05SC C 1 The limitation of cascading 100BASE T C 2 The limitation of cascading 10BASE T...

Page 17: ...ns Supports filtering forwarding and address learning of packets Filtering Forwarding Rate 148 800pps Max Switching Scheme Store and Forward Address Table 1 000 entries Packet Buffer 128KB Flow Contro...

Page 18: ...24 FX 05SC...

Reviews: