© PCE Instruments
9
•
After starting the device, enter the settings menu (Screen 9) and set the following
parameters:
NetMode: AP
B.SSID: RHW-925
C.IP: 192.168.0.254
D.Port: 200
•
Connect to the device with your smart phone Wi-Fi.
•
Start the MeterApp and select Meter 1 on the first screen (Image 2).
•
Press the settings button (Image 3, step 2).
•
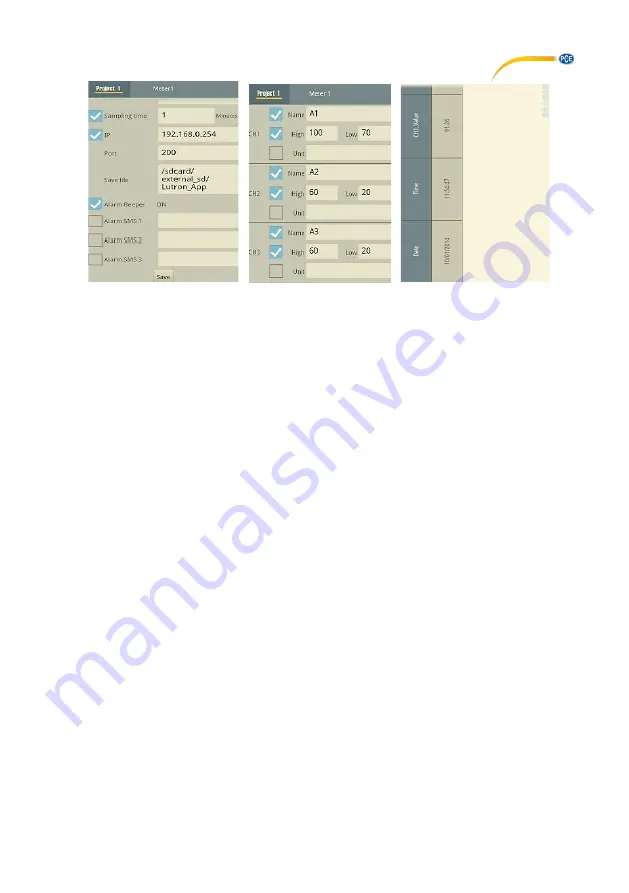
In the settings menu (Image 4) you can set/change the following settings:
o
Meter name (default is Meter 1)
o
CH No: channel number in accordance with the device channel number
o
Sampling time: must be set, in minutes. Check back after doing the logging
function.
o
IP: must be set in accordance with the device. The default IP address is
192.168.0.254.
o
Port: must be set in accordance with the device. The default port is 200.
o
Save File: select the log file save path here.
o
Alarm Beeper: device beeps when the conditions on
Image 6
are met.
o
Alarm SMS: device sends an SMS as an alarm to your smart phone when
the conditions on
Image 6
are met.
•
The
Save
button (Image 5) stores the set settings and returns the device to
Image 3
. The
Wi-Fi icon (Step 3) will now flash green, indicating that the device is connected.
•
When in the project screen (Image 3), tap on CH1 (step 4) to enter the settings screen (image
6) and set the desired parameters. Then press the return button to go back to the project
screen (Image 3). When the measured values reach the conditions set in
Image 6
, the
numbers will become red and the device will either beep or send an SMS.
•
When in the project screen (Image 3), use the buttons in
Step 5
to switch the display directly
between Meter1 to Meter4.
•
Re-connect Use the reconnect button if the device loses connection.
•
Auto Log: the log will be saved based on the sampling time set in
Image 4
.
•
Manual Log: press the Manual Log button to save the log manually. The log file is in xml
formal.
•
View Log: view the recorded data directly on your smartphone (Image 7).
Image 5
Image 6
Image 7


