PAU 100cc Extra 300-SP ARF Instruction Manual Download Page 1


1


100cc Extra 300-SP ARF 

Instruction Manual 


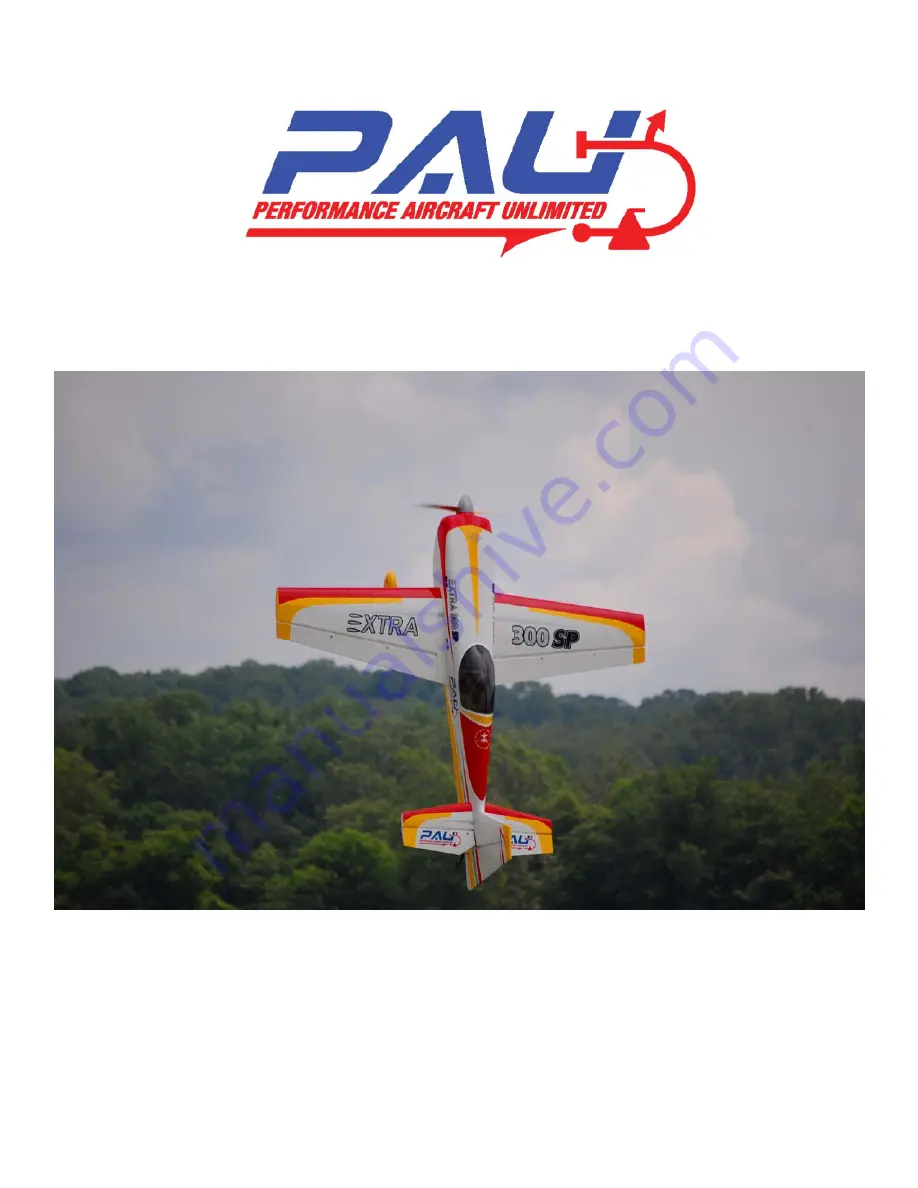
Congratulations and thank you for purchasing the Performance Aircraft Unlimited 105” Extra 300SP. The Extra 
is arguably one of the most renowned aerobatic aircraft ever produced. Walter Extra who designed the original 
Extra, named his aircraft by the horsepower rating of the motor placed in them. The Extra 300SP is one of the 
newest releases in full scale, and now in  R/C version. 
 
Our aircraft was designed with 1,922sq inches of wing area while keep the total weight to a minimum. Whether 
you want an aircraft precise enough to compete in IMAC or 3D until you’re airsick, the PAU Extra fits the bill. 
Its light weight gives you the stability in high-alpha to take it to the extremes of the flight envelope. If tumbling 

Summary of Contents for 100cc Extra 300-SP ARF

Page 1: ...rcraft by the horsepower rating of the motor placed in them The Extra 300SP is one of the newest releases in full scale and now in R C version Our aircraft was designed with 1 922sq inches of wing are...

Page 2: ...Chapter 4 Canopy and Fuselage Hatch Chapter 5 Engine Installation Chapter 6 Cowling installation Chapter 7 Rudder Installation Chapter 8 Hardware Installation Chapter 9 Radio and Control Surface Setu...

Page 3: ...assembly 1 Canopy 1 Carbon fiber wing tube 1 Carbon fiber stabilizer tube 4 Nylon wing retention bolts 6 H9 titanium pushrods turnbuckles 1 set of Dubro wheel collars 1 pair of Dubro wheel axles 1 HD...

Page 4: ...sure a scratch free finish Place an to ensure task completion Go over you model as necessary with a covering iron to insure all joints seams and corners are sealed properly Use your iron to ensure the...

Page 5: ...ch wrench Blue loc tite Allen wrench for wheel collars White wood glue such as Elmer s or Epoxy Prep the cuffs slice the supplied black neoprene tubing lengthwise Install on the cuffs around the edge...

Page 6: ...fuse it is best to leave a 1 16 gap so the cuffs don t quite touch the fuse so the cuffs do not damage the belly when the gear flexes Wipe off possible silicone excess and let cure Now let s get the...

Page 7: ...heel pants properly Mark the drilling location for the 4 40 bolts Drill the holes for the 4 40 bolts in the wheel pants at the locations you ve marked Apply some white wood or epoxy glue to the inner...

Page 8: ...ons Mark four evenly spaced locations for the screws on each side Double check to ensure all the marked screw locations will go into the hatch rail Remove canopy from the access hatch and drill the ma...

Page 9: ...rdware installation as it may need to be mounted towards the front of the aircraft for proper CG We will cover the installation of two popular engine choices in this manual the DA 85 and the DA 100 mo...

Page 10: ...e and offset centerline as a guide Mark the drilling locations and drill holes for 1 4 20 bolts Mount the motor using 1 2 standoffs for the DA 100 and four 1 4 20 x 1 3 4 long bolts Now that you have...

Page 11: ...he template provided by DA and made several light plywood rings stacked to achieve the correct standoff which is approximately 1 1 8 off the firewall Mount the motor using 1 1 8 solid mount for the 85...

Page 12: ...he cowl is preset and uses a ring to mount there will not be much to do here First cut out the bottom opening for cooling For the DA 100 using canisters you will only need to open the bottom of the co...

Page 13: ...ol surface into the stabilizer and butt the two surfaces together Move the surface back and forth a couple of times to make sure all the hinges are aligned correctly and the desired throw is attained...

Page 14: ...l dot or other fueling device Some foam rubber for mounting receiver ignition module and fuel tank Install all your flight control servos with the output shaft closest to the control surface Install 1...

Page 15: ...nt your arms parallel to the hinge line Be sure that you install the horns at the same height from the hinge line see attached By doing so you will have very little servo matching to do afterwards Scr...

Page 16: ...ot or fueling device Make sure you use Tygon fuel tubing inside the tank for the clunk as well Install the fuel tank just in front of the wing tube using zip ties or hook and latch Velcro straps Place...

Page 17: ...the carbon fiber wing tube Slide in each wing panel and secure them with the four nylon wing retention bolts Tip 6 Depending on climate conditions the wing tube may be too tight or too loose If the w...

Page 18: ...with the aircraft and its capabilities The recommended low rates for this aircraft are 25 degrees for ailerons with 0 to 20 expo 15 degrees for elevators with 0 to 20 expo 30 degrees for rudder with 0...

Page 19: ...surface hardware Gently tug on each surface to make sure the hinges are properly bonded Check the four 4 40 horizontal stabilizer fasteners and ensure they re in place and secured Check all servos for...

Page 20: ...t be at idle position whenever the nose is pointed down whether at vertical or 45 degrees down line Planes must be inspected frequently looking for any loosening screws bolts and glue joints Servos an...

Page 21: ...21 DA 100 Template If printing from Adobe turn off page scaling...

Page 22: ...22 Throw Template If printing from Adobe turn off page scaling Cut out around all the dotted lines...

Reviews: