


Introduction
28
SmartNode 4970 User Manual
4 • Initial configuration
Introduction
This chapter leads you through the basic steps to set up a new SmartNode and to download a configuration.
Setting up a new SmartNode consists of the following main steps:
Note
If you haven’t already installed the SmartNode, refer to chapter 3,
“SmartNode installation”
on page 22.
•
Configuring the desired IP address
•
Connecting the SmartNode to the network
•
Loading the configuration (optional)
Configuring the desired IP address
Factory-default IP settings
The factory default configuration for the Ethernet interface IP addresses and network masks are listed in
table 6
.
The Ethernet 0/0 port uses the DHCP client to automatically assign the IP address and network mask.
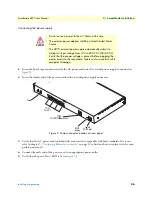
Connecting the SmartNode to the network
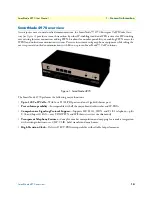
The SmartNode 4970 Series is equipped with an Auto-MDX Ethernet port, so you can use straight-through or
crossover cables for host or hub/switch connections (see
figure 6
).
Table 6. Factory default IP address and network mask configuration
IP Address
Network Mask
Ethernet 0 (ETH 0/0)
DHCP
DHCP
The interconnecting cables shall be acceptable for external use
and shall be rated for the proper application with respect to volt-
age, current, anticipated temperature, flammability, and
mechanical serviceability.
CAUTION


