EN
122
EN
123
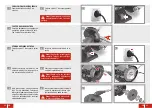
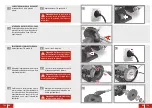
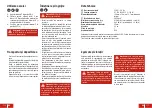
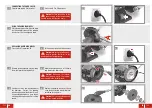
REPLACING A GRINDING WHEEL
Press switch
7
to position
O
.
1
2
3
4
Remove the wheel guard
2
by removing
the wheel guard securing bolts
4
.
Visually check the new grinding wheel
for damages. Percuss the grinding
wheel using a non-metallic tool. A fault-
free grinding disk gives a clear sound,
a damaged one gives a dull or rattling
sound.
5
Hold the grinding wheel
3
or
10
firmly
and remove the locking nut.
Caution!
Make sure the replace-
ment wheels match the require-
ments stated in the technical data!
Pull the power plug
5
out of the socket.
Caution!
Always switch off and un-
plug the grinder first. Wait for the
grinding wheels to stop rotating.
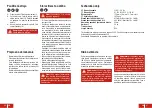
USING THE GRINDING WHEEL
Place the work piece firmly on the work
rest
9
and hold it to one of the grinding
wheels
3
or
10
at an adequate angle.
CONNECTING TO POWER SUPPLY
Plug the power plug
5
into socket.
1
1
Press switch
7
to ON position
I
.
Caution!
Before connecting to the
power supply, rotate the wheels by
hand to ensure that they run freely.
2
Replace the grinding wheel
3
or
10
and
clean the parts before reinstalling them
according to the picture.
Caution!
Only use grinding wheels
that are in good condition.
6
2
3
5
4
1
2
1
1
6

