


Release date: 24.07.18
rev 1.0 18
2 / 5
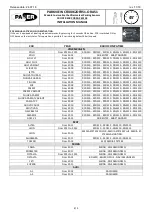
PARKVIEW CF00062OFR51-ORA51
Module to visualize the A ermarket Parking Sensors
FRONT REAR COBRA PS0158
INSTALLATION MANUAL
45’
The harness supplied with PARKVIEW is split in 2 sec ons: the first is composed by 4 wires to connect back the OEM radio of the vehicle.
In the QUADLOCK plug it must to connect:
YELLOW to the +12vdc posi ve wire
BLACK to the GND nega ve wire
GREEN to the CAN H
WHITE to the CAN L
PINK to the power of the parking sensor
The diagram above suggests the ho to manage the connec ons, the QUADLOCK plug is seen from the wire output side.
The second sec on of the harness is a kind of extension long 5 mts that must to lay down ll the boot, where is located the parking sensors device.
Then connect the 4 poles white MOLEX plug to the DISPLAY connector of the parking sensors as above described.
In the kit there are 2 module one for the rear one for the front, the connec on are both for Parkview modules;
For both modules the buzzer used is the one in the cable so do not use the one of the kit.
Once the connec ons have been made, the system will be working immediately, the PARKVIEW LED will be GREEN when the car canbus is switched on, indi-
ca ng that the module is working correctly.
When reverse gear is engaged, the parking sensor control unit will be ac vated, automa cally PARKVIEW will ac vate the display on the original radio. On
some radio models, the MUTE radio is also managed on the display. When reverse gear is removed, the display will be interrupted.
R 1 3 5
2 4
R 1 3 5
2 4
RCD 310
Switching on the parking sensors, Parkview led will generate some red/green flashes, confirming the right working.
ALTERNATIVE CONNECTION DRIVER SIDE
1
7
8
14
CAN L
CAN H
BUZZER
BUZZER
REAR
FRONT
Once the calibra on has been performed,
disconnect the BUZZER and connect con-
nector A: the system is now ready to
operate.
BUZ 4 3 2 1
A
A er making the connec ons, connect the
Parking Sensor KIT BUZZER and the PARK-
VIEW wiring connector B and calibrate the
Cobra system as usual.
BUZ 4 3 2 1
B
A
Once the calibra on has been performed,
disconnect the BUZZER and connect con-
nector A: the system is now ready to
operate.
BUZ 4 3 2 1
A
A er making the connec ons, connect the
Parking Sensor KIT BUZZER and the PARK-
VIEW wiring connector B and calibrate the
Cobra system as usual.
BUZ 4 3 2 1
B


