


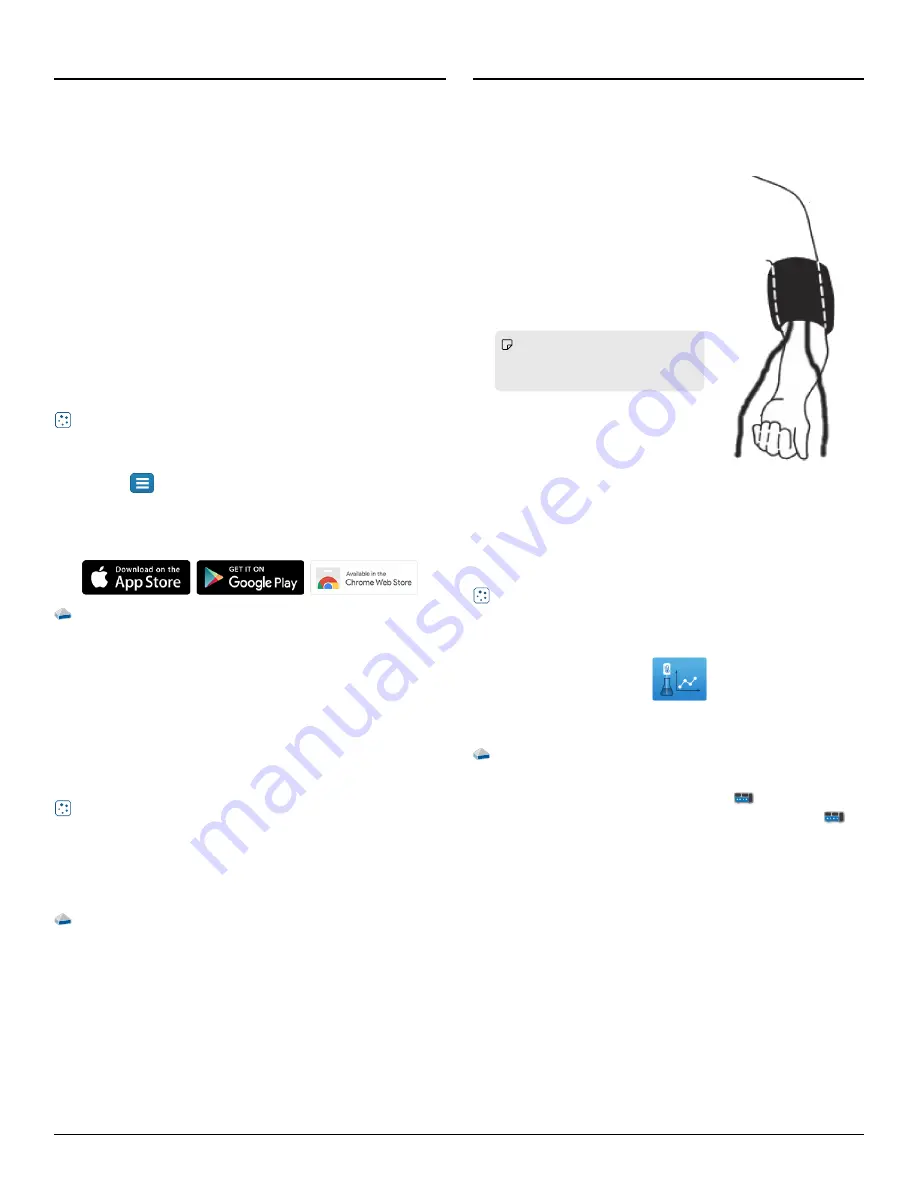
Figure 1. Cuff placement on
the arm.
Getting star
Getting started
ted
Perform the tasks in this section before using this device in the
classroom.
Char
Charge the batter
ge the batteryy
The Wireless Blood Pressure Sensor contains a rechargeable battery
that lasts an entire school day when fully charged. Charge the battery
before using the Wireless Blood Pressure Sensor for the first time
since it is not shipped with a full charge.
To charge the battery, connect the sensor to a USB wall charger or
powered USB port using the USB cable. The battery status light is
solid yellow while the battery is charging and changes to solid green
when fully charged.
Install or update data collection softwar
Install or update data collection softwaree
The latest update of PASCO Capstone or SPARKvue is required to use
the Wireless Blood Pressure Sensor. Download and install the
software from the PASCO website. Check if an update is available if
the software is already installed.
SP
SPARK
ARKvue
vue
Windows and Mac Computers
Windows and Mac Computers
Download: Go to pasco.com/sparkvue
pasco.com/sparkvue then click Downloads
Downloads.
Update: Click
then select Check for Updates
Check for Updates.
Mobile Devices and Chromebooks
Mobile Devices and Chromebooks
Search for SPARKvue in your device's app store. SPARKvue
automatically installs updates.
P
PASCO Capst
ASCO Capstone
one
Windows and Mac Computers
Windows and Mac Computers
Download: Go to pasco.com/capstone
pasco.com/capstone then click Downloads
Downloads.
Update: Click Help
Help then select Check for updates
Check for updates.
Check for a firmwar
Check for a firmware update
e update
Update the sensor firmware to access the latest features and bug
fixes. Sensor firmware is installed using SPARKvue or PASCO
Capstone. Connect the sensor to SPARKvue or PASCO Capstone to
check for a firmware update.
SP
SPARK
ARKvue
vue
1. Turn on the Wireless Blood Pressure Sensor.
2. Open SPARKvue then click Sensor Data.
3. Select the sensor that matches the device ID.
4. If a notification appears, click Yes
Yes to update the firmware. If a
notification doesn't appear, the firmware is up to date.
P
PASCO Capst
ASCO Capstone
one
1. Turn on the Wireless Blood Pressure Sensor.
2. Open Capstone then click Hardware Setup.
3. Select the sensor that matches the device ID.
4. If a notification appears, click Yes
Yes to update the firmware. If a
notification doesn't appear, the firmware is up to date.
Using the sensor
Using the sensor
Using the sensor requires two people since you can't measure your
own blood pressure. You need a partner to attach the cuff to your
arm, inflate the cuff, and collect the data.
Set up the har
Set up the hardwar
dwaree
1. Insert the luer connector on the
sensor into the connector on the
blood pressure cuff. Turn the
connector until it's finger-tight.
2. Press and hold the push-button
release valve to release all of the air
in the cuff.
3. Wrap the cuff snugly around the
upper left arm above the elbow.
Note:
Note: Remove any constrictive
clothing or jewelry that may
interfere with the cuff placement.
4. Position the cuff's bottom edge
about 3 cm above the elbow pit.
Rotate the cuff as needed to position
the white index line on the cuff over
the main artery on the inside of your
left arm.
5. Use the hook-and-loop material to
hold the cuff in place.
6. Allow the two tubes to hang down, one on each side of the arm.
Set up the softwar
Set up the softwaree
SP
SPARK
ARKvue
vue
1. Turn on the sensor.
2. Open SPARKvue then click Sensor Data
Sensor Data.
3. Select the that matches its device ID.
4. Under Quick Start Experiments, select Monitoring Blood Pressure
Monitoring Blood Pressure.
P
PASCO Capst
ASCO Capstone
one
1. Turn on the sensor.
2. Open Capstone then click Hardware Setup
Hardware Setup
.
3. Select the that matches its device ID. Click Hardware Setup
Hardware Setup
to
close the panel.
4. Select the Monitoring Blood Pressure
Monitoring Blood Pressure Quick Start Experiment.
2 | Wireless Blood Pressure Sensor


