


PS-3231
//code.Node
012-16652A
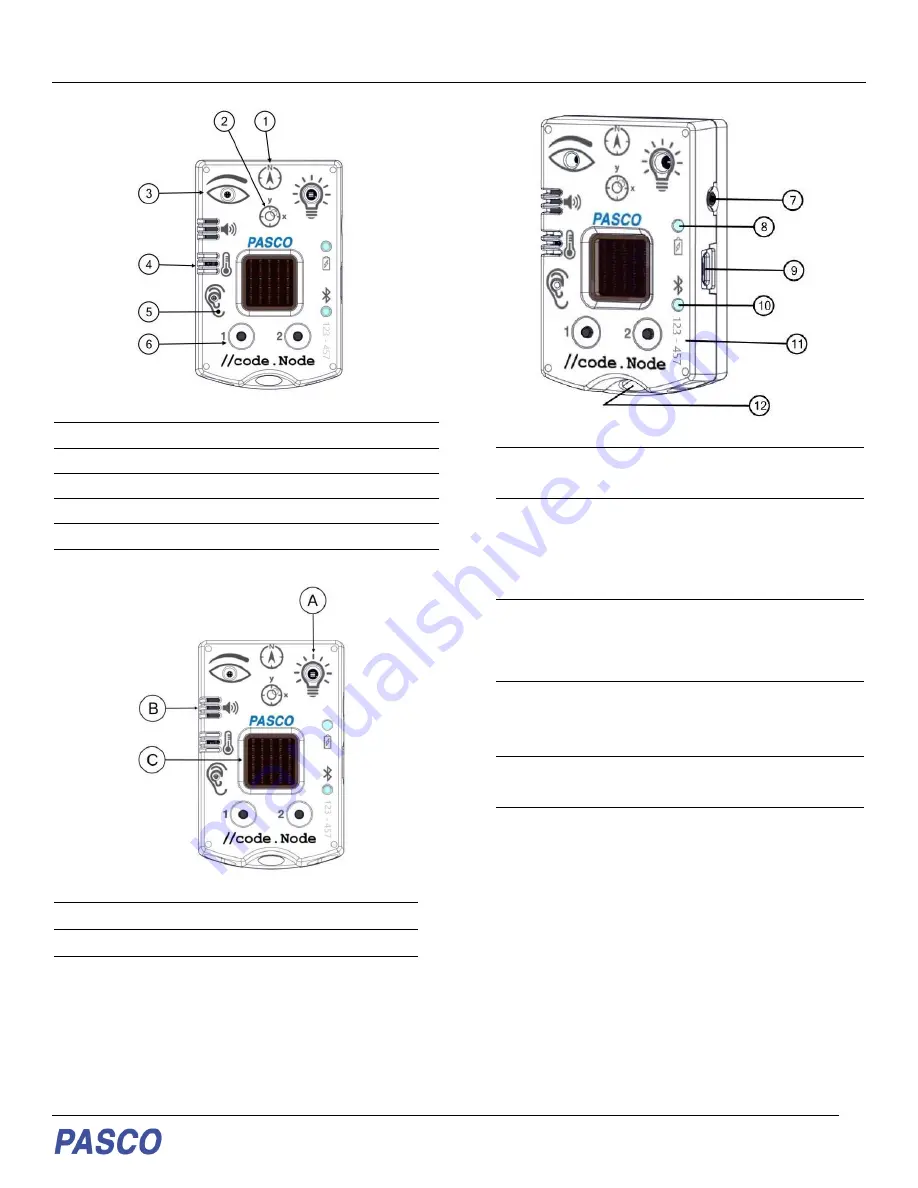
INPUTS
1
Magnetic Field Sensor
2
Acceleration Sensor and Tilt
3
Light Sensor
4
Ambient Temperature Sensor
5
Sound Sensor
6
Button 1 and Button 2
OUTPUTS
A
Red-Green-Blue (RGB) LED
B
Speaker
C
5 x 5 LED Array
SENSOR COMPONENTS
7
Power button
Press and hold for one second to turn on or off.
8
Battery status LED
Red blink
Battery needs to be recharged soon.
Green solid
Battery is fully charged
Yellow solid
Battery is charging.
9
Micro USB port
For charging the battery when connected to a USB
charger. For transmitting data when conencted to the
USB port of a computer.
10
Bluetooth status LED
Red blink
Ready to be paired with software
Green blink
Paired with software.
11
Sensor ID
Use this ID when connecting the sensor to software.
12
Lanyard Hole
For attaching a lanyard, string, or other material.


