28
C H A P T E R 2 B I O S S E T U P
Save Changes and Exit
Highlight this item and press <Enter> to save the changes that you have made in the Setup Utility and exit the
Setup Utility. When the dialog box appears, press <OK> to save and exit, or press <Cancel> to return to the
menu.
Discard Change and Exit
Highlight this item and press <Enter> to discard any changes that you have made in the Setup Utility and exit.
When the dialog box appears, press <OK> to discard changes and exit, or press <Cancel> to return to the
menu.
NOTE
If you have made settings that you do not want to save, use the “Discard
Charge and Exit” item and press OK to discard any changes you have
made.
Discard Change
Highlight this item and press <Enter> to discard any changes that you have made in the Setup Utility. When
the dialog box appears, press <OK> to discard changes and exit, or press <Cancel> to return to the menu.
Load Optimized Defaults
This option opens a dialog box that lets you load optimized defaults for all appropriate items in the Setup
Utility. The optimized defaults place demands on the system that may be greater than the performance level
of the components, such as the CPU and the memory. You can cause fatal errors or instability if you load the
optimized defaults when the hardware does not support them. If you only want to load setup defaults for a
specific option, select and display that option, and then press <F9>.
Follow these instructions to load the optimized defaults:
1. From the Exit screen, scroll to Load Optimized Defaults.
2. Press <Enter> to open the Load Optimized Defaults screen.
3. Select <Ok>.
4. Press <Enter> to load the defaults.
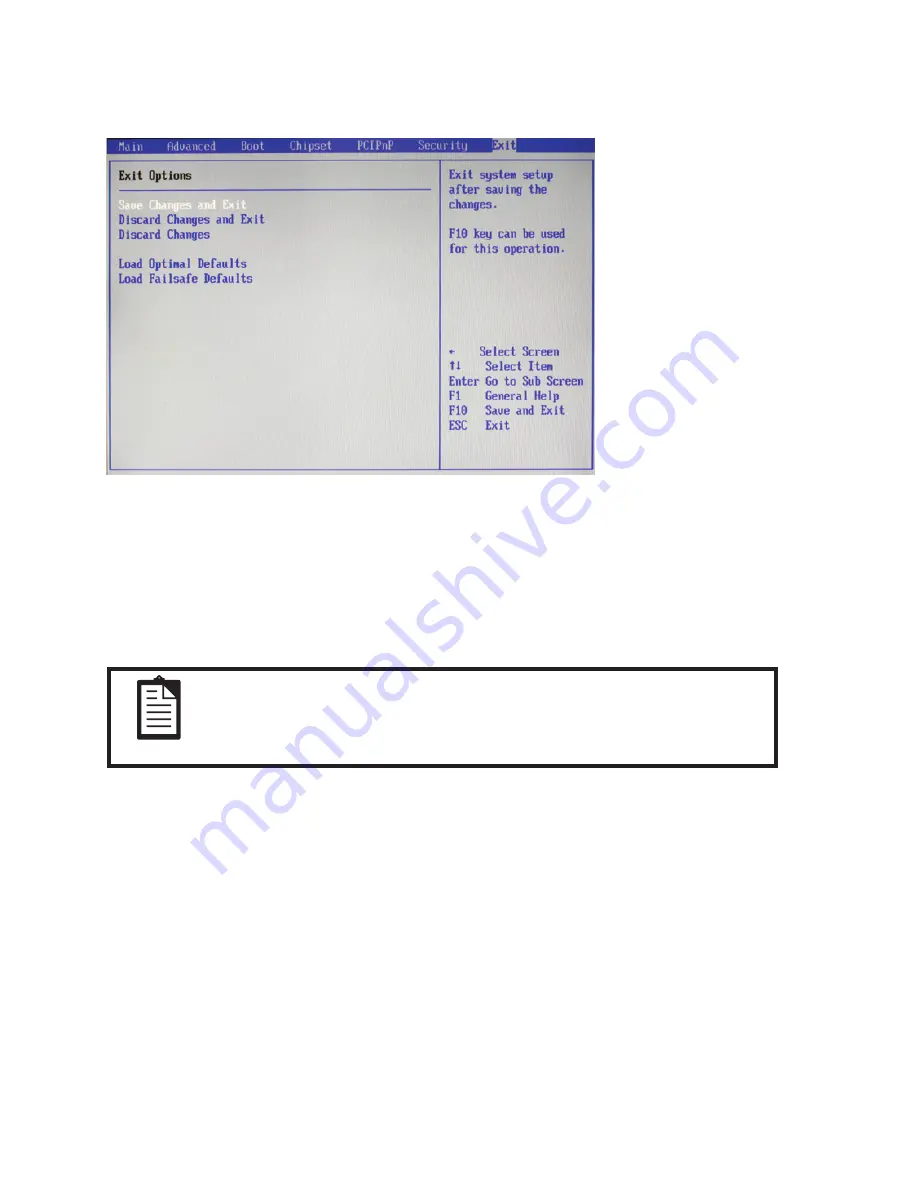
Exit Menu
This screen allows you to load the optimal or failsafe default values, and save or discard changes.
Figure 2.22 Exit Menu
screen
Summary of Contents for SP-1000
Page 1: ...POS Terminal SP 1000 Service Manual ...
Page 2: ......
Page 8: ...vi ...
Page 18: ...10 C H A P T E R 2 B I O S S E T U P IDE Configuration Figure 2 4 IDE Configuration sub menu ...
Page 38: ...30 C H A P T E R 2 B I O S S E T U P ...
Page 45: ...37 4 Click Yes I want to restart my computer now and then click Finish ...
Page 47: ...39 4 When installation is completed click Finish ...
Page 73: ...65 APPENDIX PART LIST AND SPECIFICATION Figure 6 1 Exploded diagram main parts ...
Page 74: ...66 A P P E N D I X Figure 6 2 Exploded peripheral parts ...


