PTHSA 20-Li B3
■
10
│
GB
│
IE
Checking the battery charge level
♦
Press the battery charge level button
i
to
check the status of the battery (see also main
diagram). The status will be shown on the
battery display LED
u
as follows:
RED/ORANGE/GREEN = maximum charge
RED/ORANGE = medium charge
RED = low charge – charge the battery
Inserting/removing the battery pack
Inserting the battery pack
♦
Push the battery pack
r
into the handle until it
clicks into place.
Removing the battery pack
♦
Press the release button
t
and remove the
battery pack
r
.
WARNING! RISK OF INJURY!
►
Before any work on the appliance, remove
the battery. Risk of electric shock!
Fixing/attaching the shoulder strap
♦
Hook the shoulder strap
e
into the carrying
lug
9
.
♦
Adjust the length of the shoulder strap
e
to
your size so that the carrying lug
9
is at hip
height when the strap is hooked in place.
Mounting the motor head on the
telescopic handle
♦
Undo the quick release
7
by pressing it in
the direction of the arrow
. Pull out the
telescopic handle until the black plastic ring
is exposed.
♦
Place the lower end of the motor head
3
on
the upper end of the telescopic handle
6
so
that the motor head
3
can be pushed through
as far as the black plastic ring. Make sure that
the groove and the recess interlock with each
other.
♦
Tighten the red connecting piece
5
by turning
it towards the symbol on the motor head
3
.
Adjusting the telescopic handle
The telescopic handle
6
can be adjusted continu-
ously by means of the quick release
7
.
♦
Undo the quick release
7
by pressing it in the
direction of the arrow
and adjust the
length by pushing or pulling as required.
♦
Close the quick release again
7
to fix the
desired working length of the telescopic
handle
6
.
♦
If the screws on the quick-release
7
have loos-
ened, tighten them again with the hex key
w
.
Adjusting the cutting angle
NOTE
►
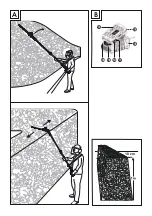
The cutting angle can be adjusted in 11 stages.
♦
Remove the battery pack
r
from the appliance.
♦
Press the release button
4
.
♦
Adjust the angle of the motor unit to the
required position.
♦
Let go of the release button
4
and the motor
unit will click into place.
♦
Insert the battery pack
r
back into the appli-
ance.
Use
NOTE
►
Comply with regulations regarding noise
protection and local rules. Using the appli-
ance on certain days (e.g. on Sundays and
public holidays), during certain times
(midday, night time) or in certain locations
(e.g. health resorts, clinics, etc.) may be
restricted or prohibited.
Switching on/off
Turn on
♦
Press the safety lock-out
0
and keep it pressed
and then press the On/Off switch
q
. You can
now release the safety lock-out
0
.
Switching off
♦
Release the On/Off switch
q
.
Summary of Contents for PTHSA 20-Li B3
Page 3: ......
Page 4: ...A B...
Page 39: ...PTHSA 20 Li B3 34 DE AT CH...
Page 59: ...PTHSA 20 Li B3 54 FR BE...
Page 77: ...PTHSA 20 Li B3 72 NL BE...
Page 111: ...PTHSA 20 Li B3 106 PL...
Page 129: ...PTHSA 20 Li B3 124 SK...
Page 147: ...PTHSA 20 Li B3 142 ES...
Page 181: ...PTHSA 20 Li B3 176 IT...
Page 199: ...PTHSA 20 Li B3 194 HU...
Page 215: ...PTHSA 20 Li B3 210 SI...


