8
GB/IE/NI/CY/MT
• With accessories as well as wearing parts and spare parts
use only original parts. Spare parts can be obtained from
your specialist dealer.
• When ordering, please provide our article number, the type
and year of manufacture for your device.
m
DANGER!
The device and the packaging are not children’s
toys!
Do not let children play with plastic bags, films or
small parts! There is a danger of choking or suf-
focating!
9. Before commissioning
Electrical safety
Prior to use, the power generator/inverter and its electrical
equipment (including lines and plug connectors) should be
checked to ensure that there are no defects.
Never connect the power generator/inverter to the mains
(socket).
The power lines to the consumer must be kept as short as possible.
m
DANGER!
Risk of fire and explosion!
When filling, fuel may ignite and even explode. This can lead
to severe burns or death.
- Switch off the engine and let it cool down.
- Keep heat, flames and sparks away.
- Only fill up with fuel outdoors.
- Wear protective gloves.
- Avoid contact with skin and eyes.
- Start the device at a distance of at least 3 m from the fuel
filling point.
- Watch out for leaks. If petrol is leaking, do not start the
engine.
m
WARNING!
Health hazard!
Inhaling petrol/lubricant vapours may lead to severe health
damage, loss of consciousness and, in extreme cases, to death.
- Do not inhale petrol/lubricant vapours.
- Operate the device outdoors only.
NOTE!
Device damage
Using the device without or with too little engine and gearbox
oil can result in engine damage.
- Fill with petrol and oil before commissioning. The device is
supplied without engine oil and gearbox oil.
NOTE!
Environmental damage!
Spilled oil can pollute the environment permanently. The liq-
uid is highly toxic and can quickly lead to water pollution.
- Fill/empty oil only on level, paved surfaces.
- Use a filling nozzle or funnel.
- Collect drained oil in a suitable container.
- Wipe up spilled oil carefully immediately and dispose of
the cloth according to local regulations.
- Dispose of oil as per local regulations.
m
ATTENTION!
Check before operation
• Check all sides of the engine for oil or fuel leaks.
• Check the engine oil level.
• Check the fuel level – Fill with at least 7 litres of Super E10
petrol.
• Check the condition of the air filter.
• Check the condition of the fuel lines.
• Look for signs of damage.
• Check that all protective covers are in place and all screws
are tightened.
• Ensure that the device is sufficiently ventilated.
• Make sure that the spark plug connector is attached to the
spark plug.
• Disconnect any connected electrical devices from the pow-
er generator/inverter.
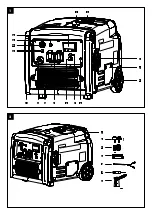
9.1 Earthing screw (6) (Fig. 1)
m
Attention! Electric shock!
- Do not use bare wires for earthing.
- Power generator/inverter must be safely earthed.
Earthing the housing is necessary to discharge static charging.
1. To do this, connect a cable on one side to the earthing
screw (6) of the power generator/inverter and on the
other side to an external earth (e.g. earth rod).
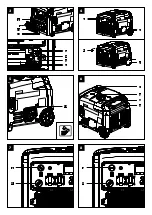
9.2 Connecting the battery connection cable
(17a) (Fig. 3)
1. Remove the battery compartment cover (10) by removing
the two screws with the enclosed Phillips screwdriver (F).
2. Connect the battery connection cable (17a) to the engine
connection cable (17b).
3. Replace the battery compartment cover (10) and screw
in the two screws.
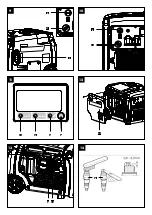
9.3 Top up oil (Fig. 4, 5)
m
Attention!
The power generator/inverter is delivered with-
out engine oil. Therefore, ensure that you add oil
before starting it up. Use 15W40 oil here.
Note:
Check the oil level regularly before commissioning. An oil
level that is too low can damage the engine. The oil warning
system protects the power generator/inverter from damage
caused by an oil level that is too low.
Before the minimum level is reached, the oil warning indicator
(23) lights up and the system automatically switches off the
engine (but the main switch is still set to REMOTE).
1. Place the device on a level, even surface.
2. Remove the ignition key (B) from the ignition lock (14).
3. Remove the cover (4) by unscrewing the two screws with
the Phillips screwdriver (F) provided.
4. Unscrew the oil dipstick (19).
5. Use the oil filler bottle (G) provided to top up the engine
oil. Note the max. filling capacity of 600 ml. Carefully fill
the oil up to the lower edge of the filling port.
6. Wipe the oil dipstick (19) with a clean, lint-free cloth.
Summary of Contents for PISE 3400 A1
Page 3: ...1 4 3 1 2 5 7 8 9 10 11 13 14 15 16 12 6 2 A B C D E F G...
Page 4: ...5 19 4 B 4 4 B 7 11 B 6 21 2 20 22 8 11 B 3 B 17b 17a 17 10 17c 18...
Page 5: ...9 3 11 B 10 11 B 13 28 29 12 27 Low Oil Overload Disp 11 23 24 25 26 14 28...
Page 6: ...16 33 32 15 30 31 32b 32a...
Page 117: ...111 18 18 18 18 18 18 18 18 18 18 18 18 18 18 18 18 18 18 18 18 18 18 18...
Page 119: ......


