


PFSA 20-Li C3
■
8
│
GB
│
IE
♦
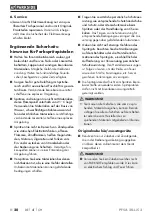
Undo the union nut completely and remove
it from the spray unit .
♦
Fit the desired nozzle onto the nozzle
head .
♦
Screw the union nut back onto the spray
unit .
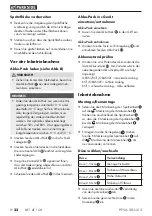
Filling with spray material
♦
Unscrew the paint cup from the spray unit .
♦
To work on a horizontal object, place the riser
pipe in front, facing the nozzle head . To
work overhead, place the riser pipe at the
back, facing the motor unit .
♦
Fill the paint cup with the spray material and
screw it firmly onto the spray unit .
Switching the appliance on/off
Working methods
♦
Hold the spray gun at a constant distance from
the object. The ideal spraying distance is
approx. 15 cm.
♦
Work out the best settings by carrying out a
test.
♦
Do not switch the appliance on/off over the
spray surface. Rather, start/end the spraying
process approx. 10 cm from the spray surface.
Switching on
♦
To switch on, pull the trigger and keep it
pressed in.
Switching off
♦
To stop spraying, simply release the trigger .
Adjust spray pattern
Set the spray rate
♦
Turn the spray volume adjusting wheel to
the desired position:
(–) = minimum spray rate
(+) = maximum spray rate
NOTE
►
We recommend starting at the minimum
setting.
Selecting a jet type
♦
Undo the union nut .
♦
Turn the protruding parts of the nozzle head
so that they point to the desired symbol on the
spray unit .
The appliance has the following settings:
▯ round jet
vertical flat jet
horizontal flat jet
♦
Re-tighten the union nut .
Maintenance and cleaning
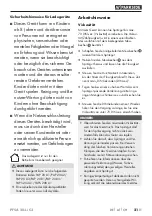
WARNING! RISK OF INJURY! Always
switch the appliance off and remove
the battery before carrying out any
work on the appliance.
ATTENTION!
►
Never immerse the paint spray gun completely
in solvent.
NOTE
►
Thorough cleaning after every use is very
important for safety and operation.
Otherwise, the needle could get blocked and
proper operation of the appliance cannot be
guaranteed.
■
Wear suitable gloves when cleaning.
■
After every use, squirt water through the
appliance.
♦
To clean the spray unit , nozzle head ,
nozzles and the spray holes inside, use
the supplied cleaning brush , cleaning
needle or a cloth. Never use petrol, solvents
or cleansers which can damage plastic.
♦
Store the device only in dry interior rooms.
Summary of Contents for PFSA 20-Li C3
Page 3: ...A 5a 15a...
Page 4: ...B...
Page 19: ...PFSA 20 Li C3 14 GB IE...
Page 77: ...PFSA 20 Li C3 72 CZ...
Page 93: ...PFSA 20 Li C3 88 PL...
Page 135: ...PFSA 20 Li C3 130 DK...
Page 177: ...PFSA 20 Li C3 172 SI...
Page 209: ...PFSA 20 Li C3 204 BG 1 a 2 a 3 a...
Page 210: ...PFSA 20 Li C3 BG 205 4 a 5 a...
Page 211: ...PFSA 20 Li C3 206 BG 6 a 21 C PARKSIDE...
Page 213: ...PFSA 20 Li C3 208 BG 10 C 40 C 50 80 0 C 50 C 5a 1 5 mm 1 8 mm...
Page 214: ...PFSA 20 Li C3 BG 209 2 2 mm 2 6 mm 15 cm 10 cm...
Page 215: ...PFSA 20 Li C3 210 BG 2012 19 EU...
Page 216: ...PFSA 20 Li C3 BG 211 2006 66 a b 1 7 20 22 80 98 3 X12V X20V Team 3 II 3...
Page 217: ...PFSA 20 Li C3 212 BG IAN 418086_2210...
Page 220: ...PFSA 20 Li C3 BG 215 www kompernass com QR QR IAN 418086_2210...
Page 221: ...PFSA 20 Li C3 216 BG...
Page 225: ...PFSA 20 Li C3 220 GR 1 2 3...
Page 226: ...PFSA 20 Li C3 GR 221 4 5...
Page 227: ...PFSA 20 Li C3 222 GR 6 21 C PARKSIDE...
Page 229: ...PFSA 20 Li C3 224 GR B 10 C 40 C 50 80 0 C 50 C LED LED LED 5a 1 5 mm 1 8 mm 2 2 mm 2 6 mm...
Page 230: ...PFSA 20 Li C3 GR 225 15 10...
Page 231: ...PFSA 20 Li C3 226 GR 2012 19 U 2006 66 C...
Page 232: ...PFSA 20 Li C3 GR 227 a b 1 7 20 22 80 98 Kompernass Handels GmbH 3 X12V X20V Team 3...