Operation / Maintenance and cleaning
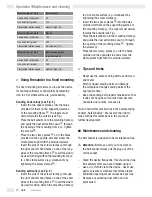
Material / type of work
Rust removal
Coarse finish (Grit grade)
40
Fine finish (Grit grade)
120
Preselected rotation speed
medium / high (3-4)
Material / type of work
Plastic
Coarse finish (Grit grade)
120
Fine finish (Grit grade)
240
Preselected rotation speed
low / medium (2-3)
Material / type of work
Non-ferrous metals
(e.g. aluminium)
Coarse finish (Grit grade)
80
Fine finish (Grit grade)
150
Preselected rotation speed
medium / high (3-4)
L
Using the sander in a fixed mounting
The fixed mounting kit allows you to use the device
for sanding vertically or horizontally by fastening
it on to a flat stable surface (e.g. workbench).
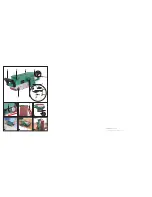
Sanding horizontally (see Fig. E)
j
Insert the two spacer plates e into the holes
provided for them on the supporting surface
of the mounting frame
e
. The tapers must
narrow towards the outside (see Fig.).
j
Place the belt sander on to the mounting frame
}
and guide the dust extraction spout
T
through
the opening of the mounting frame
}
. Tighten
the screws
r
.
j
Place the two clamp plates
q
on to the holes
provided on the opposite side and screw the
clamp plates tight with the provided screws.
j
Insert the pins of the screw clamps
w
through
the right and left hand holes on one of the long
sides of the mounting frame
}
to suit the side to
be used for fixing. Attach the mounting frame
}
to a flat, stable surface (e.g. workbench) by
tightening the screw clamps
w
.
Sanding vertically (see Fig. F)
j
Insert the pins of the screw clamps
w
through
the right and left hand holes on one of the short
sides of the mounting frame
}
to suit the side to
be used for fixing. Attach the mounting frame
}
to a flat, stable surface (e.g. workbench) by
tightening the screw clamps
w
.
j
Insert the two spacer plates
e
into the holes
provided for them on the supporting surface of
the mounting frame
}
. The tapers must narrow
towards the outside (see Fig.).
j
Place the belt sander on to the mounting frame
}
and guide the dust extraction spout
T
through
the opening of the mounting frame
}
. Tighten
the screws
r
.
j
Place the two clamp plates
q
on to the holes
provided on the opposite side and screw the
clamp plates tight with the provided screws.
L
Tips and tricks
j
Never use the same sanding belt to sand wood
and metal.
j
Worn or ripped sanding belts can damage
the workpiece. Change sanding belts at the
appropriate time.
j
Keep the sanding belt properly tensioned so that
it does not hang down too much and become
unusable due to nicks, creases etc.
You can find further practical tips in the accompanying
booklet „Safety Advice“. We reserve the right to
make technical modifications in the course of
further development.
L
Maintenance and cleaning
The belt sander is designed to be maintenance-free.
m
Attention:
Before you carry out any work on
the belt sander always pull the plug out of the
mains socket.
j
Clean the device frequently. This should be done
immediately after you have finished using it.
j
Use a dry cloth to clean the device - never use
petrol, solvents or cleaners that attack plastic.
j
Ventilation openings must always be kept free.
j
Remove any adhering dust with a narrow
paint brush.
10 GB/IE


