OPERATION
WARNING
Never run the engine indoors or in a poorly ventilated
area. Engine exhaust contains carbon monoxide, an
odorless and deadly gas. Keep hands, feet, hair and
loose clothing away from the trimmer and any moving
parts on the engine. Avoid the muffler and surrounding
areas. Temperatures may exceed 150 degrees.
HOW TO STOP THE ENGINE
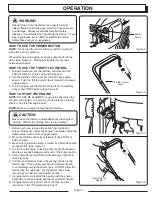
Move the throttle control lever completely back to the STOP
position.
CAUTION
The trimmer head will continue to rotate for several
seconds after the engine has stopped.
HOW TO STOP THE TRIMMER HEAD
Release the start lever. It will return to its position and
disengage the trimmer head.
HOW TO USE THE TRIMMER HEAD DRIVE
LEVER
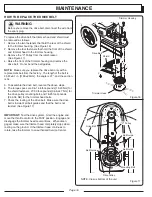
1. To engage the trimmer head, hold the start lever against
the handle. Move the trimmer head drive lever forward
to engage the trimmer head. (See Figure 9)
HOW TO SET THE HEIGHT OF CUT
CAUTION
Before you set the height of cut, stop the engine. Wait
for all moving parts to stop. Allow engine to cool and
disconnect the spark plug wire.
Figure 9
Start Lever
Handle
Trimmer Head
Drive Lever
Height of Cut Positions
Set Screws
Trimmer Head
T-Handle Wrench
Height Guide
Figure 10
The height of cut can be set from 11⁄2 to 3 in. [38-76 mm].
Recommended cutting height for the average yard is 2 in.
[51 mm].
1. Use the T-Wrench, found in a parts bag, to loosen the (2)
set screws. (See Figure 10)
NOTE:
The (2) set screws are only on one side of the
trimmer head. If you don’t see the set screws, check the
opposite side. Both set screws need to be loosened to
change the height of the cut.
2. Slide the trimmer head up or down for desired height of
cut.
3. Tighten both set screws to
2.6 - 3.7
foot-pounds (
3
.5-
5
Nm).
Page 10


