background image

GB - 3

Record Unit Model and Serial 
numbers here.

Record Engine Model and Serial 
numbers here.

PRODUCT REGISTRATION

The dealer must register the product at the 
time of purchase. Registering the product will 
help the company process warranty claims or 
contact you with the latest service 
information. All claims meeting requirements 
during the limited warranty period will be 
honored, whether or not the product 
registration card is returned. Keep a proof of 
purchase if you do not register your unit.

Customer Note:

 If the dealer does not 

register your product, please fill out, sign, and 
return the product registration card to Parker 
or go to www.parkersweeper.com.

UNAUTHORIZED REPLACEMENT 
PARTS

Use only Parker replacement parts. The 
replacement of any part on this vehicle with 
anything other than a Parker authorized 
replacement part may adversely affect the 
performance, durability, or safety of this unit 
and may void the warranty. Parkerdisclaims 
liability for any claims or damages, whether 
warranty, property damage, personal injury or 
death arising out of the use of unauthorized 
replacement parts. To locate your nearest 
Parker Dealer, go to 
www.parkersweeper.com on the internet.

DISCLAIMER

Parker reserves the right to discontinue, 
make changes to, and add improvements 
upon its products at any time without public 
notice or obligation. The descriptions and 
specifications contained in this manual were 
in effect at printing. Equipment described 
within this manual may be optional. Some 
illustrations may not be applicable to your 
unit.

DELIVERY

Customer Note: 

If you have purchased this 

product without complete assembly and 
instruction by your retailer, it is your 
responsibility to:

1. Read and understand all assembly 

instructions in this manual. If you do not 
understand or have difficulty following 
the instructions, contact your nearest 
Parker Dealer for assistance. Make sure 
all assembly has been properly 
completed.

NOTE: 

To locate your nearest Parker Dealer, 

go to www.parkersweeper.com on the 
Internet.

2. Understand all Safety Precautions 

provided in the manuals.

3. Review control functions and operation 

of the unit. Do not operate the unit 
unless all controls function as described 
in this manual. 

4. Review recommended lubrication, 

maintenance and adjustments.

5. Review Limited Warranty Policy. 

NOTE: 

This machine comes with a one-year 

limited warranty. The selling dealer is 
responsible for explaining the terms and 
limitations of the warranty coverage offered in 
the country of sale. 

6. Fill out a Product Registration Card and 

return the card to Parker or go to 
www.parkersweeper.com.

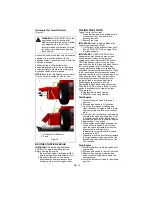
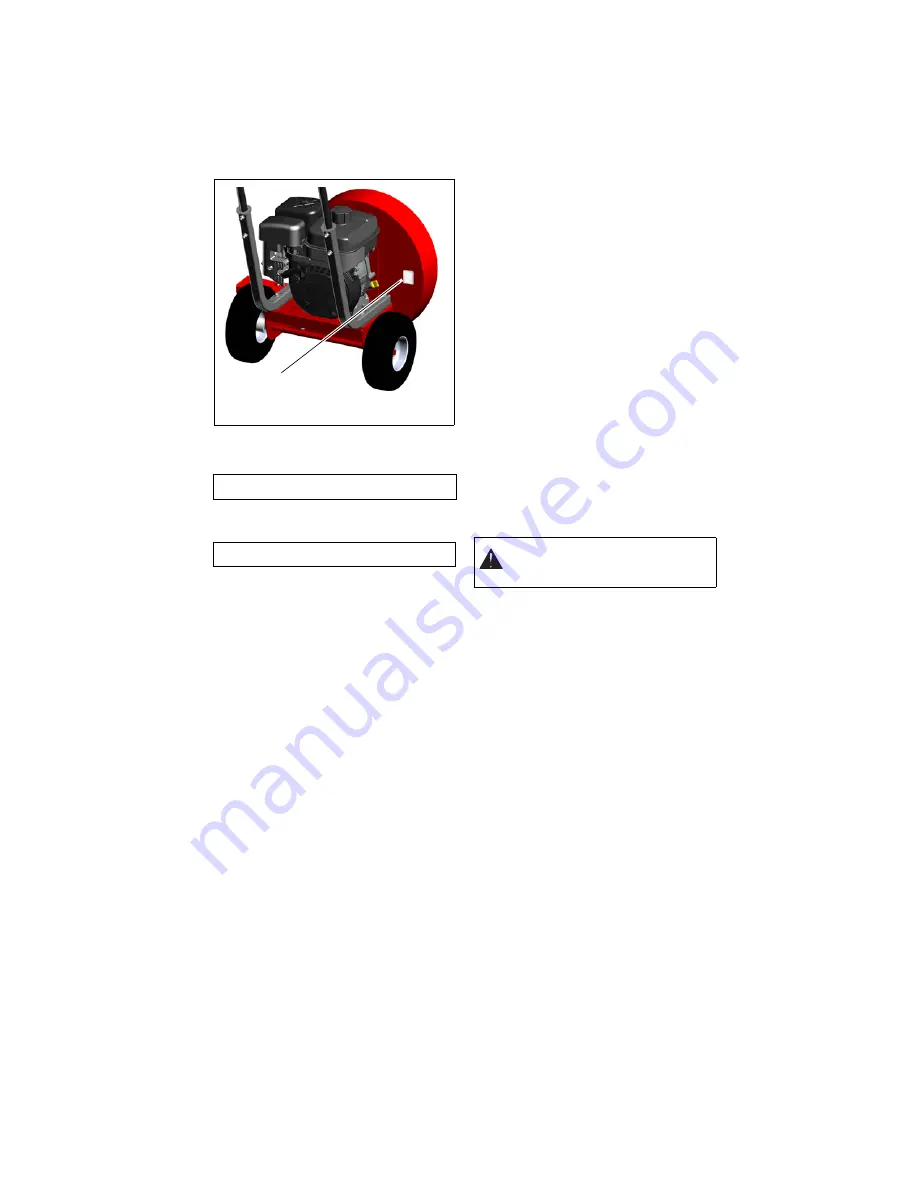
Figure 1

Serial 
Number 
Label

WARNING: 

Improper assembly or 

adjustments can cause serious 
injury.

Summary of Contents for 947103-169cc

Page 1: ...f any gasoline exceeding 10 ethanol E10 or 10 MTBE will void the product warranty Il est possible d utiliser de l essence contenant jusqu à 10 d éthanol E10 ou 10 de MTBE éther méthyl tertiobutylique sur cette machine L utilisation d une essence contenant plus de 10 d éthanol E10 ou de 10 de MTBE annulent la garantie Models 947103 169cc Blower 947104 265cc Blower 947105 404cc Blower 04308100A 1 12...

Page 2: ...rimés dans des langues différentes de l anglais sont également disponibles en téléchargement gratuit sur notre site Web http www parkersweeper com MANUALS Before operation of unit carefully and completely read your manuals If used improperly this unit could be dangerous and cause personal injury or property damage The contents will provide you with safety instructions for the safe use of your unit...

Page 3: ...anges to and add improvements upon its products at any time without public notice or obligation The descriptions and specifications contained in this manual were in effect at printing Equipment described within this manual may be optional Some illustrations may not be applicable to your unit DELIVERY Customer Note If you have purchased this product without complete assembly and instruction by your...

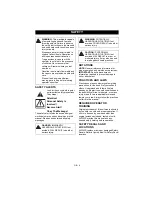
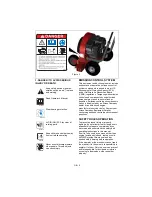
Page 4: ...ginal purchaser loaned rented or sold ALWAYS provide this manual and any needed safety training before operation SAFETY DECALS AND LOCATIONS ALWAYS replace missing or damaged Safety Decals Refer to figure below for Safety Decal locations SAFETY WARNING This machine is capable of amputating hands and feet and throwing objects Failure to observe the safety instructions in the manuals and on decals c...

Page 5: ...rty damage do not attempt to start engine until all assembly steps are complete and you have read and understand the safety and operating instructions in this manual If unit is to be used by someone other than original purchaser loaned rented or sold ALWAYS provide this manual and any needed safety training before operation If the operator or the mechanic cannot read the manual it is the owner s r...

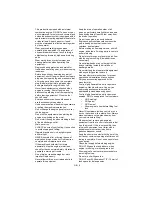
Page 6: ...eld or repair damaged or worn impeller Replace only Never allow children or untrained adults to operate this equipment Keep the area of operation clear of all persons particularly small children and pets Keep bystanders at least 25 feet away from the area of operation Do not run engine in an enclosed area Engine exhaust contains carbon monoxide gas a deadly poison that is odorless colorless and ta...

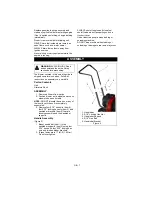
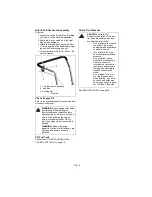
Page 7: ...in one box Follow all instructions on assembly very carefully Carton Contents Unit Literature Pack ASSEMBLY 1 Remove all items from carton 2 Position blower on its wheels and chock wheels to keep unit stable NOTE DO NOT discard the carton or any of the inserts until the unit is completely assembled 3 Remove four 5 16 hex bolts item 4 four 5 16 locking hex nuts item 2 and handlebar brackets item 5 ...

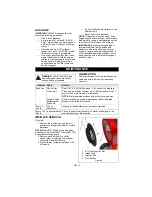
Page 8: ...nit Be sure you know how to start and stop the engine before proceeding further Do not start the engine until all assembly is finished WARNING Make a thorough inspection to see that all fasteners are tight and all parts are properly installed Figure 4 1 Throttle Lever Assembly 2 Hex Bolt 3 Locking Nut 1 3 2 CAUTION Avoid injury Explosive separation of tire and rim parts is possible when they are s...

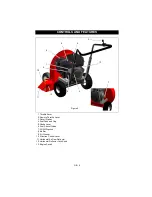
Page 9: ...uel Tank and Cap 5 Choke Lever 6 Fuel Shut off Valve 7 Oil Fill Dipstick 8 Muffler 9 Air Cleaner 10 Direction Control Lever 11 Horizontal Air Flow Deflector 12 Horizontal Deflector Lock Knob 13 Engine Switch CONTROLS AND FEATURES Figure 5 12 11 7 3 10 4 2 1 6 8 9 13 5 ...

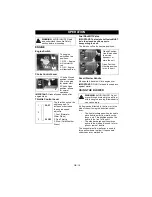
Page 10: ...l turn engine over IMPORTANT DO NOT let handle snap back against starter USING THE BLOWER Air flow can be directed to the front or to the side of the unit using the direction control lever The front discharge position is used to move debris away from walls curbs fences etc This position pushes the debris to the front of the unit The side discharge position moves debris to the side and is used to f...

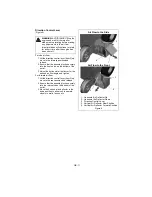
Page 11: ...assembly locks securely into the rear notch on the bottom of the outlet 3 Move the horizon al air deflector to the down position to allow unit to operate closely to walls fences etc WARNING AVOID INJURY Stop the engine and wait for the impeller blades to stop rotating before making any adjustments to the air flow Impeller blades will continue to rotate for a short time after the engine has been sh...

Page 12: ...ired to allow for fuel expansion Pay close attention while filling the fuel tank to ensure that the recommended fuel level inside the tank is not exceeded Use a portable gasoline container with an appropriately sized dispensing spout when filling the tank Do not use a funnel or other device that obstructs the view of the tank filling process 4 Replace fuel cap and tighten 5 ALWAYS clean up spilled...

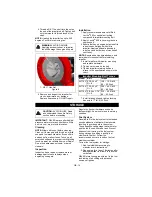
Page 13: ...d a few drops of oil to the throttle control cable and wire to help keep it operating smoothly IMPELLER REMOVAL Figure 8 1 Remove the locking hex nuts item 1 and remove intake grille item 2 Retain hardware NOTE Model 947103 has four intake grille mounting points Models 947104 and 947105 have eight mounting points 2 Remove hex bolt item 3 and flat washer item 4 retaining the impeller assembly Disca...

Page 14: ...rfaces Touch up all scratched surfaces to prevent rust Matching touch up paint is available from your Dealer Do not use abrasives solvents or harsh cleaners Inspection Inspect unit and repair or replace worn or damaged parts to avoid delays when beginning use again Regularly check all hardware and keep fasteners tight Know unit is in safe working condition Fuel System Gasoline left in the fuel sys...

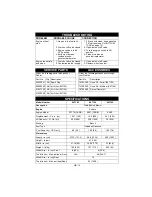
Page 15: ...AR Air Filter 947103 21547300 AR Air Filter 947104 21550200 AR Air Filter 947105 ACCESSORIES Order the following accessories through your Dealer Part No Description 74700300 Hose Kit Small 947103 74700200 Hose Kit Medium 947104 74700400 Swivel Caster Kit SPECIFICATIONS Model Number 947103 947104 947105 Description Walk Behind Blower Engine Subaru Engine Model SP170 CARB EX27 CARB EX40 Displacement...

Page 16: ... or replace any defective part subject to the conditions limitations and exclusions set forth herein Such repair or replacement will be free of charge labor and parts to the original purchaser except as noted below Special Extensions The chart below details special extensions to this warranty Warranty Code Product Group Warranty Period Consumer Use Warranty Period Commercial Use PA Log Splitters B...

Page 17: ...anty Period Use Detail All Batteries 1 Year All Prorated All Belts Muffler Tires None Commercial These components are not covered when used commercially All Cloth Plastic and Rubber Components Including Belts and Cables Maximum 2 Years All Warranty is limited to 2 years for consumer use 1 year for warranty code PD Except as noted above these components are covered for defect not for wear SA SB SC ...

Page 18: ...vely parts or accessories Modifying the utility vehicle without express written authorization from the Ariens Company Operating the utility vehicle when it has not been completely and properly assembled and pre delivered by an authorized Gravely dealer Disclaimer Ariens Company may from time to time change the design of its products Nothing contained in this warranty shall be construed as obligati...

Page 19: ...e amount of time not to exceed 30 days If you have a question regarding your warranty coverage you should contact Ariens Company Technical Service Center at 1 920 756 2141 DEFECTS WARRANTY REQUIREMENTS a The warranty period begins on the date the small off road equipment is delivered to an ultimate purchaser b General Evaporative Emissions Warranty Coverage Ariens Company warrants to the ultimate ...

Page 20: ...his article The manufacturer issuing the warranty will not be liable under this Article to warrant failures of warranted parts caused by the use of an add on or modified part Evaporative Emission Warranty Parts List The following parts are considered emission related components for evaporative emissions Fuel Tank Fuel Cap and Tether Fuel Line Fuel Line Fittings Clamps Pressure Relief Valves Contro...

Page 21: ......

Page 22: ...duct contains chemicals known to the State of California to cause cancer birth defects or other reproductive harm WARNING Parker 655 West Ryan Street Brillion WI 54110 920 756 4688 Fax 920 756 2407 www ariens com www parkersweeper com ...

Reviews: