


—
9
—
—1
1
—
—
10
—
3.Press the [power key] to start up. In the power on status (after 15 seconds),
press the [power key], internal screen will enter in sleep mode, press [power key]
again to switch on the screen, long press [power key] to shut down.
1.Eyepiece focusing, also known as diopter adjustment, aim at enable users
with different vision conditions can clearly see the displayed content.
2.Turn the focusing wheel until you can see the text or icon on the screen
clearly.
3.
(the image
may not be clear when the objective lens is not well focused), this procedure is
done.
Eyepiece focusing
Please note that the image is not clearly visible after eyepiece focusing
adjustment, as long as the words on the display screen are clearly visible
Objective focusing
1.Before the objective lens focusing, please make sure you have the eyepiece
focusing (diopter adjustment) completed.
2.Focus at the target you want and adjust the focusing wheel of the objective
lens until you can see the target image sharply.
3.Generally, the focusing position of the objective lens is placed at objects
located far away from you.
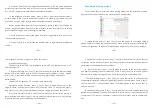
Non menu mode (shortcut)
After startup, without pressing the [menu key] machine is in non menu mode
(15 seconds after startup)
1.Press [power key] to sleep / wake up the device; long press to shutdown.
4.Thermal imaging has the least focusing distance. It is normal an object may
not be able to see sharply within 3 meters.
5.Objects behind glasses cannot be detected.
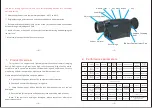
There are two controlling key arrangements at the thermal imaging device,
which are
1: non menu mode (shortcut key mode)
2: menu mode (enter normal setting mode)
Key and interface operation method
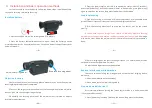
Eyepiece focusing wheel
Objective focusing
wheel
—
8
—
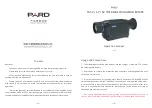
For the first time you use the device, follow the below steps: install the battery
> eyepiece focusing > objective focusing.
Install the battery
1.Please use 18650 lithium ion rechargeable 3.7V battery.
2.Press the battery compartment cover to open, install the battery positive
electrode towards the front objective lens. Put on the battery compartment cover
and well fasten it.
3
、
Installation and basic operation methods
push