—
12
—
—
13
—
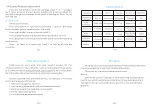
8>WiFi
9>Exposure compensation
12>Formatting
—
14
—
—
15
—
7>Keyboard press sound
11>Date/Time
10>Languages
13>Factory setting
Record
Audio
B
eep
Sound
WiFi
Exposure
Language
Date/Time
Format
Select
"
Keyboard press sound
"
and press
"
OK
"
for keyboard press
setting. Select
"
on
"
or
"
off
"
. Press
"
OK
"
to confirm. This setting allows
Select
"
WiFi
"
and press
"
OK
"
for WiFi setting. Select
"
on
"
or
"
off
"
to turn
on / off WiFi. Please note you cannot call out menu when WiFi is On. Press
and hold
"
WiFi
"
button.
Select
"
Exposure compensation
"
and press
"
OK
"
for exposure compe-
sation setting. Options
"
+2/3
、"+
1/3
"、"+
0
.
0
"、"
-1/3
"
are available.
Select
"
language setting
"
and press
"
OK
"
for language setting. Options
include
"
English
""
Francais
""
Espanol
""
Portugurs
""
Deutsch
""
Italino
""简 体 中
文""
Pyccknn
"
and
"日 本 语""
Cesky
"
.Choose your preferred language for your
system.
Select
"
Date/Time
"
and press
"
OK
"
to set up date and time. Select
respectively
"
Year
"
,
"
Month
"
,
"
date
"
,
"
Hour
"
.
"
Minute
"
and
"
Second
"
,and
press
"
+/-
"
for designated value. Press
"
OK
"
to save change.
Also select
"
Date display format
"
, press
"
+/-
"
for preferred date
display format among
"
YY/MM/DD
""
MM/DD/YY
""
DD/MM/YY
"
.
Select
"
Formatting
"
and press
"
OK
"
for formatting setting. You can
select
"
Memory
"
or SD card
"
. When tend to apply operation system will
prompts
"
all data will be erased!
"
Please take extreme caution to perform
this operation. All data could not be restored if formatted.
Select
"
Factory setting
"
and press
"
OK
"
for factory setting. Select
"
OK
"
or
"
Cancel
"
to restore factory setting or not. Please take extreme caution
to perform this setting.
3>Auto Recording
4>Circulating recording
5>Time stamp
6>Audio synchronization
Select
"
Auto Recording
"
and press
"
OK
"
for auto recording setting.
Select
"
on
"
or
"
off
"
. This setting determines auto recording is on or not in
your next starting up.
Select
"
Circulating recording
"
and press
"
OK
"
for circulating
recording setting.Select
"
off
"
,
"
1min
"
,
"
3 min
"
,
"
5 min
"
or
"
10 min
"
. Press
"
OK
"
to confirm. This setting determines circulating recording is on or not
in your next starting up.
Select
"
Time stamp
"
and press
"
OK
"
for time stamp setting. Select
"
on
"
Select
"
Synchronized audio video
"
and press
"
OK
"
. Select
"
on
"
or
"
off
"
.
Press
"
OK
"
to confirm. This allows audio synchronization when recording.
Please enter into BW mode and press
"
IR fill light brilliance
control
"
button for instant brilliance control.
or
"
of
"
. Press
"
OK
"
to confirm. This determines time stamp is set or not
when recording.
keyboard press sound is also recorded when making recordings.

