


12
13
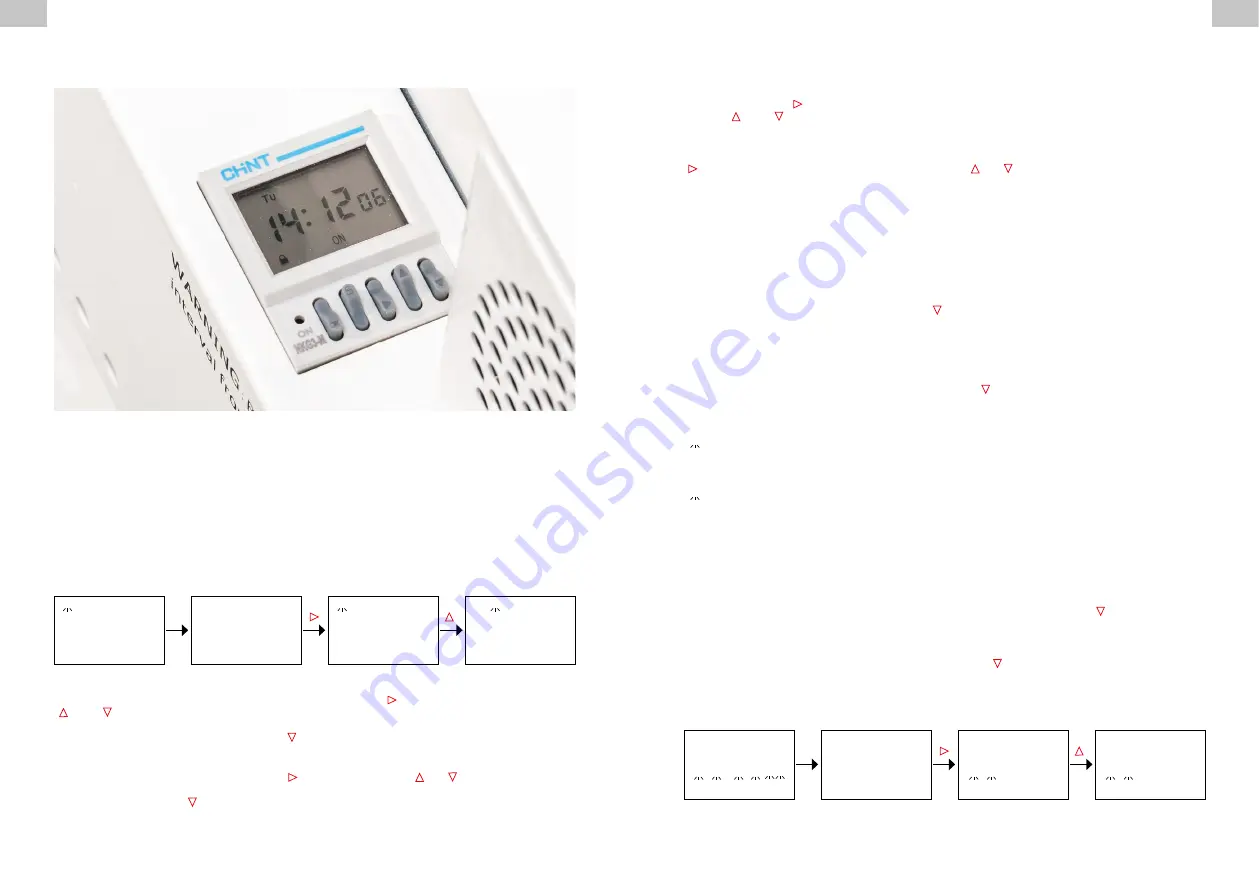
Wochenzeitschaltuhr / Week-Time-Control
Wochenzeitschaltuhr / Week-Time-Control
Beispiel 1: Einstellen der Wochenanzeige und des aktuellen Datums:
Example 1: Set the week to current day:
Drücken Sie die
„OK”
-Taste für 3 Sekunden, um die Tastensperre aufzuheben, danach drücken
Sie 3 Sekunden die
„S”
-Taste, um die gewünschten Einstellungen vorzunehmen, daraufhin blinkt
die Anzeige für die jeweilige Woche, danach gehen Sie wie in der Grafik unten vor.
Press the
„OK”
key for 3 seconds to unlock the keyboard, then press the
„S”
key for 3 seconds to
make the settings as needed, the respective days of the week will flash, then operate as shown in
the figure below.
Erklärung zu obiger Abbildung: Drücken Sie die
„OK”
-Taste, danach einmal
„ “
und jeweils einmal
„ “
oder
„ “
, um das aktuelle Datum einzustellen – danach drücken Sie zweimal
„OK”
, um ihre
gewünschten Einstellungen zu speichern und das Programm zu verlassen. Falls der User weitere
Einstellungen vornehmen möchte, drückt man die
„ “
-Taste , um Uhrzeit / Timer-Optionen /
Switch-Modus einzustellen.
Above figure in words: Press
„OK”
once, then once
„ “
and in each case press
„ “
or
„ “
once
to set the current date – then press
„OK”
twice to save your settings and exit. If the user wishes to
make further settings, press
„ “
key to set time / timing options / switch mode.
Auto off
Mo
Mo
Tu
Mo
Mo
08:00
00
OK
on
oFF
16
Beispiel 2: Einstellen der Uhrzeit:
Example 2: Clock setting:
Wenn die Tastatursperre aufgehoben wurde und die Wochenanzeige blinkt, drücken Sie die
„ “
Taste und gehen Sie im Menü nach unten, um die Uhrzeit einzustellen, die Zahlenwerte für die
Uhrzeit blinken und können nun verändert werden, danach gehen Sie wie in der Abbildung unten vor.
After having unlocked the keyboard and the week is flashing, press
„ “
key to shift down to set
the clock, the time characters will flash and can now be modified, then operate as shown in the
following figure:
Auto off
Mo
08:00
00
08:00
00
08:00
00
09:00
00
OK
on
oFF
16
Anmerkung 1:
Unabhängig von den einzelnen Optionen, die der User einstellen möchte, muss bei gesperrter
Timereinstellung immer zunächst die
„OK”
-Taste für 3 Sekunden gedrückt werden, um die Tasten-
sperre aufzuheben, danach drücken Sie 3 Sekunden lang die „
S
”-Taste, um die jeweiligen Ein-
stellungsparameter einzugeben, danach blinkt die Wochenanzeige; falls keine Wochenintervalle
eingestellt werden müssen, bewegen Sie sich mit der
„ “
Taste so lange nach unten, bis die
gewünschte Funktion erscheint, die geändert werden soll.
Note 1:
No matter which feature the user needs to be set, the first step is always to press
„OK”
for 3
seconds to unlock the timer, then press „
S
” key for 3 seconds to enter setting mode, the days of
the week will flash; if no time-controlled setting is needed, press
„ “
key to shift down until the
feature to be changed appears.
Anmerkung 2:
„ “
unterhalb der angezeigten Werte bedeutet, dass diese Zahlenwerte blinken, nach oben oder
unten gewechselt werden kann oder Werte an dieser Stelle verändert werden können.
Note 2:
„ “
underneath the figures means that the figures are flashing and are now allowing you to be
shifted up or down to make modifications.
Alle Einstellungen müssen gemäß obigem Ablauf vorgenommen werden: Drücken Sie
„OK”
zum
Bestätigen, danach die
„ “
Taste zum Anwählen der gewünschten Funktion, danach drücken Sie
entweder
„ “
oder
„ “
zum Auswählen der einzelnen Zahlenwerte. Nach Abschluss der Änderungen
drücken Sie die
„OK”
-Taste zweimal, um das Programm zu verlassen.
All the settings must follow the above-mentioned procedure: Press
„OK”
to confirm, then press
„ “
key to select the feature to be modified, then press either
„ “
or
„ “
and shift up or down
to select the individual characters to be changed. After all modifications are done, press
„OK”
key
twice to exit.


