TM
TM
ST
AC
K
POSITION
2
3
6
5
4
1
AC
INPUT
1
2
3
ES
D
ES
D
48VDC CLASS 2
OR LIMITED
PW
R SOURCE
48V
A
RT
N
A
B
B
A
B
DC FUSES
T4A, MIN.
48V
PW
R
A
ALM
FA
N
B
OU
T
IN
SE
RIA
L
ALM
IN
TF
M
CP
/1
2
3
M
CP/
DSL
M
AN
AG
EM
EN
T
10 B
AS
E T
8610
99-16319
INPUT
AC
RTN
–48V
A
A
B
B
48VDC CLASS 2
OR LIMITED
PWR SOURCE
18
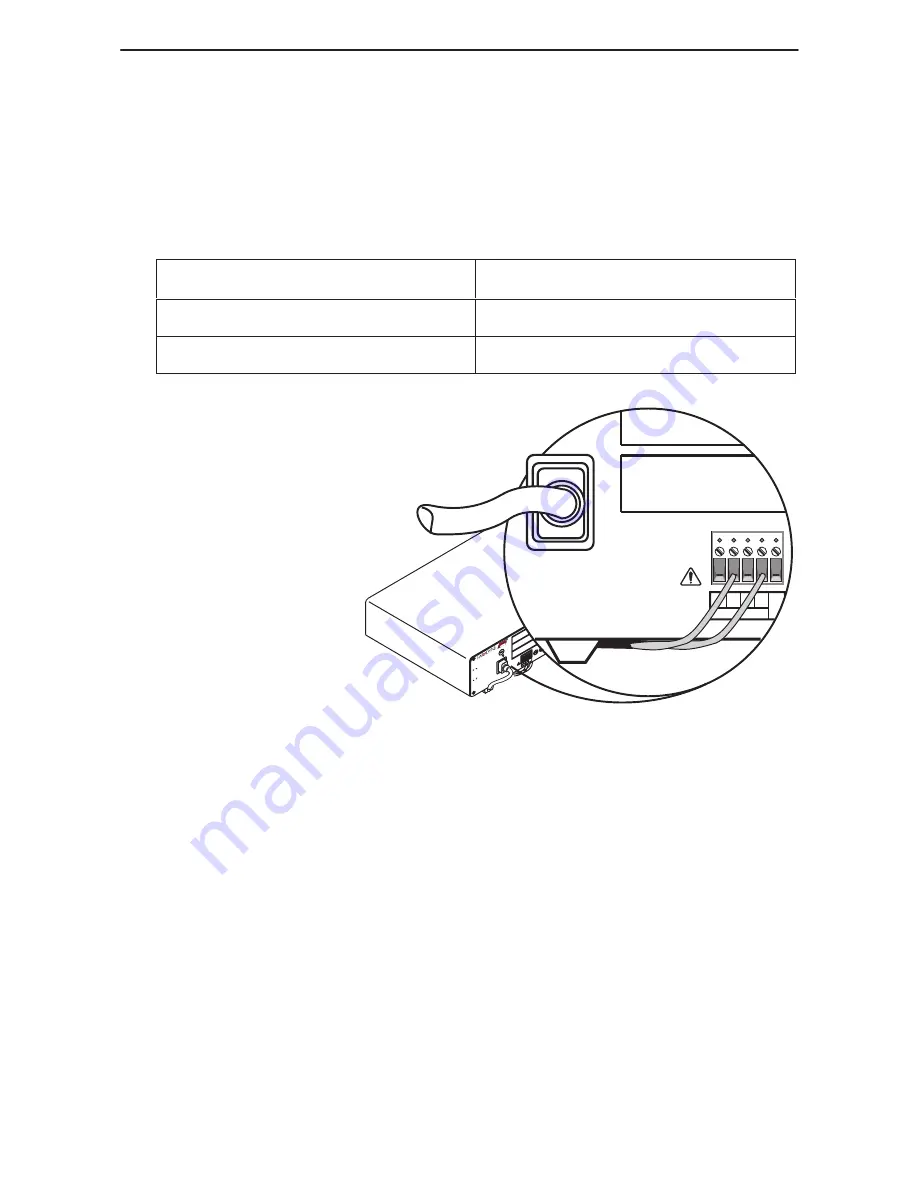
2. Insert the wires for the dc power source into the appropriate terminal and securely
fasten each wire by tightening the screw above it. The insulation should be fully
within the terminal block and no bare wire should be exposed outside of the block.
NOTE:
You should clearly label these power source wires as – 48V and RTN
respectively.
Insert Power Source B’s . . .
Into the . . .
Negative side
– 48V B input terminal.
Positive side
RTN B (return) terminal.
3. Dress the wires under
the 8610 chassis to the
left and behind the front
left support foot.
4. Plug the other end of the
ac power cord into the ac
outlet.
5. Power the Hotwire 8610
DSLAM chassis.
6. Make sure the PWR A
and PWR B LEDs on the
front panel are both ON
(green).
Installing the Cards
Use a small- to medium-size flat-blade screwdriver to install the MCP and DSL cards.
The MCP card
must be installed in Slot 1 of the base chassis.
CAUTION:
Do not insert the MCP card into Slots 2 or 3 as this will damage the DSLAM
chassis. The MCP card must be used in Slot 1 of the base 8610 chassis for
proper functionality. Only use the MCP card in an 8610 chassis. Do
not try to
use an MCC or MCC Plus card.
A circuit card may be replaced without disruption to user data (i.e., you can remove and
reinstall a card without powering down the 8610 chassis and disrupting user data on
the other cards). To remove the card from the chassis, unfasten the screws on both
ends of the faceplate. Then, simply push the ejector handles outward and slide the card
out.


