61
/
79
Remark:
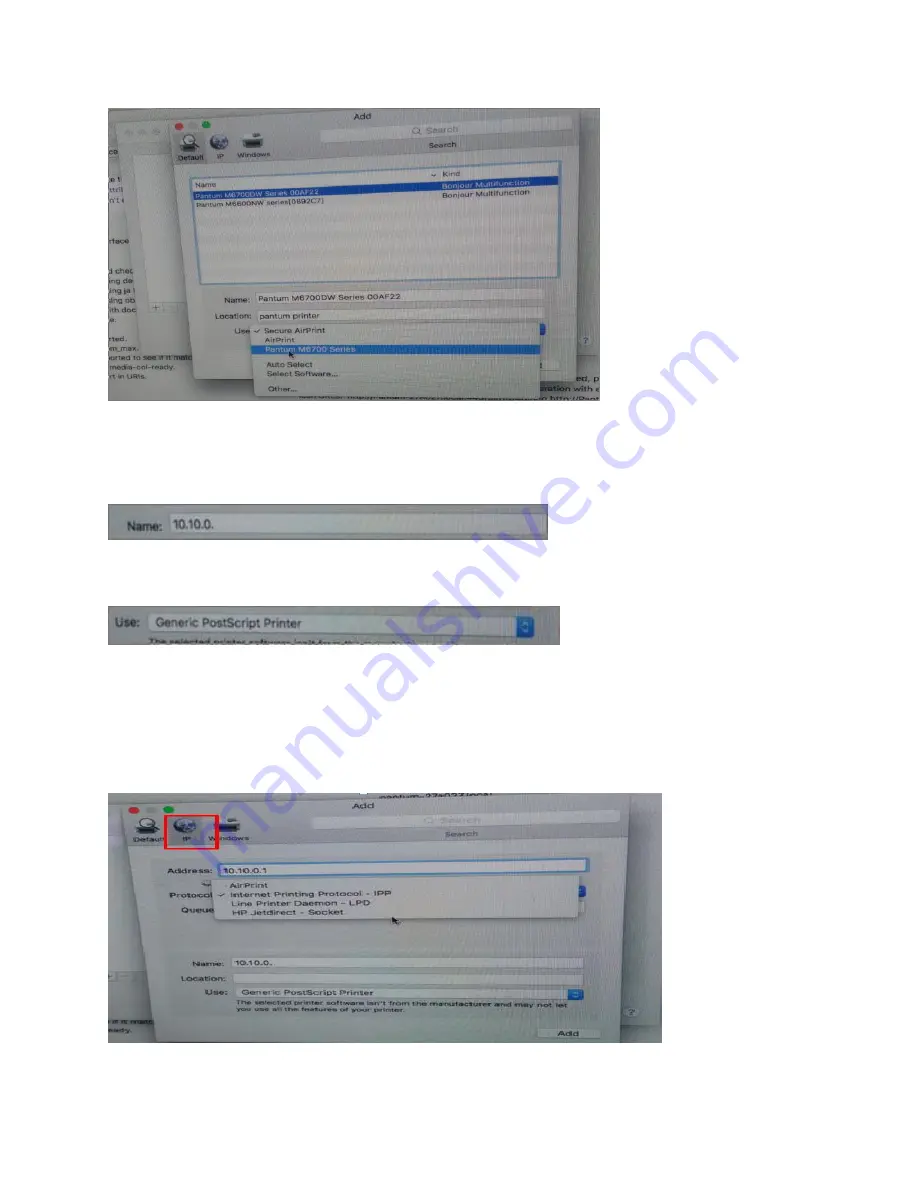
If the internet needs to set up manually. You can chose to IP modified at the forth step.
Modify the IP address need to match to the IP agreement.
Here is the printer
’
s name without modifications.
Please chose the corresponding driver which installed on PC.(it is need to be the same with
printer model.)
Step5:
After chose to save, it will be finished to install the internet printing.
Summary of Contents for P2200 Series
Page 5: ...5 79 2 Select way 3 Connect with wifi and attention to the instructions display in the video...
Page 6: ...6 79 3 Please make sure that pc is connected with router via network cable or wi Fi...
Page 16: ...16 79 Step2 Chose Setting in the below picture Step3 Chose wireless Hotpot at the left column...
Page 17: ...17 79 Step4 Chose Close to apply and it will be done...
Page 19: ...19 79 26 Step4 Select the WIFI name of your router and click next...
Page 27: ...27 79 Step 3 Open the Safari or others browser...
Page 33: ...33 79 9 How to check the printer s serial number location Please check with below pictures...
Page 35: ...35 79 LED2 Status Indication Indication of LED1 and LED2 Combination Status...
Page 50: ...50 79 Step2 Please click on the version in red circle then the version will show as below...
Page 53: ...53 79 2 What is my P2200 P2500 series Printer Specifications...
Page 55: ...55 79 Step3 Chose Media Quality in the option select from Draft Normal Best per your request...
Page 79: ...79 79 Step2 then select the Two Sided option and then try to print it...


