107
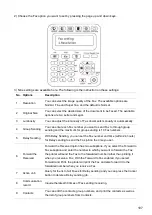
2) Choose the Fax option you want to set by pressing the page up and down keys.
3) Nine settings are available here. The following is the instruction on these settings:
No. Options
Description
1
Resolution
You can select the image quality of the Fax. The available options are
Normal, Fine and Super fine, and the default is Normal.
2
Original Size
You can select the desired size of the document to be Faxed. The available
options are A4, Letter and Legal.
3
Luminosity
You can adjust the luminosity of Fax documents manually or automatically.
4
Group Sending
You can enter each Fax number you want to send Fax to through group
sending and the maximum for group sending is 10 Fax numbers.
5
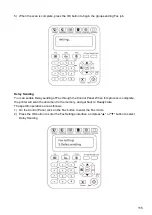
Delay Sending
With Delay Sending, you can set the Fax number and time (within 24 hours)
for Delay sending to send the Fax job on the time you set.
6
Forward the
Received
Forward the Received option has two suboptions. If you select the Forward to
Fax suboption and enter the number to which you want to forward the Fax,
the printer will send the Fax to the forwarded number rather than printing it
when you receive a Fax; With the Forward to Fax enabled, if you select
Forward and Print, the printer will print the Fax and also forward it to the
forwarded number when you receive a Fax.
7
Active Job
Query for the list of all Faxes for Delay sending and you can press the Cancel
button to delete a Delay sending job.
8
Communication
record
Inquire the latest 30 times of Fax sending/ receiving.
9
Contacts
You can edit the contacts, group numbers, and print the contacts as well as
the list of group numbers from Contacts.

