EM
BR
OI
D
ER
Y
B
AS
IC
S
7
Cut-away
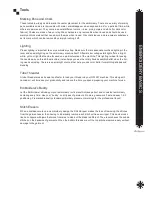
Cut-away backing provides the most stability. It also offers the sharpest embroidery on highly detailed
designs that includes small lettering. Cut-away backing is denser with slightly longer fiber which grabs the
thread better and allows tighter registration. It is highly recommended for knit fabric because it prevents the
design from stretching out with frequent wearing and washing. Choose a lightweight cut-away for designs
with a light stitch density and a heavy backing for dense designs. After finishing the sew out of the design,
remove the fabric from the hoop and very carefully cut with scissors the backing away from the embroidery
design leaving some backing on.
Tear-away
Tear-away backing is less stable then a cut-away backing. It is easy to remove the excess backing material by
simply tearing it away from the embroidered piece. Be careful when tearing the backing material so not to pull
or stretch the fabric. Some tear-away is easier to remove than others so test them to see which works best
for you. When a project requires strong support, try using several layers of light to medium-weight backing
instead of one layer of heavyweight. It is easier to remove the layers individually then tearing a heavyweight
stabilizer. Tear-away backing is recommended for very strong and stable fabrics and also on garments where
visible backing is an issue, such as the back of towels or where the article is not going to be washed such as
ball caps or bags.
Wash-away
A tear-away backing that when laundered, any excess backing simply washes away.
Specialty
Poly mesh is a lightweight woven cut-away backing that is thin, soft and strong. It is recommended for low
stitch count designs on polos and T-shirts. The poly mesh does not show through light color garments like
conventional backing. It is also available as a fusible backing, applied by an iron prior to hooping.
Pressure-sensitive backings such as Peel-n-Stick and Hydrostick have an adhesive backing and tear-away.
These are ideal where the fabric or garment is too difficult to hold in a hoop. A common usage is with the
Fast Frame or window type frames. The embroider places the backing in the hoop, and the fabric held in
place by the adhesive not by the hoop. For the Peel-n-Stick remove the paper backing to reveal a sticky
adhesive that holds the product in place. The adhesive on Hydrostick is water activated by applying a moist
sponge. The advantage to using Hydrostick, is it will not gum up the machine’s needles and can be remoist-
ened if necessary.
Topping
Topping is a plastic film used on the top side of an embroidered item that helps prevent stitches from sinking
into textured fabrics such as pique, fleece, terry or corduroy. Topping used this way should always be used in
conjunction with a backing. The topping lies on top of the fabric; after you finish embroidering, rip the topping
off and spritz any remaining topping with water to remove.
Aqua film and Romeo are a real heavy plastic soluble substrate used for lace or freestanding embroidery de
-
signs that can be applied like a patch. Hoop one or two layers of heavy material, embroider design then pull
away and dissolve material in water.
Foam
Foam is used to add dimension to embroidery, most often on lettering for caps. It is available in a variety of
colors in 2mm and 3mm thickness by the sheet. Choose a color that closely matches the thread. The foam
sheet is laid on top of the area that will be dimensional and then stitched over with a column fill that uses
short stitches to cut the foam. The excess foam is pulled away from the embroidery leaving a 3D effect. Some
stray pieces of foam may remain which can be eliminated by applying a hot hair dryer or heat gun* carefully
over the area. The excess foam will shrink back into the embroidery leaving a clean, smooth finish. 3D foam
requires a special digitizing techniques with a recommended satin column width between 3mm and 11mm.
*Caution: The use of a heat gun can singe/discolor the fabric if too hot or held too close to material.
Summary of Contents for GS1501
Page 30: ...GETTING STARTED 28 ...
Page 31: ...GETTING STARTED 29 The Control Panel Display ...
Page 62: ...EMBROIDERY BASICS 28 Notes ...
Page 64: ...MACHINE BASICS 2 ...
Page 65: ...MACHINE BASICS 3 ...
Page 70: ...MACHINE BASICS 8 ...
Page 71: ...MACHINE BASICS 9 ...
Page 78: ...MACHINE BASICS 16 Notes ...


