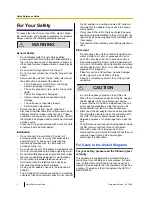
USB Port
USB Cable
Connecting using the PC cable
A
BC
D
AUDIO IN/OUT Jack
PC Cable
Microphone jack (red) of computer
Headphone jack (green) of computer
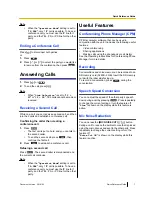
Connecting an External Wired MIC
An optional KX-NT701 External Wired MIC can be
connected to the unit using the
EXT MIC1
(
A
) or
EXT
MIC2
(
B
) jacks. 2 mics can be connected.
A
B
Changing the Language
1.
Press
[MENU]
.
2.
Press
[ ]
or
[ ]
repeatedly to select "
Basic
Settings
".
3.
Press
[ENTER]
two times.
4.
Press
[ ]
or
[ ]
repeatedly to select the desired
language.
5.
Press
[ENTER]
.
6.
Press
[MENU]
.
Operation Mode
By selecting an operation mode, the unit operates as a
SIP extension of the PBX, peer to peer IP conferencing
phone or USB audio device of a computer.
1.
Press
[MENU]
.
2.
Select "
Operation Mode
", then press
SELECT
.
3.
Select the desired setting. (default: "
IP-PBX
")
•
"
IP-PBX
": The unit can make and receive IP
calls as a SIP extension of the PBX.
•
"
Peer to Peer
": Peer to peer IP calls are
possible. To make a call, the other party’s IP
address is specified.
•
"
USB Audio
": The unit operates as the USB
audio device of a computer.
4.
Press
SAVE
.
5.
For the new setting to take effect, disconnect the AC
adaptor from the AC outlet, then connect it again to
restart the unit.
•
When you are using PoE, disconnect the LAN
cable from the unit, then connect it again.
Line Selection
Whether the TEL line, PS line, or PC line is available is
determined by the "
Line Selection
" setting.
1.
Press
[MENU]
.
2.
Press
LINE
.
3.
Select the desired setting.
•
"
IP + TEL
": The IP and TEL lines are available.
•
"
IP + PS
": The IP and PS lines are available.
•
"
IP + PC
": The IP and PC lines are available.
4.
Press
SAVE
.
5.
Press
[MENU]
.
Note
•
When the operation mode is set to "
USB
Audio
", the "
Line Selection
" cannot be
selected.
•
If you select "
IP + TEL
", change the dial mode
(default: "
Tone
") if necessary:
[MENU]
®
select "
TEL Settings
"
®
select
"
Dial Mode
"
®
select "
Pulse
" or "
Tone
"
®
SAVE
®
[MENU]
IP Network, SIP Settings
To properly connect the unit to an IP network, the
following settings must be set to match the settings of
the IP network.
–
IP address mode: Automatic (DHCP) or manual
(static) IP address assignment (default: static)
–
IP address (when static connection mode is
selected; default: 192.168.0.2)
–
Subnet mask (when static connection mode is
selected; default: 255.255.255.0)
–
Default gateway (when static connection mode is
selected; default: 0.0.0.0)
To use the unit as a SIP extension of the PBX, the unit
must be registered as a SIP extension through PBX
programming, the "
Operation Mode
" setting must be
set to "
IP-PBX
" (this is the default setting), and the
following settings must be set to match the settings of
the PBX.
Document Version 2010/02
Quick Reference Guide
5
Quick Reference Guide


