


Link Functions (VIERA
Link)
86
VIERA Link (HDMI and Audio out connections)
Connected equipment
Features
Player theatre
Blu-ray Disc theatre
Amplifier
Channel download
–
–
–
Easy playback
∗
5
∗
5
–
Power on link
–
Power off link
Reduce unnecessary power
consumption in Standby
–
∗
3
–
Auto standby for unnecessary
equipment
∗
3
∗
6
∗
3
∗
6
∗
3
Pause Live TV programme
–
–
–
Direct TV Recording
–
–
–
Control the menu of the connected
equipment by VIERA remote control
∗
1
∗
1
–
Speaker control
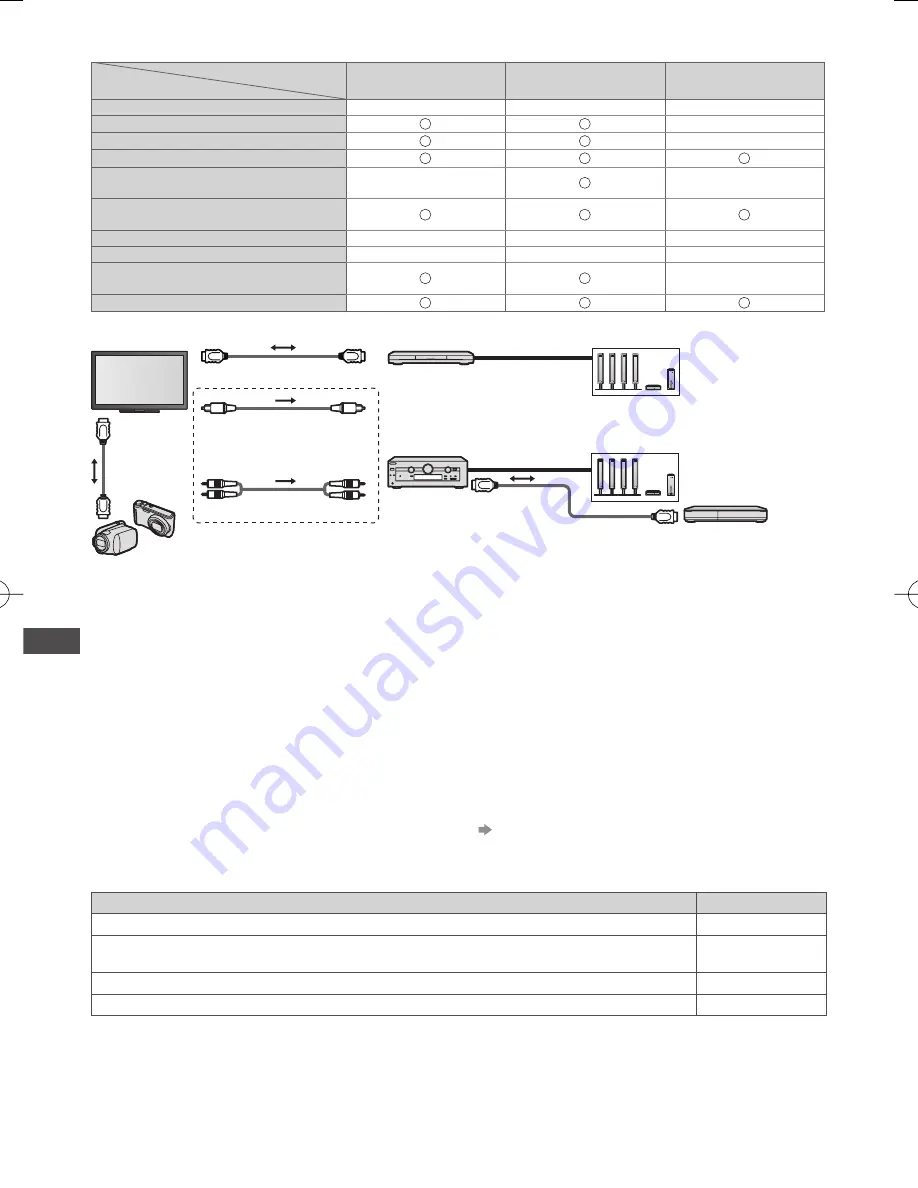
Connection
●
To use Player theatre / Blu-ray Disc theatre
HDMI cable
∗
7
Speaker system
Speaker system
Player theatre / Blu-ray Disc
theatre with VIERA Link
function
Amplifier with
VIERA Link function
DIGA Recorder with
VIERA Link function
HDMI
cable
HDMI cable
HD Video Camera / LUMIX Camera with VIERA Link function
●
To use Amplifier
Optical digital
audio cable
or
RCA cable
●
Use fully wired HDMI compliant cable.
●
Connect the equipment supporting VIERA Link to the TV’s HDMI2 terminal via an HDMI cable.
●
Use the optical digital audio cable, or RCA cable for audio output from the TV.
∗
1: Available with the equipment which has “HDAVI Control 2
or later” function.
∗
2: Available with the equipment which has “HDAVI Control 3
or later” function.
∗
3: Available with the equipment which has “HDAVI Control 4
or later” function.
∗
4: Available with a DIGA Recorder which has HDD.
∗
5: While playing a disc.
∗
6: Except for watching a disc.
∗
7: If the connected equipment has “HDAVI Control 5”
function, you do not have to use this audio cable
(Optical digital audio cable or RCA cable). In this
case, connect the equipment to the TV’s HDMI2
terminal via an HDMI cable.
VIERA Link Control of compatible equipment
[VIERA Link Control] (p. 89)
●
Table below displays maximum number of compatible equipment that can be controlled by VIERA Link Control. This
includes connections to equipment already connected to the TV.
For example, DIGA Recorder connected to Amplifier which is connected to the TV via an HDMI cable.
Type of the equipment
Maximum number
Recorder (DIGA Recorder, etc.)
3
Player (DVD Player, Blu-ray Disc Player, HD Video Camera, LUMIX Camera, Digital Camera,
Player theatre, Blu-ray Disc theatre, etc.)
3
Audio system (Player theatre, Blu-ray Disc theatre, Amplifier, etc.)
1
Tuner (Set top box, etc.)
4
Summary of Contents for Viera UT50A series
Page 114: ...114 MEMO...
Page 115: ...115 MEMO...


