Using Network Services (DLNA
/ VIERA
Connect)
88
Network Setup
●
Ensure the connections are completed before starting Network Setup.
“Network connections” (p. 87)
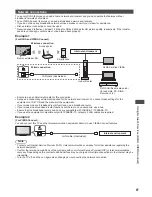
Display the menu and select [Network]
Network
select
access
Network Link settings
Sets the link settings to access and control this TV from the network equipment (PC with Windows 7 installed,
smartphone, DLNA Certified VIERA, etc.) via the network.
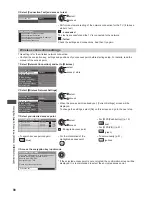
1
Select [Network Link Settings]
Network Connection
Wired
Access
Wireless Network Settings
IP/DNS Settings
Connection Test
Software Update
Network Link Settings
On
Network Status
New Software Message
select
access
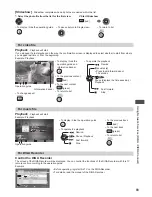
2
Select the items and set
VIERA
VIERA Name
DLNA Remote Control
DLNA Remote Volume
Network Link Settings
Network Remote Control
On
On
On
DLNA Server Settings
Access
select
access / store
Menu
Item
Adjustments / Configurations (alternatives)
Network Link Settings
VIERA Name
Sets your favourite name for this TV
●
This name will be used as the name of this TV on the screen of the other
network equipment.
DLNA Remote Control
Enables to control the TV using Windows 7 via the network
[Off] / [On]
DLNA Remote Volume
Enables to control the volume of the TV using Windows 7 via the network
[Off] / [On]
Network Remote
Control
∗
Enables to control the TV from the network equipment (smartphone, etc.)
[Off] / [On]
DLNA
Server Settings
∗
DLNA Server
Enables to share the TV programme or contents of this TV with the network
equipment (DLNA Certified VIERA, smartphone, etc.)
[Off] / [On]
Registration Type
Selects whether to restrict the access to this TV for each equipment on the home
network
[Auto] / [Manual]
[Auto]:
All the available equipment on the home network are accessible.
(maximum 16 equipment)
[Manual]:
Sets the restrictions for each equipment in the [Remote Device List].
Remote Device List
Lists the accessible equipment to this TV on the home network
∗
Depending on the area, this function may not be available. For details, consult your local Panasonic dealer.


