


How to Use Menu Functions
●
23
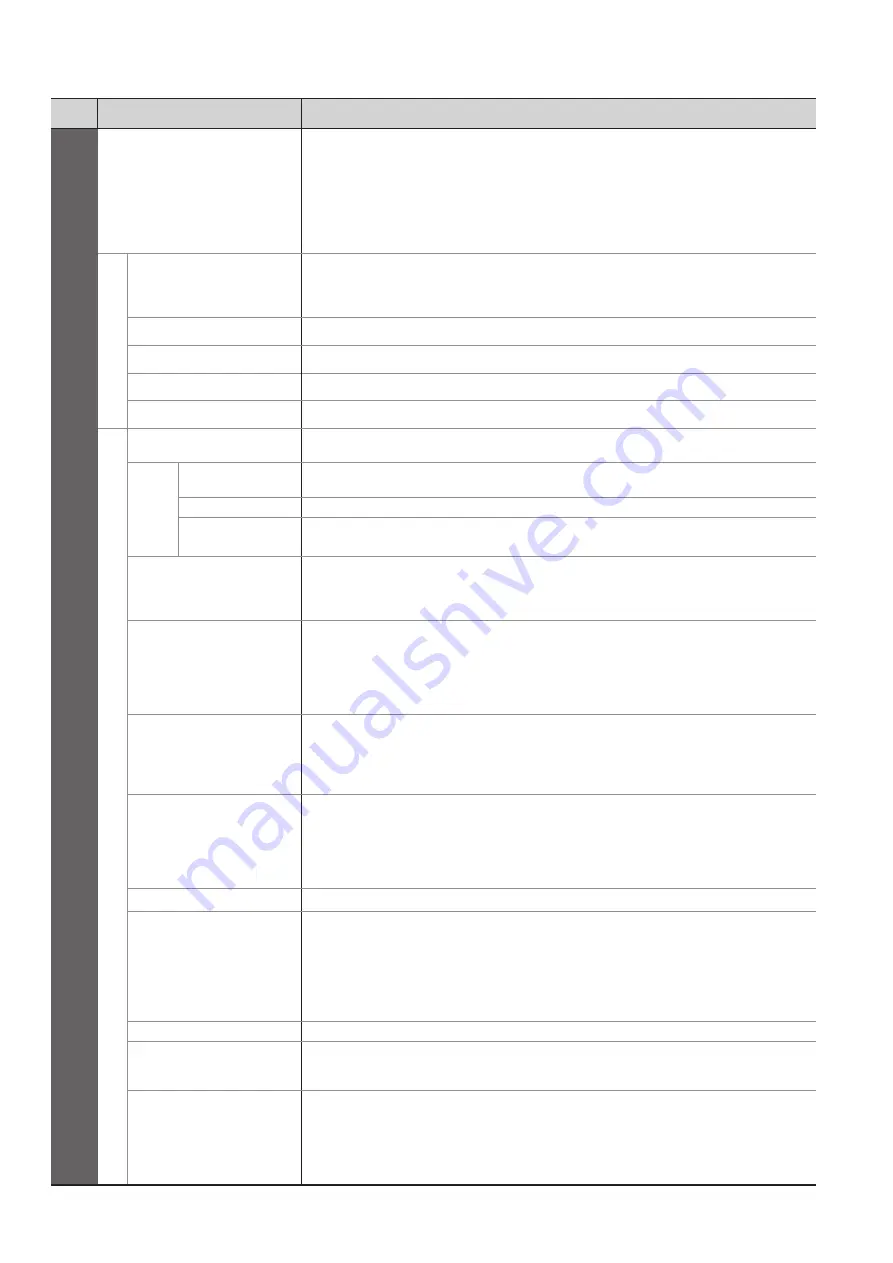
Menu
Item
Adjustments / Configurations (alternatives)
Setup
Advance(isfccc)
Enables the advanced picture settings
(Off / On)
Set to “On” to enable the mode of “Professional1” and “Professional2” in
●
“Viewing Mode”.
Set to “On” to display the advanced items in the Picture Menu - “Advanced
●
Settings”, “Lock Settings” and “Copy Adjustment”. “Copy Adjustment” will be
displayed when “Viewing Mode” is set to “Professional1” or “Professional2”.
“isfccc” is the picture setting for the certified professional dealer. For details,
●
consult your local dealer.
System Menu
USB Keyboard
Layout
Selects the language that your USB Keyboard supports
Use a USB Keyboard to enter characters in VIERA CAST.
●
Characters may not be displayed correctly on the TV screen depending on the
●
connected keyboard or the keyboard layout setting.
Shipping Condition
Resets all settings, for example, when moving house
System Update
Downloads new software to TV
Software Licence
Displays the software licence information
System Information
Displays the system information of this TV
Other Settings
AV Colour System
Selects optional colour system based on video signals in AV mode
(Auto / PAL / SECAM / M.NTSC / NTSC)
GUIDE Plus+
Settings
Update
Performs the update of the GUIDE Plus+ schedule and advertising informations for
the GUIDE Plus+ system
Postcode
Sets your postcode to display advertisements in the GUIDE Plus+ system
System
Information
Displays the system information of the GUIDE Plus+ system
Intelligent Frame
Creation
Automatically compensates the picture frame rate and removes juddering
movements to make the images smooth and clear
(Off / Mid / Max)
This function is not available for selection (default to “Off”) when “Viewing Mode”
●
is set to “Game” or in the mode of PC input, photo or Network service operations.
24p Smooth Film
Automatically compensates the picture frame rate to make the 24p source movie
images smooth
(Off / Mid / Max)
This is available only for 24p signal input and displayed instead of
●
“Intelligent Frame Creation”.
This function is not available for selection (default to “Off”) when “Viewing Mode”
●
is set to “Game” or in the mode of PC input, photo or Network service operations.
Super Resolution
Enhances the picture resolution to make the image sharper
(Off / Mid / Max)
This function is available for SD (Standard definition) signal.
●
As for HD (High definition) signal, this function is available when aspect mode is
●
set to 16:9 (16:9 Overscan is set to “On”), 4:3 Full or Zoom.
Not valid on PC, VIERA CAST and Media Player
●
Auto Standby
Sets the time the TV automatically goes to Standby mode when no operation is
performed for the selected times
(Off / 2 / 4 hours)
Starting Timer Programming automatically does not affect this function.
●
Automatic input switching with the connected equipment affects this function and
●
time-count will be reset.
The notification message will appear 3 minutes before going to Standby mode.
●
Power Save
Reduces brightness of picture to economise on power consumption
(Off / On)
16:9 Overscan
Selects the screen area displaying the image
(Off / On)
On : Enlarged the image to hide the edge of the image.
Off : Displayed the image in the original size.
Set to “On” if noise is generated on the edge of the screen.
●
This function is available when aspect is set to Auto (16:9 signal only) or 16:9.
●
This function can be memorized separately for SD (Standard definition) and HD
●
(High definition) signals.
SD Card LED
Lights blue LED while SD Card is inserted
(Off / On)
Time Zone
Adjusts the time data
The time data will be corrected based on GMT.
●
Set to “Auto” to adjust the time automatically according to your area.
●
DVI Input Setting
Changes the black level in the image for HDMI input mode with DVI input signal
manually
(Normal / Full)
When the DVI input signal from the external equipment, especially from PC, is
●
displayed, the black level may not be suitable. In this case, select “Full”.
The black level for HDMI input signal will be adjusted automatically.
●
For HDMI input mode with DVI input signal only
●
A different menu will be displayed when “Advance(isfccc)” in the Setup Menu is set to “On” or in the mode of PC
●
input, Media Player or Network service operations.
Only available items can be selected.
●


