Main Menu
VIERA Link
Picture
Sound
Setup
2/2
Input Labels
Picture Overscan
Banner Display Timeout
3 seconds
Setup Menu
On
Access
Software License
System Information
OPTION SD CARD
INPUT
EXIT
TV
RETURN
Input Labels
AV1
DVD
AV2/S
AV2/S
COMPONENT
COMPONENT
AV3/S
AV3/S
PC
PC
HDMI1
HDMI1
HDMI2
HDMI2
HDMI3
HDMI3
MENU
28
Input Labels
2
3
4
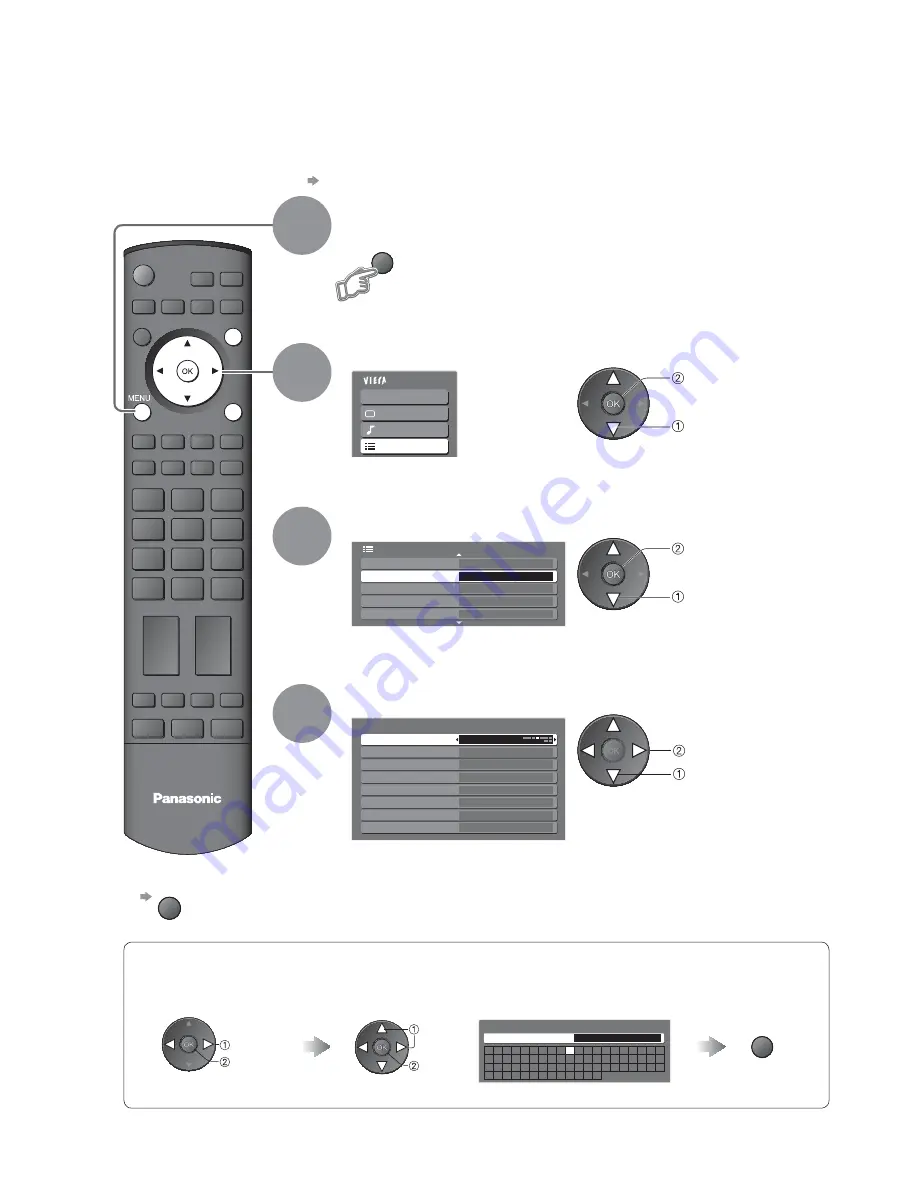
Select “Setup”
Select “Input Labels”
Display the menu
Select a input terminal and set
To return to TV
EXIT
For easier identi cation and selection of the input mode, you can label each input terminals or skip
terminal that is not connected to any equipment.
•
To select the input mode p. 16
1
The labels you set will be displayed in “Input Selection” menu (p. 16) or banner.
•
If “Skip” is selected, you cannot select the mode.
set
select
access
select
access
select
User input
You can name each input terminals freely.
Select “User input”
access
select
Set characters
User input
Name
A B C D E F G H
I
J
K
L M N
U V W X Y Z
0
1
2
3
4
5
6
a
b
c
d
e
f
g
h
i
j
k
l
m n
u
v
w
x
y
z
(
)
+
-
.
*
_
O P Q R S T
7
8
9
!
:
#
o
p
q
r
s
t
set
select
(maximum: ten characters)
Store
RETURN