Panasonic Viera TX-26LXD600 Operating Instructions Manual Download Page 3

4

5

Example 1

Example 2

Safety Precautions

AC 220-240 V

50 / 60 Hz

Electronic equipment
In particular, do not place video equipment near the 

TV (electromagnetic interference may distort images 

/ sound).
Equipment with an infrared sensor
This TV also emits infrared rays (this may affect 

operation of other equipment).


Keep the TV away from these equipment

Warning & Caution

Notes

IMPORTANT: THE MOULDED MAINS PLUG

FOR YOUR SAFETY, PLEASE READ THE FOLLOWING TEXT CAREFULLY.

The wire which is coloured BLUE must be connected to the terminal in the mains plug 

which is marked with the letter N or coloured BLACK.

The wire which is coloured BROWN must be connected to the terminal in the mains plug which is 

marked with the letter L or coloured RED.

Under no circumstances should either of these wires be connected to the Earth terminal of the 

three pin mains plug, marked with the letter E or the earth symbol   .

How to replace the fuse.

For plug type shown in example 1:

Lift out the removable fuse compartment with a screwdriver and replace the fuse, then refit 

securely into the mains plug (see example 1).

For plug type shown in example 2:

Lift open the fuse compartment, in the mains plug, with a screwdriver, and replace the fuse, then 

press the fuse cover down securely (see example 2).

As the colours of the wire in the mains lead of this appliance may not correspond with the coloured 

markings identifying the terminals in your mains plug, proceed as follows.

IMPORTANT:

 – The wires in this mains lead are coloured in accordance with the following code: –

 Blue: 

Neutral Brown: Live

If a new mains plug is to be fitted, please observe the wiring code as shown below.

If in any doubt, please consult a qualified electrician.

If the fitted moulded mains plug is unsuitable for the socket outlet in your home, then the fuse shall be

removed and the mains plug cut off and disposed of safety. There is a danger of severe electrical shock 

if the cut off mains plug is inserted into any 13 amp socket.

If the mains plug contains a removable fuse cover, you must ensure that it is refitted when the fuse is replaced.

If you lose the fuse cover the mains plug must not be used until a replacement cover is obtained.

A replacement fuse cover may be purchased from your local Panasonic Dealer.

This appliance is supplied with a moulded three pin mains plug for your safety and convenience. A 5 amp fuse is

fitted in this mains plug. Shall the fuse need to be replaced, please ensure that the replacement fuse has a rating 

of 5 amps and that it is approved by ASTA or BSI to BS1362.
Check for the ASTA mark 

ASA

 or the BSI mark 

 on the body of the fuse.

Handling the mains plug

Ensure that the mains plug is easily accessible at all 

times. The On/Off switch on this model does not fully 

disconnect the TV from the mains supply. Remove the 

mains plug from the wall socket when the TV is not used 

for a prolonged period of time.

Note

If the TV is not switched off when the TV station stops 

transmitting, it will automatically go to standby mode 

after 30 minutes. This function will operate only in 

Analogue TV mode.

Do not expose to 

direct sunlight and 

other sources of heat

Avoid exposing the TV to direct 

sunlight and other sources of heat. To 

prevent fire never place any type of 

candle or naked flame on top or near 

the TV.

Power source

This TV is designed to operate on 220-240V, 

50 / 60 Hz AC.

Display panel

Cabinet

Mains plug

Daily care: Gently wipe the surface clean of dirt by using 

a soft cloth.

Major contamination: Wipe the surface clean using a soft 

cloth dampened with clean water or water containing a 

small amount of neutral detergent. Then, using a soft dry 

cloth, evenly wipe the surface clean until it is dry.

Daily care: Wipe the surface clean using a soft dry cloth.

Major contamination: Dampen a soft cloth with clean water 

or water containing a small amount of neutral detergent. 

Then, wring the cloth and wipe the surface clean with it. 

Finally, wipe the surface clean with a dry cloth.

Wipe the mains plug with a dry cloth at regular intervals. 

(Moisture and dust may lead to fire or electrical shock.)

First, remove the mains plug from the socket outlet.

Caution

• 

The surface of the display panel has been specially 

treated and may be easily damaged.

Do not tap or scratch the surface with your fingernail or 

other hard object.

• 

Use care not to subject the surface to insect repellent, 

solvent, thinner, or other volatile substances

(this may degrade surface quality).

Caution

• 

Use care not to subject the TV's surfaces to detergent.

(A liquid inside the TV could lead to product failure.)

• 

Use care not to subject surfaces to insect repellent, 

solvent, thinner, or other volatile substances

(this may deteriorate the surface by peeling the paint).

• 

Do not allow the cabinet to make contact with a rubber 

or PVC substance for a long time.

Maintenance

Allow sufficient space around 

the TV for radiated heat

10

10

6

10

10

(cm)

Do not remove the cover

Do not remove the rear cover as live parts are 

accessible when it is removed. There are no 

user serviceable parts inside.

Do not expose to rain or 

excessive moisture

To prevent damage which might result in electric 

shock or fire, do not expose this TV to rain or 

excessive moisture.

  This TV must not be exposed to dripping or 

splashing water and objects filled with liquid, 

such as vases, must not be placed on top of or 

above the TV.

Do not block the rear 

ventilation openings

Ventilation should not be impeded by covering 

the ventilation openings with items such as 

newspapers, tablecloths and curtains.

Cabinet and display panel care

Remove the mains plug from the wall socket.

  The cabinet and display panel can be cleaned 

with a soft cloth moistened with mild detergent 

and water. Do not use solutions containing 

benzol or petroleum.

  TV can produce static electricity, care must be 

taken whenever touching the TV screen.

Use only the dedicated 

stands / mounting equipment

Using an unauthorized stand or other fixtures may 

make the TV shaky, risking injury. Be sure to ask 

your local Panasonic dealer to perform setup.

Use optional stands / mounts (p. 6).

Do not place the TV on 

sloped or unstable surfaces

The TV may fall off or tip over.


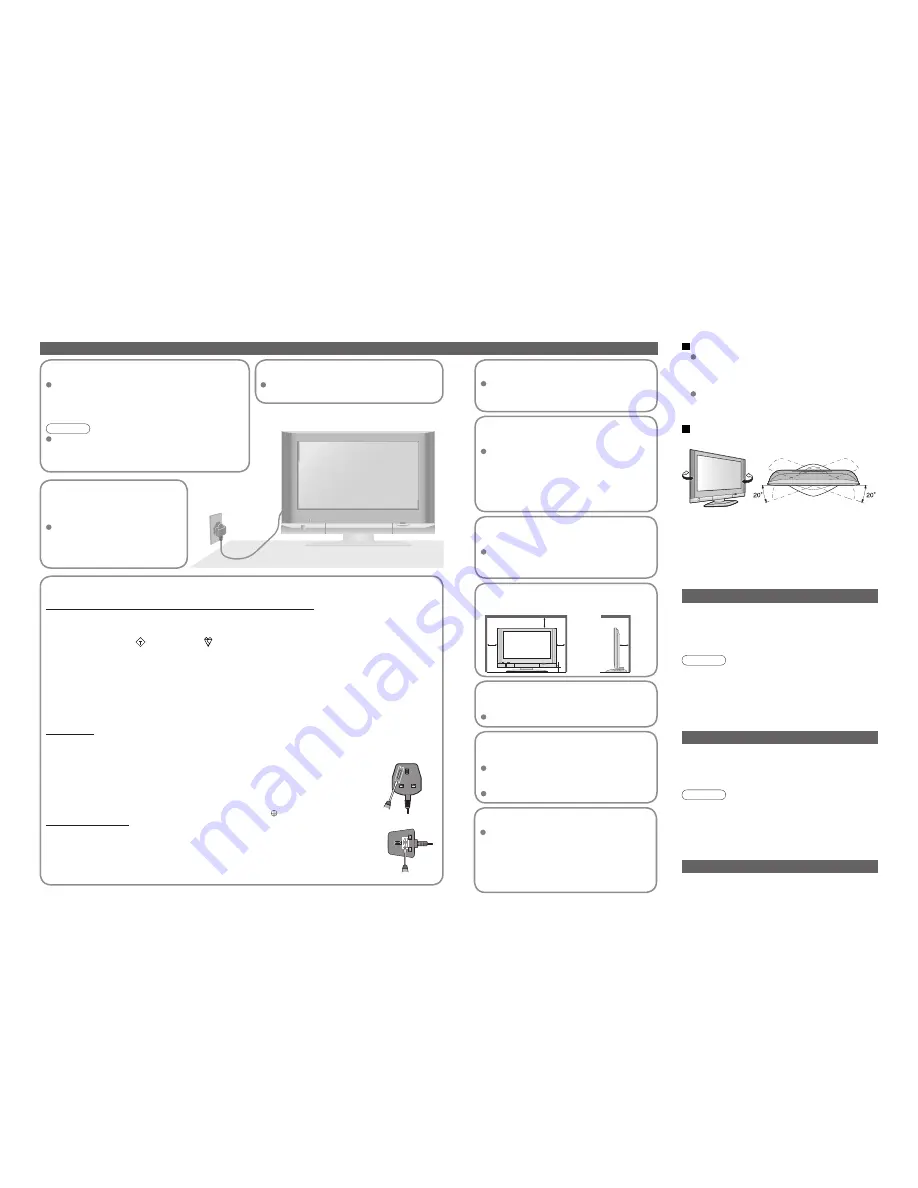
Adjust the LCD panel to your desired 

 angle

(View from the top)

Summary of Contents for Viera TX-26LXD600

Page 1: ...nd XT SRS and symbol are trademarks of SRS Labs Inc TruSurround XT technology is incorporated under license from SRS Labs Inc Information on Disposal for Users of Waste Electrical Electronic Equipment private households This symbol on the products and or accompanying documents means that used electrical and electronic products should not be mixed with general household waste For proper treatment r...

Page 2: ...Information 48 FAQs 51 On screen messages 53 On screen messages SD Card 54 Index 55 Specifications 55 Licence 56 FAQs etc Accessories Options 6 Identifying Controls 7 Basic Connection 8 Auto Setup 10 Enjoy rich multi media Quick Start Guide Receive terrestrial digital services using an integrated Digital Video Broadcasting tuner Display DVB programmes with TV Guide p 14 Timer recording p 36 Regist...

Page 3: ...dby mode after 30 minutes This function will operate only in Analogue TV mode Do not expose to direct sunlight and other sources of heat Avoid exposing the TV to direct sunlight and other sources of heat To prevent fire never place any type of candle or naked flame on top or near the TV Power source This TV is designed to operate on 220 240V 50 60 Hz AC Display panel Cabinet Mains plug Daily care ...

Page 4: ...RD slot p 38 Standby On Off switch Switches TV On or Off standby Sound mute On Off Changes picture aspect ratio p 13 TV Guide p 14 Selects programmes in sequence Subtitles p 13 To view subtitles Teletext p 18 OK button to confirm selections and choices Press after selecting programme positions 1 99 0 9 in Analogue mode to avoid delay VCR DVD operations p 17 Volume Programme Information p 13 Telete...

Page 5: ...order DVD Digital Versatile Disc Rear of the TV Satellite receiver External equipment and cables shown are not supplied with this TV Please ensure that the unit is disconnected from the mains socket before attaching or disconnecting any leads Basic Connection SCART cable fully wired Ex 1 Connecting aerial TV only Ex 2 Connecting DVD Recorder VCR TV DVD Recorder and VCR Note Connect to AV3 for a DV...

Page 6: ...by your local dealer When inputting owner ID Auto Setup is now complete and your TV is ready for viewing When inputting owner ID later You can now use the remote control to turn On the TV or turn the TV to standby mode Power LED On 2 If you input the ID later Owner ID p 35 If a compatible recording equipment with Q Link or similar technologies p 42 is connected analogue channel information is auto...

Page 7: ...isplay information banner Display programme information In DVB In Analogue Displays analogue information for a few seconds Change aspect ratio or Each press changes the mode While the bar is displayed red green Auto aspect 16 9 14 9 4 3 Zoom1 Zoom2 Zoom3 Channel Programme Broadcast time Current time During scrambled broadcasting Category Features available To change the category blue To change the...

Page 8: ...0 21 22 23 24 red green yellow blue TV Guide time Channel To change the layout Landscape Portrait To previous day To next day To view a programme list of the selected category To view a programme list of the selected type Using TV Guide Portrait Displays by time select category TV Guide Electronic Programme Guide EPG provides an on screen listing of programmes currently broadcast and future broadc...

Page 9: ...ut mode is not switched automatically Perform and When colour bar disappears Press any coloured buttons You can also select the connector using the TV AV button on the front panel of the TV Press the button repeatedly until you reach the connector to view Dependant on DVD VCR setup Screen display Watching VCR DVD and Satellites VCR DVD switch Select VCR to operate Panasonic VCR or DVD equipment Se...

Page 10: ...see can contain graphics and text laid out and controlled in a manner decided by the broadcaster You can check if the programme has teletext information To change the channel When select or go is displayed When symbol is displayed When the key words are displayed on colour bar red green yellow blue When options with numbers are displayed When i is displayed information Displayed if programme has t...

Page 11: ...es do not change number on blue button To change stored pages press and hold Enter new page number Using Analogue teletext Continued To resume Colour button you want to change View sub page Only when teletext is more than one page View theTV picture while searching for a teletext page Analogue mode How to Use Menu Functions picture sound quality etc Viewing Teletext How to Use Menu Functions chang...

Page 12: ... format for digital sound over television Reproduces stereo sound Off On Off if reception is poor FM monaural sound Analogue mode only Mode Sound quality can be improved when watching music scene or drama Music Speech SRS TruSurround XT SRS TruSurround XT creates a high quality surround sound effect using just two speakers from the source which can output surround encoded signals Off On HDMI1 inpu...

Page 13: ...annel to prevent access to it p 29 DVB Tuning Menu Auto Setup Add New Service New Service Message Signal Condition p 30 DVB System Setup Common Interface Module Preferred Subtitles System Update Display Timeout p 26 Multi Audio Chooses the sub voice for watching DVB Alternatives vary depending on the broadcaster Owner ID Inputs the owner ID p 35 Shipping condition Resets all settings for example w...

Page 14: ...ule optional Rear of the TV CI slot Insert or remove straightly and completely CI module access Follow the on screen instructions example The features that appear on screen are dependent on the contents of the selected CI module For more details see the manual of the CI module or check with the broadcaster On screen operation guide may not correspond to the remote control buttons Caution Turn Off ...

Page 15: ...ce You can lock specific channels and control who watches them When a channel is selected a message appears by entering the PIN number you can watch the channel select Appears when the channel is locked Enter the PIN number 4 digits Select Child Lock Service List To cancel Select the locked channel To lock all channels yellow To cancel all channel locks blue Select the channel to be locked Note Se...

Page 16: ...s another synchronous signal if the image is distorted H V On G H V by the horizontal and vertical signals from your PC On G by the green signal from your PC if available Control with HDMI Volume correction p 25 Main menu Picture menu Sound menu Setup menu Timer Programming Child Lock DVB Setup menu Multi Audio Access DVB System Setup eng DVB Tuning Menu Profile Edit DVB Auto Setup New Service Mes...

Page 17: ...nnel The analogue channel settings can be changed according to your needs and reception conditions To return to TV To return to TV 1 If in DVB mode Select Analogue Manual tuning screen Edit channels Delete Add Move Change name Lock Download to equipment Programme edit Set automatically Auto setup Set manually Manual tuning Analogue mode To download channel information to a Q Link compatible equipm...

Page 18: ...se DVB DVB Auto Setup p 30 Analogue Auto setup p 33 Shipping condition Restore Settings set Resets the TV to its original condition i e no channels tuned in All settings other than Owner ID channels picture sound quality etc are reset Enter the 4 digit PIN number of your choice Make a note of the PIN number in case you forget it Enter your name address and post code in that order Store Owner ID In...

Page 19: ...MER button to be On A message will appear if you try to programme a timer event which overlaps an already programmed event 2 min before the starting time a reminder message appears To remove the message OK button To cancel the programming EXIT button 10 sec before the starting time in DVB mode the TV automatically selects the programmed channel Cancelling the programming may not be valid immediate...

Page 20: ...p 50 and p 54 Select MPEG4 view or Photo view Video Photo Select the file to be viewed 4 Date Movie without sound Movie for which lock has been set Displayed one at a time Rewind press and hold To previous video Pause Playback Fast forward press and hold To next video Stop To previous photo To thumbnail Rotate 90 clockwise To next photo ZOOM 1 2 3 Select the SD mode select watch SD menu screen Rot...

Page 21: ...file will be unreadable Do not remove the SD card while recording The data being recorded and other data stored on the SD card may become unreadable SD recording may not be fully compatible or playable in some PC software or PDA devices When two pictures are shown on the same screen as Multi window functions the main window is the one that is recorded The picture can be switched for the sub window...

Page 22: ...ition is locked and no other DVB channel can be selected However you can watch analogue channels DATA LOGIC a trademark of Metz Corporation Megalogic a trademark of Grundig Corporation Easy Link a trademark of Philips Corporation SMARTLINK a trademark of Sony Corporation Read the manuals of the equipment too Download analogue channel settings Perform Auto setup p 33 When first using this TV see Au...

Page 23: ...are activated the TV is automatically turned on Only when TV is in Standby mode Power off link When TV is set to Standby mode the connected Panasonic equipment is also automatically set to Standby Theatre speaker You can control the theatre speaker with TV s remote control This function is available when Panasonic Amplifier or Player theatre is connected Display the menu Select Home theatre or TV ...

Page 24: ...ol with HDMI p 44 Types of connectable equipment to each connector DVD recorder or AV amplifier External Equipment To adjust volume Headphone volume in the Sound menu p 23 External Equipment A PC may be connected to this TV so that the PC screen is displayed and sound is heard from the TV PC signals that can be inputted Horizontal scanning frequency 31 to 69 kHz vertical scanning frequency 59 to 8...

Page 25: ...ect determined which ratio to use WIDE appears in the top left of the screen if a widescreen identification signal WSS is found or a signal found through a SCART terminal Auto aspect switches to the appropriate 16 9 or 14 9 widescreen ratio This function will also work in any aspect mode Auto aspect appears in the top left of the screen if black stripes above and below the picture are detected Aut...

Page 26: ... once You cannot select the same input source between Main and Sub screen This function cannot be used with a PC HDMI SD card or when progressive signals 1080i signals Y PB PR are being inputted Technical Information Frequently Asked Questions Technical Information Data format for Card browsing Photo Video Created automatically Created automatically 4 digit arbitrary characters 4 digit file number...

Page 27: ...are viewing in multi window p 13 Max number of Timer already set Maximum timer programming event is 8 New DVB Service Found Press OK start Auto Setup Press EXIT to Ignore Warning Selecting Auto Setup will delete current Profile and Childlock settings There is a new DVB station New version 1 90 found Do you really want to update the software and reboot the system Press OK to download the new versio...

Page 28: ...3 Power LED 7 10 Profile Edit 29 Programme edit 33 Q Link 42 Quick Start Guide 6 11 Remote control 6 7 RGB 9 Sales and Support Information 56 Satellite receiver 9 16 46 SCART 9 49 SD Card 38 50 54 SD Card Recording 40 50 Shipping condition 34 Signal Condition 30 Specifications 55 SRS TruSurround XT 23 Subtitles 13 20 S video 9 49 System Update 27 48 Teletext 18 20 Timer programming 15 36 TV Guide ...

Reviews: