


34
35
Advanced
Editing and Setting Channels
Auto
program
Set
automatically
Automatically searches and adds available channels to the memory.
Select “ANT in”
Select “Cable” or “Antenna”
Or select “Not used” (p. 13).
Select “Auto program”
Menu
Cable
ANT/Cable setup
ANT in
Auto program
Manual program
Signal meter
next
select
Select a scanning mode (p. 13)
Menu
Auto program
All channels
Analog only
Digital only
OK
select
Settings are made automatically
After the scanning is completed, select “Apply”.
(see below ).
All previously saved channels are erased.
Manual
program
Set
manually
Use this procedure when changing the channel setup or
changing the channel display.
Also, use this to add or skip channels from the channel list
manually.
You can select a channel tuning mode (Digital only/Analog
only) in “Channel surf mode”(p. 25)
Edit
Caption
---
80-101
Edit CH caption
Caption
Channel
OK
RETURN
Delete
ABC
→
abc
R
G
B
Y
Select
@ D A
change
set
or
Caption
Select or edit the station identifier.
(maximum 7 characters available)
Favorite
Set favorite
1/3
26-1
1
2
select
set
Set favorite
Select the number
Add
Press OK to select “Yes (add)” or “No (skip)”
Move the cursor to a channel number
Manual program
Edit
Cancel
Apply
Caption
Favorite
Add
2
...
...
Yes
3
...
...
Yes
Channel
select
Press OK to tune
to the channel
Select “Apply”
program
Cancel
Apply
Caption
Favorite
Add
...
...
Yes
el
select
OK
Select “Edit”
Manual program
Edit
Cancel
Apply
Caption
Favorite
Add
2
...
...
Yes
3
...
...
Yes
4
...
...
Yes
5
...
...
Yes
Channel
select
next
Select the item to edit
R
G
B
Y
Select
RETURN
OK
Manual program
Edit
Cancel
Apply
Caption
Favorite
Add
2
...
...
Yes
3
...
...
Yes
4
...
...
Yes
5
...
...
Yes
6
...
...
Yes
7
...
...
Yes
8
...
...
Yes
9
...
...
Yes
Channel
Prev.page
Next page
Caption
Favorite
Add
Proceed to
next page
Go back to the previous
page
select the item
to edit (Caption/
Favorite/Add)
next
•
Caption:
Changes the station identifier
•
Favorite:
Registers channels to the
Favorite List
•
Add:
Adds or skips channels
To cancel the Edit
Manual program
Edit
Cancel
Apply
Caption
Favorite
Add
2
...
...
Yes
3
...
...
Yes
4
...
...
Yes
5
...
...
Yes
Channel
select
next
Changes will be lost. Continue?
Yes
No
OK
(returns to “ANT/
Cable setup”)
select “Yes”
Signal
meter
Check signal
strength
Check the signal strength if interference is found or freezing occurs on a digital image.
Menu
Selects which channel to be tested for signal
strength.
--
Signal meter
Channel
Signal strength
Current
86%
Peak level
98%
change
channel
OK
or
Signal intensity
If the signal is weak, check the antenna.
If no problem is found, consult your local dealer.
Note
Not available if “Cable” is selected in “ANT in” (see above).
Available only for digital antenna channels.
If “Lock” (p. 32) is activated and “ANT/Cable setup” is selected, “Enter password.” will be displayed.
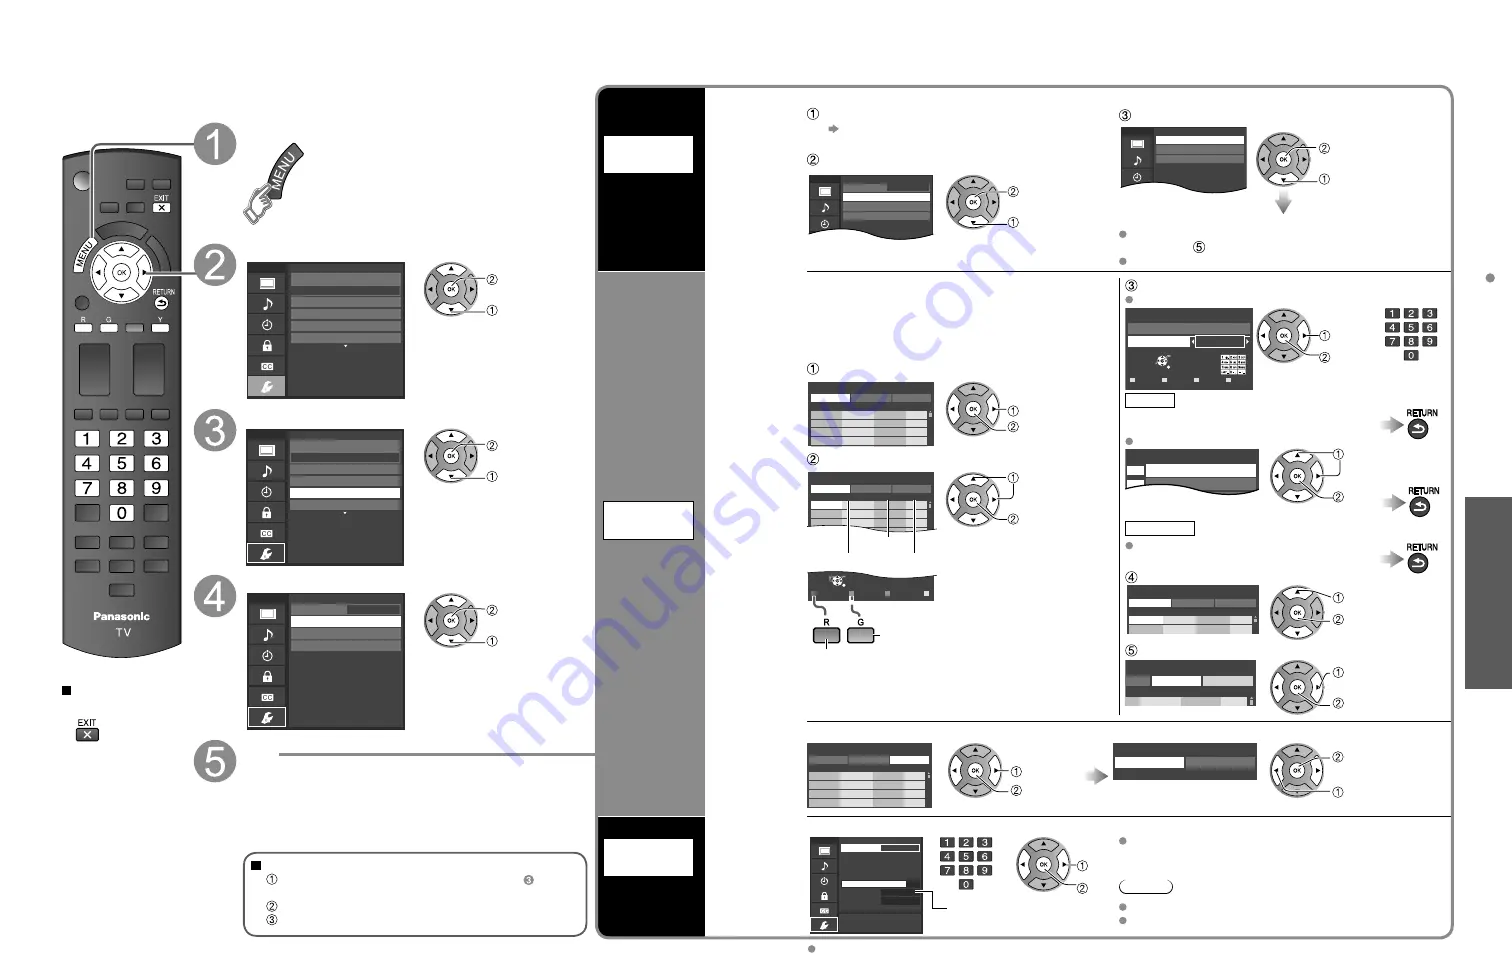
Editing and Setting Channels
The current channel settings can be changed according to your needs and reception
conditions.
Press to exit from
a menu screen
Display the menu
Select “Setup”
Menu
Adjusts Surf mode, Language, Clock,
Channels, Inputs, and other settings.
Setup
1/2
Clock
ANT/Cable setup
Input labels
Language
All
Channel surf mode
next
select
Select “ANT/Cable setup”
Menu
Scans for Antenna or Cable channels.
Specify when using Cable or Satellite box.
Setup
1/2
Clock
ANT/Cable setup
Input labels
Language
All
Channel surf mode
next
select
Select the function
Menu
Automatically searches and saves available
channels to memory.
Cable
ANT/Cable setup
ANT in
Auto program
Manual program
Signal meter
next
select
Set
To reset the settings of the Setup menu
Select “Reset to defaults” in the Setup menu ( ) and
press OK
Input your 4-digit password with number buttons
Select “YES” on the confirmation screen and press OK


