Link Functions (VIERA
Link)
|
Additional Information
19
y
Note
●
Some operations may not be available depending on
the equipment. In this case use its own remote control
to operate the equipment.
■
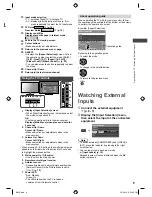
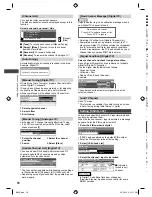
If multiple recorders or players are connected
VIERA Link Menu
VIERA Link Control
Speaker Selection
Home Cinema
Recorder2
Recorder2
[Recorder1-2] / [Player1-2]
The number is given from the TV’s lower number
of HDMI terminal connected to the same type of
equipment. For example, when two recorders are
connected to HDMI 1 and HDMI 2, the recorder
connected to HDMI 1 is displayed as [Recorder1],
and the recorder connected to HDMI 2 is displayed as
[Recorder2].
■
If you access non-VIERA Link equipment
The type of the connected equipment is displayed.
Although you can access the connected equipment, you
cannot operate it. Use its own remote control to operate
the equipment.
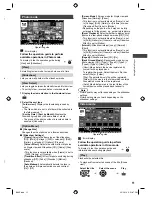
[Speaker Selection]
You can control the theatre speaker with this TV remote
control by pointing at the TV’s signal receiver.
1
Select [Speaker Selection]
2
Set to [Home Cinema] or [TV]
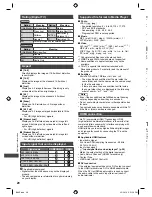
[Home Cinema]:
The sound is from theatre speakers.
Player theatre, Blu-ray Disc theatre or Amplifier will be
automatically turned on if it is in Standby mode.
• You could use the
Volume Up / Down
and
MUTE
buttons.
• The sound of TV speakers is mute.
• When the equipment is turned off, TV speakers will
be active.
[TV]:
TV speakers are active.
Multi-channel sound
If you want to enjoy the multi-channel sound (e.g. Dolby
Digital 5.1ch) via an Amplifier, connect it with HDMI
cable and optical digital audio cable, and then select
[Home Cinema]. If your Amplifier has “HDAVI Control 5”
function, you only need to connect it with HDMI cable to
the TV’s HDMI 2 terminal.
To enjoy the sound from the DIGA Recorder in multi-
channel sound, connect an HDMI cable from the DIGA
Recorder to the Amplifier.
Note
●
These functions may not work properly depending on
the connected equipment.
●
Image or sound may not be available for the first few
seconds when input mode is switched.
●
“HDAVI Control 5” is the newest standard (as of
December, 2011) for HDAVI Control compatible
equipment. This standard is compatible with
conventional HDAVI equipment.
●
To confirm this TV’s version of HDAVI Control
[System Information] (p. 15)
Additional
Information
Auto power standby function
The TV will automatically go into Standby mode in the
following conditions:
●
No signal is received and no operation is performed for
30 minutes in Analogue TV mode.
●
[Off Timer] is active in the Timer Menu (p. 14).
●
[Auto Standby] is set to [On] (p. 15).
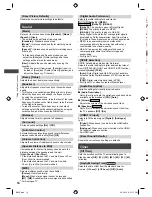
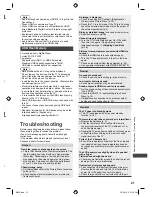
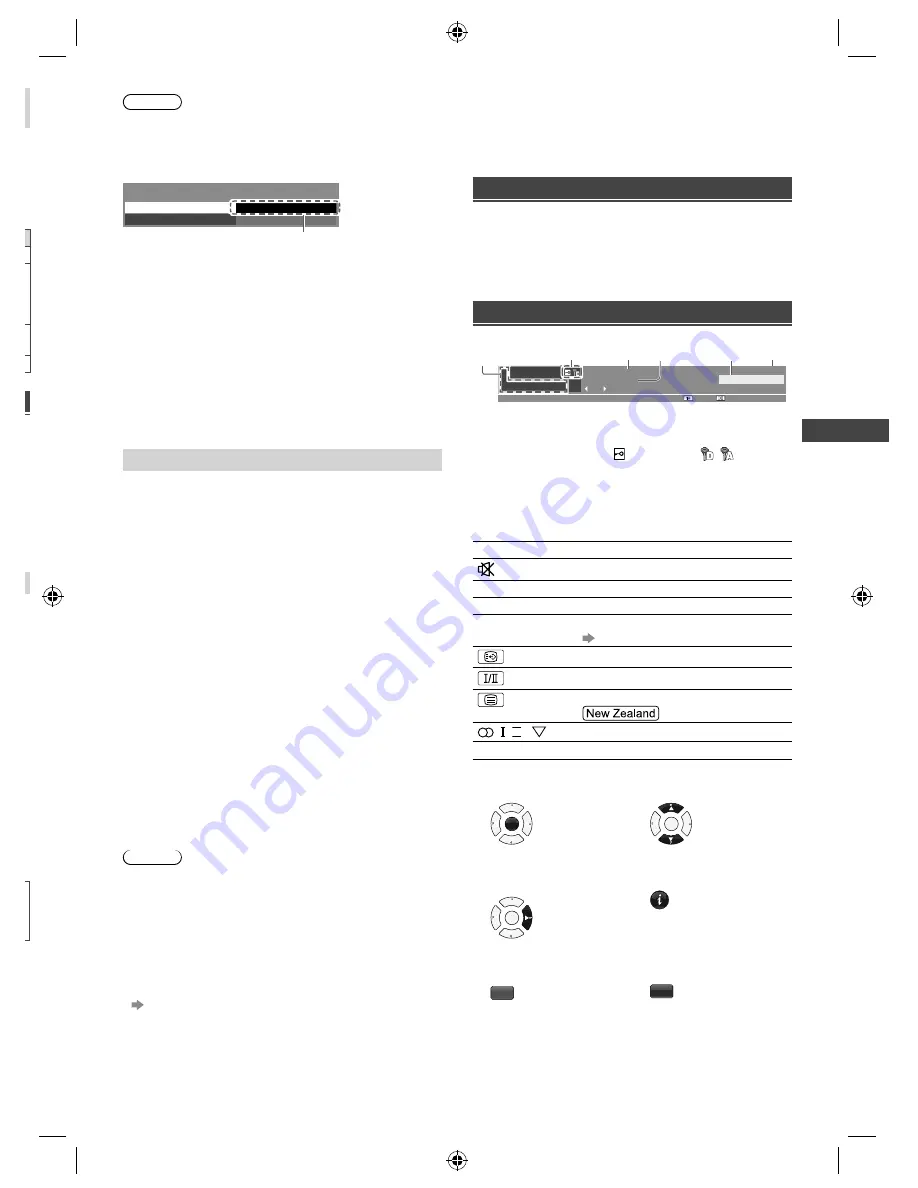
Information banner
Example : Digital TV
: PG
1
BBC ONE WALES
Coronation Street
8:00 pm - 8:55 pm
8:35 pm
Now
All Digital Channels
Rating
1
2
3
6
4
5
1
BBC ONE WALES
1
Channel position and name
2
Channel type ([Radio], [Data], etc.) /
Encrypted channel (
) / TV mode ( , )
3
Programme
4
Programme Start / Finish time (Digital TV)
Channel number, etc. (Analogue TV)
5
Category
6
Current time
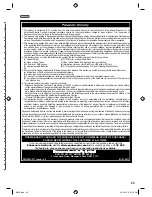
Icon / Message
Meaning
Sound mute On
[Rating]
Rating information
[Bad signal]
Poor TV signal quality
[AD]
Audio Description service available
(p. 14)
Subtitle service available
Multiple image or audio available
Teletext service available
, ,
II
,
Audio mode
1 - 90
Off Timer remaining time
■
To watch the channel
listed in the banner
OK
■
To confirm another
tuned channel name
OK
■
Information on the
next programme
(Digital TV)
OK
■
Extra information
(Digital TV)
INFO
(Press again to
hide the banner)
■
To update the TV
software (if available)
R
■
To select a favourite list
(Digital TV)
B
(if the favourite
list is created in
[Favourites Edit])
B6AZ.indd 19
B6AZ.indd 19
2/1/2013 3:51:13 PM
2/1/2013 3:51:13 PM

